background image

BGS technic KG

Bandwirkerstr. 3

D-42929 Wermelskirchen

Tel.: 02196 720480

Fax.: 02196 7204820

[email protected]

www.bgstechnic.com

© BGS technic KG, Copying and further use not allowed


PREPARATION 

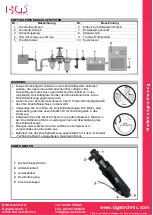
1.  Remove the sealing cap (4) from the air inlet (5). 
2.  Mount the air nipple to the air inlet (5). 
3.  Put a few drops of air device oil into the device via the air inlet. 
4.  Make sure that the trigger lever (3) is in the non-depressed position. 
5.  Connect the device to the compressed air source hose. 
6.  Start the device by pushing the trigger lever (4) down. 


LOOSENING 

1.  Connect ratchet to air source. 
2.  Fit suitable socket onto the output square drive. 
3.  Adjust switch (1) on ratchet head to desired rotational direction (for most screws = counter 

clockwise). 

4.  Place ratchet with socket onto the screw and start loosening the connection by twisting the 

ratchet counter clockwise MANUALLY! As soon as the screw has been loosened a bit, you can 
push down the trigger lever (3) and drive the screw out with air pressure support. 


TIGHTENING 

1.  Connect ratchet with air pressure system 
2.  Fit suitable socket onto the square drive (2). 
3.  Adjust the switch (1) to desired rotational direction (for most screws = clockwise). 
4.  Put in the screw by hand and screw it in 2 or 3 turns manually. 
5.  Put ratchet with socket onto the screw and push down the trigger lever (3) to screw in the screw 

with air pressure support. CAUTION: Wear safety gloves and hold the ratchet firmly. The ratchet 
will build up a strong torque against its rotational direction as soon as the screw has reached its 
dead stop. Risk of injury caused by negligence. 

CAUTION

: Check all screw connections after tightening with a torque wrench for the prescribed 

torque. 


TROUBLESHOOTING (I

nsufficient power) 

Probable Cause


Solution 

Dirty or clogged air passages 

Flush and lubricate tool, drain air tank and supply line


Insufficient air supply 

Increase line pressure, make sure compressor matches 
tool's air pressure and consumption needs


Air leakage


Use teflon tape at all fittings and joints. 
Check tool for worn or damaged o-rings & seals.


Worn/damaged wear & tear parts 

Replace as necessary 

Tool matching 

Be sure you are using a tool suited for the requirements of 
the job at hand. 


ENVIRONMENTAL PROTECTION 

Dispose of this product at the end of its working life environmentally. 
Recycle unwanted materials instead of disposing of them as waste. All tools, accessories 
and packaging should be sorted, taken to a recycling centre and disposed of in a manner 
which is compatible with the environment. Contact your local solid waste authority for 
recycling information.


Содержание 3239

Страница 1: ...beitsbereich sauber aufgeräumt trocken und frei von anderen Materialien Lassen Sie keine ungeschulten Personen mit diesem Werkzeugsatz arbeiten Stellen Sie sicher dass der Auslöser sich in der Position OFF befindet wenn es mit dem Druckluftsystem verbunden wird Nehmen Sie keine Änderungen am Werkzeug vor Verwenden Sie ausschließlich Zubehör das für den Einsatz mit Druckluft Werkzeugen ausgelegt is...

Страница 2: ...on einem autorisierten Fachmann repariert worden sind ARBEITSSCHUTZ Achten Sie bei Verwendung von Druckluftwerkzeugen immer auf geeignete Schutzausrüstung Tragen Sie bei Verwendung dieses Werkzeugs grundsätzlich folgende Schutzausrüstung Schutzbrille Gehörschutz Rutschfeste Sicherheitsschuhe Arbeitshandschuhe Ein Haarnetz bei langen Haaren AUSPACKEN Achten Sie beim Auspacken darauf dass alle Teile...

Страница 3: ...Öler besitzen muss regelmäßig Druckluftgeräte Öl über den Druckluftanschluss in das Druckluftwerkzeug gegeben werden Geben Sie vor dem ersten Gebrauch 4 bis 5 Tropfen Druckluftgeräte Öl über den Druckluftanschluss in das Gerät Verwenden Sie zum Ölen von Druckluftwerkzeugen kein Motor oder Getriebeöl geben Sie ausschließlich Öl für Druckluftgeräte in das Werkzeug Entwässern Sie das Druckluft System...

Страница 4: ...chrauben bedeutet das rechtsdrehend 4 Schraube von Hand ansetzen und 2 3 Gewindegänge eindrehen 5 Ratsche mit Steckschlüssel auf die Verschraubung stecken und Auslöser 3 betätigt die Schraube wird mit Druckluftunterstützung befestigt ACHTUNG Schutzhandschuhe tragen und Ratsche mit festem Griff halten da bei Erreichen des Schraubenanschlags die Ratsche ein starkes Drehmoment aufbaut Bei Nichtbeacht...

Страница 5: ...Nous déclarons sous propre responsabilité que ce produit Declaramos bajo nuestra sola responsabilidad que este producto folgenden einschlägigen Bestimmungen entspricht complies with the requirements of the est en conformité avec les réglementations ci dessous esta conforme a las normas Angewandte Normen GHQWL FDWLRQ RI UHJXODWLRQV VWDQGDUGV Norme appliquée Normas aplicadas ppa Frank Schottke Proku...

Страница 6: ... illuminated Keep the work area clean organised dry and free from other materials Do allow untrained persons work with this tool set Ensure that the trigger is located in the OFF position when being connected to the compressed air system Do not carry out any modifications on the tool Use only accessories that are dimensioned for use with compressed air tools Disconnect the tool from the compressed...

Страница 7: ...ts have been repaired by an authorised specialist OCCUPATIONAL SAFETY When using this tool always wear following protective equipment Safety glasses Hearing protection Anti slip safety shoes Work gloves Hair net if you have long hair UNPACKING When unpacking make sure that all parts are present Contact your dealer if parts are missing or damaged SAFETY WHILE OPERATING Take enough time for a carefu...

Страница 8: ...ing air systems that do not have an automatic oiler air tools must be regularly added oil to the air tool via the air connection Before first use add 4 to 5 drops of air device oil to the air connection of the device Do not use engine or gear oil to oil pneumatic tools only use oil for pneumatic tools Drain the compressed air system before each use Water in the air lines leads to a loss of perform...

Страница 9: ...n the screw by hand and screw it in 2 or 3 turns manually 5 Put ratchet with socket onto the screw and push down the trigger lever 3 to screw in the screw with air pressure support CAUTION Wear safety gloves and hold the ratchet firmly The ratchet will build up a strong torque against its rotational direction as soon as the screw has reached its dead stop Risk of injury caused by negligence CAUTIO...

Страница 10: ...Nous déclarons sous propre responsabilité que ce produit Declaramos bajo nuestra sola responsabilidad que este producto folgenden einschlägigen Bestimmungen entspricht complies with the requirements of the est en conformité avec les réglementations ci dessous esta conforme a las normas Angewandte Normen GHQWL FDWLRQ RI UHJXODWLRQV VWDQGDUGV Norme appliquée Normas aplicadas ppa Frank Schottke Proku...

Страница 11: ... pas de personnes non formées travailler avec ce jeu d outils Assurez vous que la gâchette se trouve en position OFF quand elle est connectée au système d air comprimé Ne modifiez pas l outil Utilisez exclusivement des accessoires adaptés à une utilisation avec des outils à air comprimé Par exemple évitez d utiliser des clés à douilles pour l utilisation manuelle mais uniquement des accessoires po...

Страница 12: ...OTECTION AU TRAVAIL Portez toujours l équipement de protection suivant lorsque vous utilisez cet outil Lunettes de sécurité Protection auditive Chaussures de sécurité antidérapantes Gants de travail Filet à cheveux aux cheveux longs DÉBALLAGE Lors du déballage assurez vous que toutes les pièces sont présentes Contactez votre revendeur si des pièces sont manquantes ou endommagées SÉCURITÉ PENDANT L...

Страница 13: ...joutée au travers du raccord d alimentation en air comprimé de l outil Avant la première utilisation de l outil pneumatique appliquez 4 à 5 gouttes d huile pour outils pneumatiques dans son raccord d alimentation en air comprimé Pour lubrifier des outils pneumatiques n utilisez pas d huile de moteur ou de transmission utilisez uniquement de l huile pour outils pneumatiques Purgez le système pneuma...

Страница 14: ...tamez le vissage à la main sur 2 à 3 tours 5 Placez la clé à cliquet avec l insert sur le raccord vissé et actionnez la gâchette 3 pour le serrer complètement à l aide de la motorisation pneumatique Attention Portez des gants de protection et tenez le cliquet fermement en main car il développe un couple de serrage très élevé lorsque la butée du raccord est atteinte Vous pourriez vous blesser si vo...

Страница 15: ...Nous déclarons sous propre responsabilité que ce produit Declaramos bajo nuestra sola responsabilidad que este producto folgenden einschlägigen Bestimmungen entspricht complies with the requirements of the est en conformité avec les réglementations ci dessous esta conforme a las normas Angewandte Normen GHQWL FDWLRQ RI UHJXODWLRQV VWDQGDUGV Norme appliquée Normas aplicadas ppa Frank Schottke Proku...

Страница 16: ...ca y libre de materiales que no vaya a utilizar No permita que personas no capacitadas trabajen con este juego de herramientas Asegúrese de que el gatillo esté en la posición OFF cuando se conecte al sistema de aire comprimido No haga ninguna modificación en la herramienta Utilice únicamente accesorios diseñados para su uso con herramientas neumáticas Por ejemplo no utilice llaves de tubo para el ...

Страница 17: ...os hayan sido reparados por un especialista autorizado PROTECCIÓN DEL TRABAJO Utilice siempre el siguiente equipo de protección cuando utilice esta herramienta Gafas protectoras Protección para los oídos Calzado de seguridad antideslizante Guantes de trabajo Redecilla para cabello largo DESEMBALAR Al desembalar asegúrese de que todas las piezas estén presentes Póngase en contacto con su distribuid...

Страница 18: ...os sistemas de aire comprimido que no disponen de un engrasador automático el aceite para las herramientas neumáticas debe añadirse regularmente a la herramienta neumática a través de la conexión de aire comprimido Antes de utilizar el dispositivo de aire comprimido añada 4 a 5 gotas de aceite para herramientas neumáticasa través de la conexión de aire comprimido No utilice aceite de motor o de en...

Страница 19: ...cuadrada 2 3 Ajuste el sentido de giro en la cabeza de la carraca 1 para la mayoría de los tornillos esto significa rotación a la derecha 4 Colocar el tornillo a mano y enroscarlo 2 o 3 vueltas de rosca 5 Colocar la carraca con el vaso en la atornilladura y accionar el gatillo 3 el tornillo se aprieta con la ayuda de aire comprimido Atención Utilice guantes de protección y sujete la carraca con un...

Страница 20: ...Nous déclarons sous propre responsabilité que ce produit Declaramos bajo nuestra sola responsabilidad que este producto folgenden einschlägigen Bestimmungen entspricht complies with the requirements of the est en conformité avec les réglementations ci dessous esta conforme a las normas Angewandte Normen GHQWL FDWLRQ RI UHJXODWLRQV VWDQGDUGV Norme appliquée Normas aplicadas ppa Frank Schottke Proku...

Отзывы: