


Chapter 5. Wired Connection Setting
IP Video Door Station DS06M(P) Installation User Manual
39
5.5. Configuring Door Station Network Settings through the Web Interface
After connecting the door station to the local network you need to change its network
parameters to get it and your other devices (e.g. computer, laptop etc.) to the same subnet.
ATTENTION!
To make your door station and your computer work together, the first three parts of their IP addresses
must be identical but the fourth must differ.
For example, the IP address of your computer is 192.168.0.40. An IP address consists of four octets
separated by dots. In the provided example, the 1st octet is 192, the 2nd octet is 168, the 3rd octet is 0,
and the 4th octet is 40. You need to change the IP address of your door station so that the first three
octets of its IP address were the same as your computer’s IP address. Therefore, the IP address of your
door station must be of the form 192.168.0.xxx. You only need to change the fourth octet to a number
different from the IP address of your computer and other network devices.
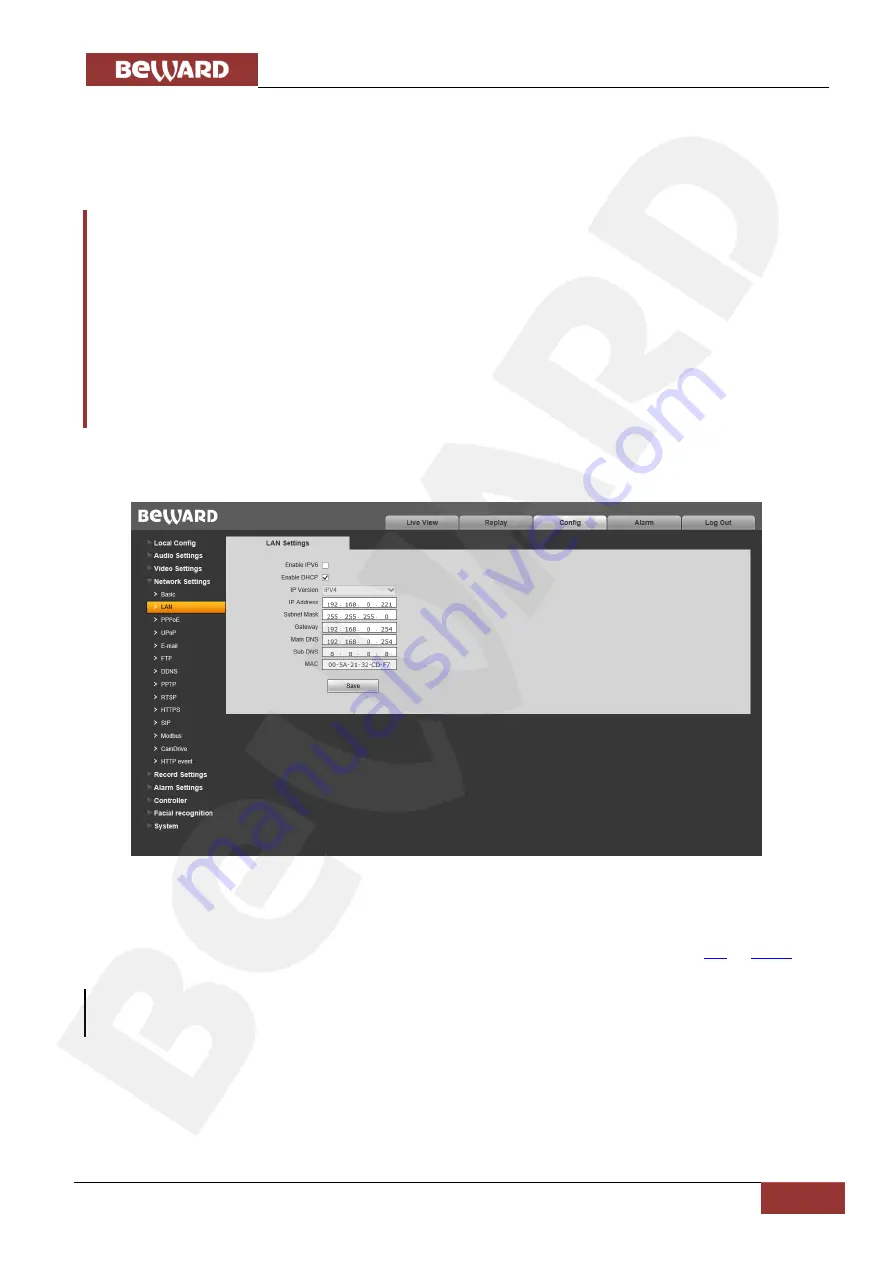
To configure the network settings through the web interface, click the
[Config]
button and
go to the
Network Settings
– LAN
(
Pic. 5.28
).
Pic. 5.28
In the fields
[IP Address]
,
[Subnet Mask]
,
[Gateway]
,
[Main DNS]
,
[Sub DNS]
you need
to enter such values which provide joint work of the door station and other devices in the same
subnet. To do so apply to the settings you had to write out or save in the paragraphs
NOTE:
Contact your system administrator if you need help.
Click
[Save]
to save the changes.
After rebooting the door station will be available on the IP address you specified.
Configuring the door station network settings is completed.