background image


4. Menu-Driven Console Management -86 

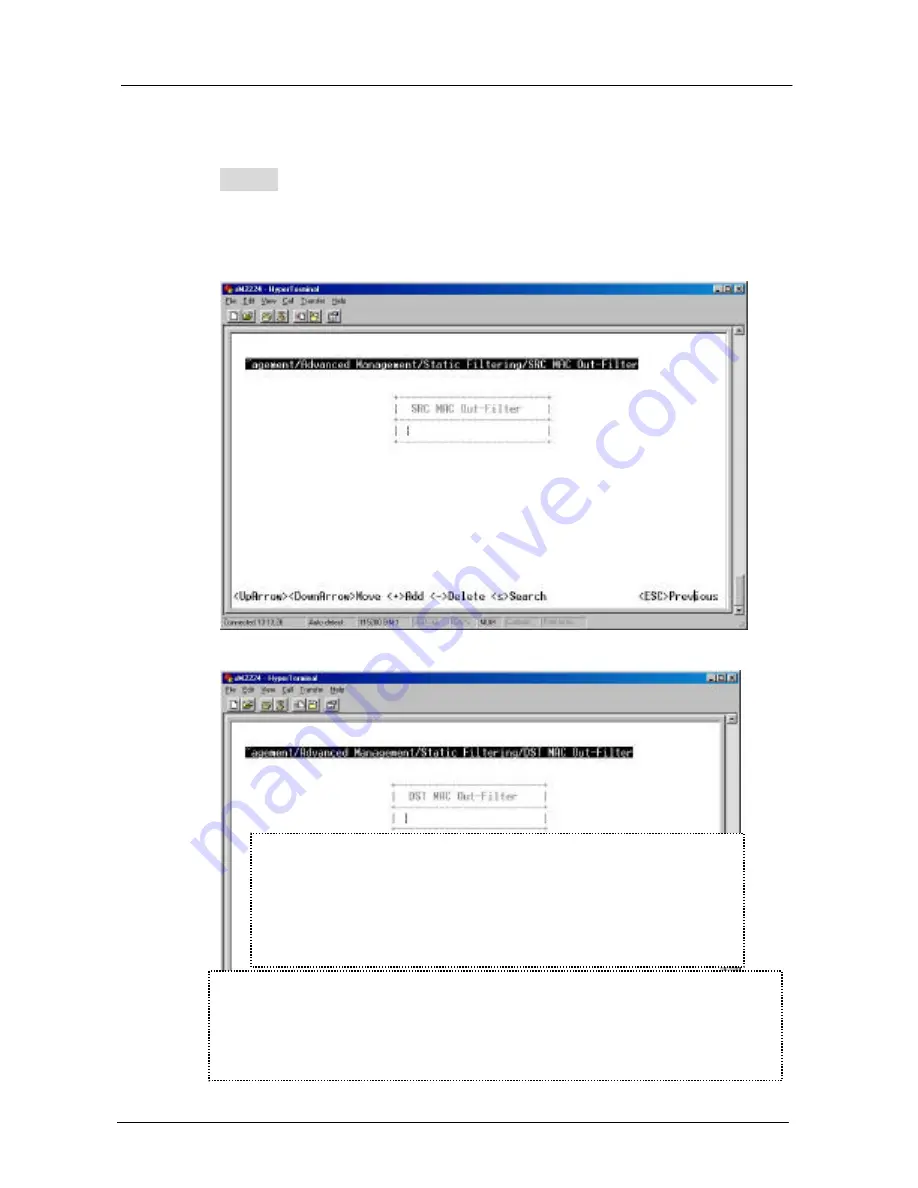
SOURCE/DESTINATION MAC ADDRESS OUT-FILTERS


Step 1:    Move to highlight source MAC addresses or 

destination MAC addresses for static filtering, and 

press <Enter>.


If you select source MAC addresses, the SRC MAC 

Out-Filter appears. 

If you select destination MAC addresses, the DST 

MAC Out-Filter appears 

* No precautionary message appears before you delete a 

specific MAC address from being filtered.   

* Be sure you want to delete it before doing so. 

Содержание SM2224

Страница 1: ...However there is no guarantee that interference will not occur in a particular installation CE Mark Warning This is a Class A product In a domestic environment this product may cause radio interferenc...

Страница 2: ...N 10 1 2 7 Class of Service CoS Support 14 1 2 8 GVRP 14 1 2 9 IGMP Snooping and IP Multicast Filtering 15 1 2 10 Switch Management 16 1 3 Product outlook and LED display 17 1 3 1 Product Outlook 17 1...

Страница 3: ...Console Management 36 4 1 Logging on to the switch 36 4 2 Switch Management Screen 37 4 3 Basic Management 40 4 3 1 Start with Selection Menu 40 4 3 2 General Management Configurations 41 4 3 3 LAN P...

Страница 4: ...File Activities 141 5 3 1 Start with Selection Menu 141 5 3 2 Saving Setting 142 5 3 3 Receive File Via TFTP 142 5 3 4 Reboot 143 5 3 5 Logout 144 5 4 Performing Basic Setup Activities 145 5 4 1 Start...

Страница 5: ...ree Perspective 185 5 5 10 SNMP 189 5 5 11 Other Protocols 192 5 5 12 Port Trunking 193 5 5 13 Port Mirroring 195 5 5 14 QoS 196 6 SNMP RMON Management 212 6 1 Overview 212 6 2 SNMP Agent and MIB 2 RF...

Страница 6: ...r the two 100BASE FX fiber ports each allows for multi mode SC ST VF 45 MT RJ fiber module or single mode SC fiber module For the two Gigabit ports it allows options of fiber type and wavelength at us...

Страница 7: ...otiation for speed and duplex mode on all TX ports Full wire speed forwarding rate Store and forward mechanism Back pressure and IEEE 802 3x compliant flow control Supports 32K MAC addresses Provides...

Страница 8: ...62 5 125 m multi mode fiber 1300nm Up to 550m 10 125 m single mode fiber 1300nm Up to 20km LED Indicators Per unit Power status Per port LNK ACT FDX COL 10 100M Per Gigabit port LNK ACT FDX COL VLAN...

Страница 9: ...smission priorities 4 queues per output port Packet transmission scheduled using Weighted Round Robin WRR User defined weights Classification of packet priority can be based on either a VLAN tag on pa...

Страница 10: ...Q RFC2674 Private MIB Java applet based MIB browser Web browser support based on HTTP server and CGI parser Kermit TFTP software upgrade capability 1 2 3 Physical Specifications Power 100 240VAC 50 60...

Страница 11: ...VLAN tagged and untagged frames from a receiving port to one or more transmitting ports The switch performs multiple steps during the switching process l VLAN classification l Learning l Filtering l...

Страница 12: ...the source MAC address VLAN pair is known l If it is unknown the switch inserts the source MAC address VLAN into the SDB and learns the source MAC address VLAN l If it is known the switch checks the...

Страница 13: ...is unknown the switch floods the receiving frame to all ports in the VLAN excluding the source port l If it is known the switch forwards the receiving frame to the port associated with the destinatio...

Страница 14: ...the forwarding process described below FORWARDING The switch floods the received multicast frame to all ports that are in forwarding state within the VLAN excluding the source port At the same time t...

Страница 15: ...iguration Because VLANs are not limited by the hardware constraints that physically connect traditional LAN segments to a network they can define a network into various logical configurations For exam...

Страница 16: ...MULTICAST BASED MULTIMEDIA APPLICATIONS Multimedia applications such as interactive training video conferencing and news video transmissions require large amounts of bandwidth These applications are...

Страница 17: ...5 7 and 8 can be on another VLAN Broadcasts from servers within each group would only go to the members of its own VLAN This ensures that broadcast storms cannot cause a network meltdown due to volume...

Страница 18: ...th VLAN aware workstations and switches to issue and revoke VLAN memberships VLAN aware switches register an propagate VLAN membership to all ports that belong to the active topology of the VLAN VLAN...

Страница 19: ...assignments for the received packets 1 2 8 GVRP In addition to network management tools that allow network administrators to statically add and delete VLAN member ports the routing switch supports GAR...

Страница 20: ...the group membership information learned from the IGMP a router can determine which if any multicast traffic needs to be forwarded to each of its leaf subnetworks Multicast routers use this informatio...

Страница 21: ...mber hosts in multicast groups within each VLAN Note however IGMP neither alters nor routes any IP multicast packets Since IGMP is not concerned with the delivery of IP multicast packets across subnet...

Страница 22: ...EMENT APPLICATION The switch can also be configured via SNMP For more information on switch management refer to the Switch Management section on page 14 1 3 Product outlook and LED display 1 3 1 Produ...

Страница 23: ...LNK ACT Port number Green Flashing Transmitting or receiving data ACT stands for ACTIVITY On 100M mode 100M Green Off 10M mode On Connection in full duplex mode FDX stands for FULL DUPLEX Flashing Co...

Страница 24: ...package you shall find the items listed below Please inspect the contents and report any apparent damage or missing items immediately to your authorized reseller SM2224 x 1 This User s Guide AC power...

Страница 25: ...owing requirements The ambient temperature should be between 32 and 122 degrees Fahrenheit 0 to 50 degrees Celsius The relative humidity should be less than 90 percent non condensing Surrounding elect...

Страница 26: ...Speed Half Full Duplex Cable Max Distance 10BASE T RJ 45 10 20 Mbps 2 pair UTP STP Cat 3 4 5 100 m 100BASE TX RJ 45 100 200 Mbps 2 pair UTP STP Cat 5 100 m 1000BASE T RJ 45 1000 2000 Mbps 2 pair UTP S...

Страница 27: ...e of port in use Note To connect two regular RJ 45 ports between switches or hubs you need a cross over cable Step 3 Consult Cable Specifications Table on previous page for cabling requirements based...

Страница 28: ...m is functioning integrity l decompress the main switching software runtime image from the flash ROM into DRAM area l begin executing the main switching software A command line prompts when you press...

Страница 29: ...re for download requirements When the file transfer is completed the target system jumps to the entry point of the diagnostic program and starts executing the diagnostic code The Main Menu of the diag...

Страница 30: ...static free container Unscrew the cover plate of the expansion slot Remove the plate and keep it for future use when you decide to remove the module With the power off slide the module into the slot...

Страница 31: ...ee container Set Full Duplex or Half Duplex operation mode by using J2 jumper Full Duplex Half Duplex Unscrew the cover plate of the expansion slot Remove the plate and keep it for future use when you...

Страница 32: ...nd management protocols that deliver data between your management device workstation or personal computer and the system It also contains information about port connection options This chapter covers...

Страница 33: ...nistration console via RS 232 serial port ADVANTAGES No IP address or subnet needed Text based Telnet functionality and HyperTerminal built into Windows 95 98 NT 2000 operating systems DISADVANTAGES M...

Страница 34: ...r connections l External SNMP based network management application ADVANTAGES Communicates with switch functions at the MIB leve Based on open standards DISADVANTAGES Requires SNMP manager software Le...

Страница 35: ...o the switch s console port There are two ways to use this management method direct access or modem access The following sections describe these methods DIRECT ACCESS Direct access to the administrati...

Страница 36: ...h as TIP MODEM ACCESS You can access the switch s administration console from a PC or Macintosh using an external modem attached to the console port The switch management program provides Console Port...

Страница 37: ...requires either Microsoft Internet Explorer 4 01 or later or Netscape Navigator 4 03 or later 3 4 SNMP Based Network Management You can use an external SNMP based application to configure and manage t...

Страница 38: ...ch before you can establish access to it with a virtual terminal protocol Note Terminal emulation is different from a virtual terminal protocol in that you must connect a terminal directly to the cons...

Страница 39: ...h a single MAPI configuration parameters set using one method e g console port are immediately displayed the other management methods e g SNMP agent of web browser The management architecture of the s...

Страница 40: ...switch first This chapter describes how to configure the switch using its menu driven console 4 1 Logging on to the switch AT THE SCREEN PROMPT Login Password LOGIN NAME Enter the console interface f...

Страница 41: ...lt Password no password press Enter directly Note Only one console and three telnet users can log on to the switch concurrently However it is not recommended that multiple users modify the configurati...

Страница 42: ...asic management activities ADVANCED MANAGEMENT Refer to page 51 for performing advanced management activities LOGOUT Highlight this option and press Enter to log out SAVE SETTINGS Highlight this optio...

Страница 43: ...nu box has several options which are listed vertically Move the highlight to select an option as you wish press the Enter key to activate that option Press this key To Up Arrow or K Move the highlight...

Страница 44: ...ivities consist of General LAN Port and Console Port tasks 4 3 1 Start with Selection Menu Step 1 Highlight Basic Management from Switch Management screen and press Enter The Basic Management screen a...

Страница 45: ...m Basic Management screen and press Enter System Name Step 2 System Name is highlighted Press Enter if you want to change it Location Step 3 Move to highlight Location and press Enter if you want to c...

Страница 46: ...and press Enter if you want to change it Disabled or Enabled Reboot On Error Step 7 Move to highlight Reboot On Error and press Enter if you want to change it Disabled or Enabled Remote Telnet Login S...

Страница 47: ...ent 43 4 3 3 LAN Port Configurations Step 1 Highlight LAN Port from Basic Management screen and press Enter SPEED FLOW CONTROL Step 2 Speed Flow Control is highlighted Press Enter if you want to set s...

Страница 48: ...ighlight All 10 100M or 1000M Ports and press Enter to configure at one time Otherwise move to highlight each port and press Enter to configure individually Step 4 Port Setting Options screen appears...

Страница 49: ...e Speed move to highlight a desired setting from Speed Options and press Enter Note In the Speed Options Auto denotes auto negotiation on speed and duplex mode and FD denotes full duplex Step 6 Press...

Страница 50: ...light a desired setting from the Flow Cntl Options and press Enter Step 8 Press Esc to a previous screen as shown in Step 3 Admin Control Step 9 Highlight All Ports and press Enter to configure at one...

Страница 51: ...Step 10 For Admin Control move to highlight Up or Down from admin Status Options Step 11 E g Port 4 is set as Admin Down to stop TX RX transmission To allow TX RX transmission on Port 4 move to highl...

Страница 52: ...no link Down denotes no link PHYSICAL PORT ADDRESS Step 12 Press Esc to a previous screen as shown in Step 1 Step 13 Move to highlight Physical Address to view physical port address RETURN TO BASIC MA...

Страница 53: ...e Step 2 Baud Rate is highlighted Press Enter if you want to change the current console baud rate Flow Control Step 3 Move to highlight Flow Control and press Enter if you want to change the current f...

Страница 54: ...hlight SLIP and press Enter if you want to change it Disabled or Enabled Note If you enable SLIP a message tells you that the console port becomes accessible only through the SLIP protocol after you l...

Страница 55: ...anagement Advanced management activities consist of L2 Switching DataBase IP Networking Bridging Static Filtering Spanning Tree SNMP Other Protocols Port Trunking Port Mirroring File Transfer 4 4 1 St...

Страница 56: ...s IP NETWORKING View and change IP settings ARP and routing table parameters DHCP gateway settings and ping settings BRIDGING View and change the aging period for a MAC address and the flood limit for...

Страница 57: ...hange the SNMP configuration OTHER PROTOCOLS View and change GVRP and IGMP settings PORT TRUNKING Assign a range of ports to trunking groups PORT MIRRORING Mirror one port to Port 1 or Port 13 FILE TR...

Страница 58: ...ault VLAN or if you want to obtain a VLAN perspective instead of the default VLAN Note Default VLAN The IEEE802 1Q standard defines VLAN ID 1 as the default VLAN The default VLAN includes all the port...

Страница 59: ...ew VLAN Settings Enter new VLAN ID and VLAN name The VLAN ID appears as both decimal and hexadecimal values side by side in the VLAN Perspective screen to create VLAN press on keypad to delete VLAN pr...

Страница 60: ...te switch Add New Switch Ports Step 3 Press Esc and appears the following screen Press to add new switch ports to the newly created VLAN to add switch ports press on keypad to delete switch ports pres...

Страница 61: ...able option from Port Options and press Enter e g Untagged Ports Step 5 From Select Untagged Ports press Enter to select All Ports or move to highlight each port individually and press Enter Similar p...

Страница 62: ...and want to now add tagged ports or forbidden ports or vice versa repeat Step 4 and Step 5 Step 6 Press Esc to a previous screen as shown in Step 1 Delete VLAN Step 7 Delete VLAN highlight a VLAN ID...

Страница 63: ...Driven Console Management 59 Step 8 Press Esc to a previous screen as shown in Step 1 when completed with deleting a VLAN VLAN Info Step 9 Highlight an existing VLAN and press Enter to view VLAN infor...

Страница 64: ...to highlight VLAN Settings and press Enter The screen appears as shown in Step 3 for adding or deleting switch ports IP MULTICAST GROUP PERSPECTIVE Step 1 Move to highlight IP Multicast Group Perspec...

Страница 65: ...reen on page 54 and press Enter Step 2 Enter a MAC address to view characteristics information corresponding VLANs and corresponding ports in the switching database PORT PERSPECTIVE Step 1 Move to hig...

Страница 66: ...n Console Management 62 Per Port VLAN Activities Step 2 Per Port VLAN Activities is highlighted Press Enter Step 3 Move to highlight a port and press Enter E g select Port 18 to view corresponding VLA...

Страница 67: ...ment 63 Step 4 View or search by MAC address individually Step 5 Press Esc to return to a previous screen as shown in Step 1 Per Port Statistics Step 6 Move to highlight Per Port Statistics and press...

Страница 68: ...4 Menu Driven Console Management 64 Step 7 Move to highlight a port and press Enter E g select Port 1 to view corresponding VLAN Activities Press R to reset counter for this port...

Страница 69: ...4 Menu Driven Console Management 65 Per Port MAC limit Step 8 Move to highlight Per Port MAC Limit and press Enter...

Страница 70: ...agement 66 Step 9 Move to highlight a port and press Enter E g select Port 1 to view corresponding MAC limit User can choose to set MAC learning function as 1 limit with range 0 16 or 2 Unlimited lear...

Страница 71: ...ven Console Management 67 4 4 3 IP Networking Move to highlight IP Networking from Advanced Management screen and press Enter IP RIP SETTINGS Step 1 Highlight IP RIP Settings from IP Networking and pr...

Страница 72: ...IDs IP addresses subnet masks proxy ARPs and RIPs currently defined Step 3 Move to highlight the row that contains the parameters you want to change and then press Enter Before you can define a VLAN s...

Страница 73: ...ess Enter for modifications Otherwise you may press to delete that parameter Initial IP Settings Step 5 Move to highlight IP Address and press Enter Step 6 Type an IP address and press Enter Step 7 Pr...

Страница 74: ...to highlight ARP Table from IP Networking and press Enter The screen shows the ARP table entries that have been defined or learned Add Delete Static ARP Table Entries Step 2 Press on keypad to add an...

Страница 75: ...static entry from the ARP Table Search for ARP Table Entries Step 4 Press S to search a static entry You can search by Internet address or physical address No precautionary message appears before you...

Страница 76: ...4 Menu Driven Console Management 72...

Страница 77: ...n Console Management 73 ROUTING TABLE Step 1 Move to highlight Routing Table from IP Networking and press Enter The screen shows the Routing Table allows you to view add delete or search a particular...

Страница 78: ...esides The IP route type for the IP subnetwork There are six IP route types Direct A directly connected subnetwork Remote A remote IP subnetwork or host address Myself A switch IP address on a specifi...

Страница 79: ...wn below Step 3 Press to delete an entry in the routing table Search for Routing Table Entries Step 4 Press S to search a network address Enter the network address you want you are looking for No prec...

Страница 80: ...nsole Management 76 DHCP GATEWAY SETTINGS Step 1 Move to highlight DHCP Gateway Settings from IP Networking and press Enter Step 2 Move to highlight a row you want to change the DHCP Gateway Settings...

Страница 81: ...All Interfaces from Select Outbound Relay Interfaces Otherwise you may press on keypad to delete a relay IP DHCP Gateway Options Step 4 Move to highlight DHCP Gateway and press Enter Decide to have it...

Страница 82: ...maximum number of hops Delay sec Step 7 Move to highlight Delay sec and press Enter Step 8 Enter decimal number 0 65535 configure the delay in seconds Preferred Server Step 9 Move to highlight Preferr...

Страница 83: ...ing and press Enter Host Step 2 Move to highlight Host and press Enter Step 3 Enter 4 decimal bytes dot separated as the IP address to ping Count Step 4 Move to highlight Count and press Enter Step 5...

Страница 84: ...ght Size and press Enter Step 7 Specify a packet size from 0 1500 Press Enter Timeout sec Step 8 Move to highlight Timeout and press Enter Step 9 Specify a timeout value from 1 999 Press Enter Step 10...

Страница 85: ...4 Menu Driven Console Management 81 4 4 4 Bridging Move to highlight Bridging from Advanced Management screen and press Enter...

Страница 86: ...iven Console Management 82 AGING TIME Step 1 Move to highlight Aging Time and press Enter Aging Options Step 2 Set Aging Time is highlighted Press Enter Enter a decimal number as bridge aging period i...

Страница 87: ...4 Menu Driven Console Management 83 Step 3 Otherwise you may move to highlight No Aging and press Enter FLOOD LIMIT FOR ALL PORTS Step 1 Move to highlight Flood Limit for All ports and press Enter...

Страница 88: ...nsole Management 84 Flooding Options Step 2 Set Flood Limit is highlighted Press Enter Enter a decimal number as flood limit in packets per second Step 3 Otherwise you may move to highlight Unlimited...

Страница 89: ...4 Menu Driven Console Management 85 4 4 5 Static Filtering Move to highlight Static Filtering from Advanced Management screen and press Enter...

Страница 90: ...ation MAC addresses for static filtering and press Enter If you select source MAC addresses the SRC MAC Out Filter appears If you select destination MAC addresses the DST MAC Out Filter appears No pre...

Страница 91: ...MAC address from being filtered Press S to search through current list of MAC addresses in the static filtering database The static filtering database maximum capacity is 64 MAC ADDRESS IN FILTERS St...

Страница 92: ...tered Press to delete a specific MAC address from being filtered Press S to search through current list of MAC addresses in the static filtering database The static filtering database maximum capacity...

Страница 93: ...Step 2 Press Enter to enter Spanning Tree Options Decide to have it Disabled or Enabled Bridge Priority Step 3 Move to highlight Bridge Priority and press Enter Type a decimal number for the bridge p...

Страница 94: ...pe a decimal number for the max age Forward Delay sec Step 6 Move to highlight Forward Delay and press Enter Type a decimal number for the forward delay SPANNING TREE PORT STATES Step 1 Move to highli...

Страница 95: ...er Disabled Link Down denotes Admin Status Up without a link Forwarding denotes Admin Status Up with a link Admin Status Down denotes no TX RX transmission allowed Admin Status Up denotes TX RX transm...

Страница 96: ...nter SPANNING TREE PORT PRIORITIES Step 1 To change the priority level per port move to highlight Spanning Tree Port Priorities and press Enter Step 2 Move to highlight All Ports or each port individu...

Страница 97: ...dvanced Management screen and press Enter SNMP Options Step 1 Move to highlight SNMP and press Enter Decide to have it Disabled or Enabled Get Community Name Step 2 Move to highlight Get Community Nam...

Страница 98: ...ost 1 and press Enter Repeat to specify up to three more trap host IP addresses Cold Start Trap Step 5 Move to highlight Cold Start Trap and press Enter Decide to have it Disabled or Enabled Warm Star...

Страница 99: ...Enabled Rising Alarm Trap Step 10 Move to highlight Rising Alarm Trap and press Enter Decide to have it Disabled or Enabled Falling Alarm Trap Step 11 Move to highlight Falling Alarm Trap and press En...

Страница 100: ...4 Menu Driven Console Management 96 4 4 8 Other Protocols Move to highlight Other Protocols from Advanced Management screen and press Enter...

Страница 101: ...4 Menu Driven Console Management 97 GVRP Step 1 Move to highlight GVRP and press Enter Step 2 Decide to have it Disabled or Enabled...

Страница 102: ...4 Menu Driven Console Management 98 IGMP Step 1 Move to highlight IGMP and press Enter Step 2 Decide to have it Disabled or set in either Passive or Active mode...

Страница 103: ...screen and press Enter Port trunking is provided by 3 groups Group 1 group 2 each allows up to 4 ports trunking selected from port 1 port 24 while group 3 allows 2 gigabit ports trunking Select Range...

Страница 104: ...to highlight a port range Port 1 24 Select Trunk Ports Step 3 E g Port 1 24 is highlighted Move and press Enter to select a trunk port You can select a maximum of four ports for each Trunk group Step...

Страница 105: ...4 Menu Driven Console Management 101 4 4 10 Port Mirroring Move to highlight Port Mirroring from Advanced Management screen and press Enter...

Страница 106: ...rror index 1 or 2 E g Index 1 is highlighted Press Enter to enter Port Mirroring Options Mirror To From Step 2 Press Enter to enter Mirror To Options listing the ports that can be mirrored to Options...

Страница 107: ...same policy to choose the port you want to mirror from Mirror Mode Step 4 Move to select Mirror Mode From Mode Options decide whether the port to be mirrored from will be receiving or transmitting Ste...

Страница 108: ...4 11 1 Setting global settings Step 1 Move to highlight Global Setting Press Enter to enter DiffServ Expedite Forwarding Step 2 Move to highlight DiffServ Expedite Forwarding mode and press Enter use...

Страница 109: ...ce Step 3 Move to highlight TOS VLAN Tag Preference and press Enter user can select to choose TOS or VLAN tag Select bits of TOS for transmit priority Step 4 Move to select ToS for Xmit and press Ente...

Страница 110: ...its of TOS for drop priority Step 5 Move to select ToS for Drop and press Enter to select Bit 4 2 or Bit 7 5 of ToS as drop priority similar to step 4 Set QoS Status Step 6 Move to select QoS Status a...

Страница 111: ...op Priority Setting Step 7 Move to select WRED Drop Priority Setting and press Enter Step 8 To change Low drop percentage press Enter to see below screen Note that only Level 2 s percentage can be mod...

Страница 112: ...08 Step 9 Highlight the appropriate percentage and press Enter Step 10 To change high drop percentage follow same steps in low percentage Note that Level 3 s percentage remains fixed at 100 Only Level...

Страница 113: ...4 Menu Driven Console Management 109 4 4 11 2 specifying tcp udp logical port settings Step 1 From the QoS menu move to highlight Logical Port then press Enter...

Страница 114: ...ement 110 User Defined Port Step 2 With the highlight of User Define Port press Enter Then screen appears as follows Step 3 Use the down or up arrow key to highlight the appropriate port then press En...

Страница 115: ...Console Management 111 Step 4 In the setting submenu user can choose to set drop priority as low or high change to transmit priority ranges from 0 to 7 change port status as enabled or disabled as fol...

Страница 116: ...en Console Management 112 Well Known Port Step 5 The well Known Port index screen works the same way the User Define Port Index screen works except that the well known port number is preset and cannot...

Страница 117: ...6 Move to select Range Logical Port from Logical Port submenu then press Enter to see following screen Step 7 To change the low port number press the Enter key with the highlight on Low Port Number t...

Страница 118: ...high port number the system will alert the user when this policy is violated Also note that the available range for both low and high port number is from 1 to 65535 Step 9 To change the Drop priority...

Страница 119: ...5 4 4 11 3 specifying QoS VLAN priority Step 1 Move to highlight VLAN from the QoS menu Press Enter to see the following VLAN priority index screen Step 2 Select a port and press Enter to enter this p...

Страница 120: ...agement 116 Step 3 To change Drop Priority press Enter with the highlight of the item and select it as high or low Step 4 To change Transmit Priority press Enter with the highlight of the item and cho...

Страница 121: ...117 4 4 11 4 specifying the tos priority Step 1 Move to highlight TOS from the QoS menu Press Enter to see the following TOS priority index screen Step 2 Select a port and press Enter to enter this po...

Страница 122: ...3 To change Drop Priority press Enter with the highlight of the item and select it as high or low Step 4 To change Transmit Priority press Enter with the highlight of the item and choose a integer fr...

Страница 123: ...19 4 4 11 5 selecting a QoS profile Step 1 Move to highlight Profile from QoS menu to see the following screen Megabit Profile Step 2 With the highlight of Megabit Profile press Enter to enter Megabit...

Страница 124: ...3 Choose one megabit port and press Enter to see the setting submenu Step 4 In the megabit port setting three items are available for change To change Profile name Move to highlight Profile Name and...

Страница 125: ...1 To change Bandwidth partitions Move to highlight Bandwidth partitions and press Enter to select as following screen To set QoS with flow control Move to highlight QoS with flow control and press Ent...

Страница 126: ...4 Menu Driven Console Management 122 Gigabit Profile Step 5 Choose one Gigabit port and press Enter to see the setting submenu Step 6 Choose one megabit port and press Enter to see the setting submenu...

Страница 127: ...ailable setting is Sharper Configuration User can following the above steps for Megabit setting to complete similar items Step 8 For Sharper Configuration setting press Enter with the highlight of Sha...

Страница 128: ...ment 124 4 4 11 6 specifying the port configuration Step 1 Move to highlight Port Configuration from QoS menu and press Enter to see the following screen Step 2 Choose one port and press Enter to ente...

Страница 129: ...nter with Active Profile highlighted Then use the up and down arrow keys to highlight an active profile press the enter key to change Note that other attributes are read only Note For Gigabit ports e...

Страница 130: ...1 Move to highlight Rate Control from the QoS menu and press Enter Step 2 Pressing Enter to with the Rate Control highlighted user can choose to enable or disable Rate Control mode Step 3 To change t...

Страница 131: ...ght the desired port you want to modify and a screen showing the average rate and traffic type settings for the selected port appears Average Rate Step 5 In selected port s submenu move to highlight A...

Страница 132: ...128 Traffic Type Step 6 In selected port s submenu move to highlight Traffic Type and press Enter then select traffic type as streaming or bursting Note No rate control configurable feature available...

Страница 133: ...to highlight File Transfer from Advanced Management screen and press Enter If you access the administration console by connecting an RS232 cable directly to the console port at the back of the switch...

Страница 134: ...Menu Driven Console Management 130 4 4 12 1 Receive File Via TFTP Step 1 Move to highlight Receive File Via TFTP and press Enter Step 2 Type the name of the file you intend to receive and press Enter...

Страница 135: ...4 Menu Driven Console Management 131 Step 3 Move to highlight IP Address and press Enter Type the IP address from where the file will be obtained Step 4 Press Esc when completed...

Страница 136: ...to transfer file now Highlight Yes and press Enter to start file transfer Otherwise move to highlight No and press Enter to deny it Step 6 Press Esc to a previous screen 4 4 12 2 Send File Via TFTP S...

Страница 137: ...enu Driven Console Management 133 Step 2 If the default File Type is not the one you intend to send press Enter Select the file type you intend to send and press Enter Step 3 Repeat Step 3 5 on page 1...

Страница 138: ...rt file transfer Otherwise highlight No and press Enter to deny it Step 3 Press Esc to a previous screen 4 4 12 4 Send File Via Kermit Step 1 In File Transfer screen obtained via console port move to...

Страница 139: ...4 Menu Driven Console Management 135 Step 4 Press Esc to a previous screen...

Страница 140: ...settings and remain in the configuration program highlight Save Settings from Switch Management and press Enter 4 7 Restore Default Settings To restore the factory default settings highlight Restore...

Страница 141: ...naging the switch This interface allows you to access the switch using a preferred web browser This chapter describes how to configure the switch using its web based browser interface 5 1 Logging on t...

Страница 142: ...ser Management 138 PASSWORD Enter the factory default password no password press Enter directly Otherwise enter a user defined password if you followed the instructions later and changed the factory d...

Страница 143: ...d managing the switch In addition you can click any port on the switch image to view the switch s current speed duplex and activity status The Basic Setup General parameters appear at the lower field...

Страница 144: ...40 FILE Save settings configured in the browser interface download upgraded software via TFTP reboot the switch logout of the browser interface BASIC SETUP Perform general LAN port and console port ac...

Страница 145: ...address management IP networking per port statistics static MAC filters SNMP port trunking port mirroring tasks 5 3 Performing File Activities 5 3 1 Start with Selection Menu Click the File button at...

Страница 146: ...ure you want to save setting click OK to save it or Cancel to abort it 5 3 3 Receive File Via TFTP Step 1 Click Receive File Via TFTP on the File display Note The TFTP protocol is used to download upg...

Страница 147: ...143 Step 2 For File Name type the name of the file you intend to receive Step 3 For IP Address type the IP address from where the file will be obtained Step 4 Click Receive Now 5 3 4 Reboot Step 1 Cl...

Страница 148: ...ssage asks Are you sure you want to save setting click OK to save it or Cancel to abort it 5 3 5 Logout Step 1 Click Logout on the File display Step 2 When you click it a message asks Are you sure you...

Страница 149: ...5 Web Based Browser Management 145 5 4 Performing Basic Setup Activities 5 4 1 Start with Selection Menu Click the Basic Setup button at the upper field of the main display the menu options appear...

Страница 150: ...c Setup General parameters The screen here is the same as shown on page 139 when you first access the switch browser interface System Name Step 2 Click in System Name text box on the field of Basic Se...

Страница 151: ...r disable statistics collection at the switch click the appropriate option from Statistic Collection drop down menu Reboot On Error Step 7 To allow or prevent the switch from rebooting when a fatal er...

Страница 152: ...Setting A confirmation window appears Click any button at the upper field of the screen to exit 5 4 3 LAN Port Configuration To access the LAN configuration parameters click Basic Setup button first...

Страница 153: ...5 Web Based Browser Management 149 5 4 3 1 Port Status Control Step 1 Click Speed Flow Control to view the line speed and flow control for all ports...

Страница 154: ...Management 150 5 4 3 2 Port setting Step 1 Click Basic Setup _LAN Port _Port Setting to access the configuration information for all ports Step 2 In the Port column click the port you want to configu...

Страница 155: ...ces the port in UP state In this state packets can be switched to and from the port Speed Duplex Options Step 4 Click the drop down menu under Speed Duplex Options if you want to change the line speed...

Страница 156: ...r this port Note Auto allows the switch to automatically ascertain whether or not to use flow control Disable turns off flow control at all times Enable turns on flow control at all times Step 6 Click...

Страница 157: ...click Basic Setup button first and then click Console Port Baud Rate Step 1 Click an appropriate speed from Baud Rate drop down menu on the field of Basic Setup Console Port Configuration Note Auto a...

Страница 158: ...le port click in Modem Setup String Flag drop down menu to decide whether you want to use a Default_Setup_String or Custom_Setup_String Modem Setup String Step 5 If you select Custom_Setup_String ente...

Страница 159: ...9 Click Update Setting when completed A confirmation window appears Note If you enable SLIP a message tells you that the console port becomes accessible only through the SLIP protocol after you click...

Страница 160: ...Web Based Browser Management 156 5 5 Performing Advanced Setup Activities 5 5 1 Start with Selection Menu Click the Advanced Setup button at the upper field of the main display the menu options appea...

Страница 161: ...5 Web Based Browser Management 157 5 5 2 MAC Address Management From the Advanced Setup menu point to MAC Address Management to view VLANs and their associated MAC addresses...

Страница 162: ...5 Web Based Browser Management 158 Per VLAN View Step 1 Click Per VLAN View first and click on the VLAN ID that you want to view Step 2 Click to close the VLAN Activities window when finished viewing...

Страница 163: ...MAC Address Management _ Per Port View first and click on the port that you want to view Step 2 Click to close the Per Port VLAN Activities window when finished viewing If there is a list of MAC addr...

Страница 164: ...ced Setup _ MAC Address Management _ Individual MAC View Step 2 Click in the Enter MAC Address text box and type the MAC address that you want to view Step 3 Then click on the Get Information button S...

Страница 165: ...5 Web Based Browser Management 161 5 5 3 IP Networking To access the IP networking parameters click the Advanced Setup button and Point to IP Networking from the selection menu...

Страница 166: ...Web Based Browser Management 162 5 5 3 1 IP RIP Settings Step 1 Click IP RIP Settings to access IP and RIP settings A list of VLAN IDs appears along with their corresponding IP address and subnet mas...

Страница 167: ...r change IP Address Step 3 Click in the text box and type a new address Alternatively you can use the Delete IP button to delete the IP address No precautionary message appears before you delete the I...

Страница 168: ...ck in the text box and type a new address Frame Type Step 5 Click a value from the drop down list BOOTP Step 6 Click a value from the drop down list Proxy ARP Step 7 Click a value from the drop down l...

Страница 169: ...icast Step 9 Specify whether you want to broadcast multicast or neither from the drop down list Advertise Routes Step 10 Specify whether you want to advertise routes Advertise Default Route Step 11 Sp...

Страница 170: ...RIP V1 V2 Updates Step 12 Specify whether you want to accept RIP V1 V2 updates Accept Default Route Updates Step 13 Specify whether you want to accept default route updates Use Split Horizon Step 14 S...

Страница 171: ...ether poisoned reverse is to be used Send Triggered Responses Step 16 Specify whether the switch is to send triggered responses Step 17 When you finished with these selections click Update Setting Ste...

Страница 172: ...king _ Default Gateway to access gateway settings Default Gateway Step 2 For Default Gateway click in the text box and type the IP address of the router at the next hop Metric Step 3 For Metric click...

Страница 173: ...5 Web Based Browser Management 169 5 5 3 3 ARP Table Step 1 Click Advanced Setup _ IP Networking _ ARP Table to view ARP table settings The information here is read only...

Страница 174: ...5 5 3 4 DHCP Gateway Settings Step 1 Click Advanced Setup _ IP Networking _ DHCP Gateway Settings to view and or change settings Step 2 In the VLAN ID column click on a VLAN ID that you want to view o...

Страница 175: ...he maximum number of hops Delay Step 5 Click in the text box and type a decimal number to configure the delay in seconds Preferred Server Step 6 Click in the text box and type an IP address for it Rep...

Страница 176: ...5 Web Based Browser Management 172 Step 2 Click a port to view statistic data...

Страница 177: ...Advanced Setup button and then click Bridging from the selection menu Aging Options Step 1 Click the drop down list for Disabled No Aging or Set Aging Time Aging Time Step 2 When Set Aging Time is se...

Страница 178: ...Limit for All Ports Step 4 When Controlled Flooding is selected click the text box and type a decimal number as flood limit in packets per second Step 5 Click Update Setting when completed 5 5 6 Stati...

Страница 179: ...ck Add MAC Addr button to add a source MAC address for static filtering Step 3 The Static Source MAC Filter window appears Click in the Source MAC Address Filter text box and type a unique MAC source...

Страница 180: ...2 Step 7 The Delete Source MAC Address window appears Click the Select a MAC Address drop down list and select the source MAC address you want to delete Step 8 Click the Delete button Step 9 A confirm...

Страница 181: ...menu Click Destination MAC Address Step 2 Click Add MAC Addr button to add a destination MAC address for static filtering Refer to Step 2 5 in Source MAC Address section for similar procedure Step 3 C...

Страница 182: ...Based Browser Management 178 5 5 7 IP Multicast Group To view the IP multicast group addresses click the Advanced Setup button and click IP Multicast Group in the selection menu The information is rea...

Страница 183: ...5 Web Based Browser Management 179 5 5 8 VLAN Perspective To view the VLAN configuration information click the Advanced Setup button and point to VLAN Perspective in the selection menu...

Страница 184: ...180 5 5 8 1 Adding a VLAN Step 1 Click VLAN Configuration Step 2 Click the Add VLAN button and below screen appears For VLAN ID type a unique VLAN identifier ranges from 2 to 4094 For VLAN Name type a...

Страница 185: ...setting VLAN port settings Under VLAN configuration window Add ports Step 1 Under VLAN ID click the VLAN whose setting you want to view or set Then click the appropriate button to add or delete a port...

Страница 186: ...5 Web Based Browser Management 182 Step 2 To Add a ports e g to add a forbidden port Click the Add Forbidden button to see the screen as below Click the ports you want to add as forbidden ports...

Страница 187: ...Step3 Finally press Add button to confirm addition action Step4 User can add untagged and tagged VLAN port following the same steps After each addition of VLAN ports the updated group member will appe...

Страница 188: ...Ports Delete Untagged Ports Delete Untagged Ports button to delete ports The process is just like the one in Add ports And the revise VLAN information appears after delete action confirmed 5 5 8 3 del...

Страница 189: ...te that a precautionary message does not appear before the VLAN is deleted And also note that the default VLAN VLAN ID 1 can not be deleted 5 5 9 Spanning Tree Perspective To view the spanning tree pe...

Страница 190: ...e above screen Spanning Tree Protocol Step 2 Specify whether you want to have it Disabled or Enabled by clicking the drop down list Bridge Priority Step 3 Click in the text box and type a decimal numb...

Страница 191: ...he text box and type a decimal number between 4 and 30 Step 7 Click Update Setting A confirmation window appears Click to close the confirmation window PORT SETTING Step 1 To view and or change the Sp...

Страница 192: ...Step 3 Click in the text box and type a decimal number between 0 and 255 A low value gives the port a greater likelihood of becoming a Root port Path Cost Step 4 For Path Cost click in the text box a...

Страница 193: ...ation click the Advanced Setup button and click SNMP in the selection menu The SNMP Configurations window appears As shown below the factory default SNMP value is Enabled and the factory default Commu...

Страница 194: ...he text box and type a IP address for trap host 1 4 Cold Start Trap Step 6 Specify whether it is Disabled or Enabled by clicking the drop down list Warm Start Trap Step 7 Specify whether it is Disable...

Страница 195: ...whether it is Disabled or Enabled by clicking the drop down list Falling Alarm Trap Step 12 Specify whether it is Disabled or Enabled by clicking the drop down list Topology Alarm Trap Step 13 Specify...

Страница 196: ...5 Web Based Browser Management 192 5 5 11 Other Protocols To enable or disable the GVRP and or IGMP protocols click the Advanced Setup button and click Other Protocols in the selection menu...

Страница 197: ...g the drop down list Step 3 Click Update Setting when completed A confirmation window appears Click to close the confirmation window 5 5 12 Port Trunking To use the switch s trunking capability to gai...

Страница 198: ...k the drop down menu to select a desired range E g click Port 1 24 Step 3 Click to assign a maximum of four ports to the trunk group Note That Trunk group 1 and 2 can include any four ports from port...

Страница 199: ...and click Port Mirroring in the selection menu In this feature two sets of mirroring port pairs are available Mirror To Step 1 In the Mirror To column select a mirror to port by clicking the drop dow...

Страница 200: ...ed from port will be receiving or transmitting data by clicking the drop down list Step 4 Click Update Setting when completed A confirmation window appears Click to close the confirmation window 5 5 1...

Страница 201: ...ation window Step 1 Click the Global Setting then the following window appears Step 2 Click in the DiffServ Expedite Forwarding box to specify whether you want to enable or disable this feature Step 3...

Страница 202: ...se the drop down list boxes to select the High drop percentage for level 1 Low drop and high drop percentages for level 2 Note that the low drop percentage foe level 1 remains fixed at 0 while the low...

Страница 203: ...d Browser Management 199 5 5 14 2 logic port Under VLAN configuration window click the Logic Port to enter User defined ports Step 1 Under logic port click the User defined ports and a window followin...

Страница 204: ...e Logic port number field Step 4 Click a new value from the Transmit Priority drop down list to change the transmit priority ranges from 0 to 7 Step 5 Select high or low drop priority from the Drop Pr...

Страница 205: ...k the Well defined ports and a window following appears Step 9 Click a number under Logic Port Index Then following the similar policy in User defined ports setting user can set up all related paramet...

Страница 206: ...nagement 202 Range logic ports Step 10 Following the similar policy in User defined ports setting user can set up all related parameters in Range logic ports Such as High Low Port Number Transmit prio...

Страница 207: ...configuration window Step 1 Click VLAN then the below windows shows Step 2 For each VLAN Priority user can select the left drop down list to select a transmit priority range 0 7 and select a high or...

Страница 208: ...p 1 Click Type of Service then the below windows shows Step 2 For each Type of Service Priority user can select the left drop down list to select a transmit priority range 0 7 and select a high or low...

Страница 209: ...5 Web Based Browser Management 205 5 5 14 5 Profile settings Under QoS configuration window 10 100M Profile Setting Step 1 Under Profile click the 10 100M Profile Setting to enter below window...

Страница 210: ...profile enter a new name in the Profile Name field Step 4 To change the active profile assigned to this profile name click a new name from the Assigned to Active Profile drop down list Step 5 Use the...

Страница 211: ...owser Management 207 Gigabit Profile Setting Step 8 Under Profile click the Gigabit Profile Setting to enter below window Step 9 Click a profile index number or profile name A Profile Attribute window...

Страница 212: ...file assigned to this profile name click a new name from the Assigned to Active Profile drop down list Step 12 Use the P7 P0 lists to select appropriate percentages for these priorities Step 13 Click...

Страница 213: ...Browser Management 209 Step 2 Click a port number under Port A window below shows Step 3 Use the Active Profile drop down list to choose a different active profile Step 4 Click the Update Setting butt...

Страница 214: ...14 7 Rate Control Under QoS configuration window Step 1 Click the Rate Control to enter below window Step 2 Use the Rate Control drop down list to enable or disable rate control Step 3 Click a port n...

Страница 215: ...agement 211 Step 4 Use the Average Rate drop down list to select an average rate percentage Step 5 Use the Traffic Type drop down list to select bursting or streaming traffic Step 6 Click the Update S...

Страница 216: ...evice or software agent that continually collects statistics about a LAN segment or VLAN The RMON probe transfers the collected data to a management workstation on request or when a pre defined thresh...

Страница 217: ...work Management Station if the threshold of a certain MIB counter is reached or if other trap conditions such as the following are met WARM START COLD START LINK UP LINK DOWN AUTHENTICATION FAILURE RI...

Страница 218: ...ored RMON History Group gathers and stores periodic statistical samples from the previous Statistics Group RMON Alarm Group allows a network administrator to define alarm thresholds for any MIB variab...

Страница 219: ...implement the Spanning Tree Protocol this group will not be implemented This group is applicable to any transparent only source route or SRT bridge that implements the Spanning Tree Protocol The dot1...

Страница 220: ...Check the network cable make sure it is properly connected to the switch and the network device Check the network cable make sure the UTP cables comply with EIA TIA 568 and Category 5 specification P...

Страница 221: ...FF001 MTRJ 100Base FX Fiber Module Multi Mode MT RJ connector 99 33228 005 MFF001 SC20 100Base FX Fiber Module Single Mode 20Km SC connector 99 33228 006 MFF001 SC40 100Base FX Fiber Module Single Mod...

Страница 222: ...od from the date of purchase To ensure timely response to a service request please complete and detach the Benq Warranty Registration Card then return it together with a copy of your sales receipt to...

Страница 223: ...E NETWORK PRODUCT OR ANY SOFTWARE SUPPLIED BY BENQ THAT ACCOMPANIES THE NETWORK PRODUCT EVEN IF BENQ HAS BEEN ADVISED OF THE POSSIBILITY OF SUCH DAMAGES YOU AGREE THAT REPAIR REPLACEMENT OR REFUND AS...

Отзывы: