background image

  5

  Getting started

Getting started

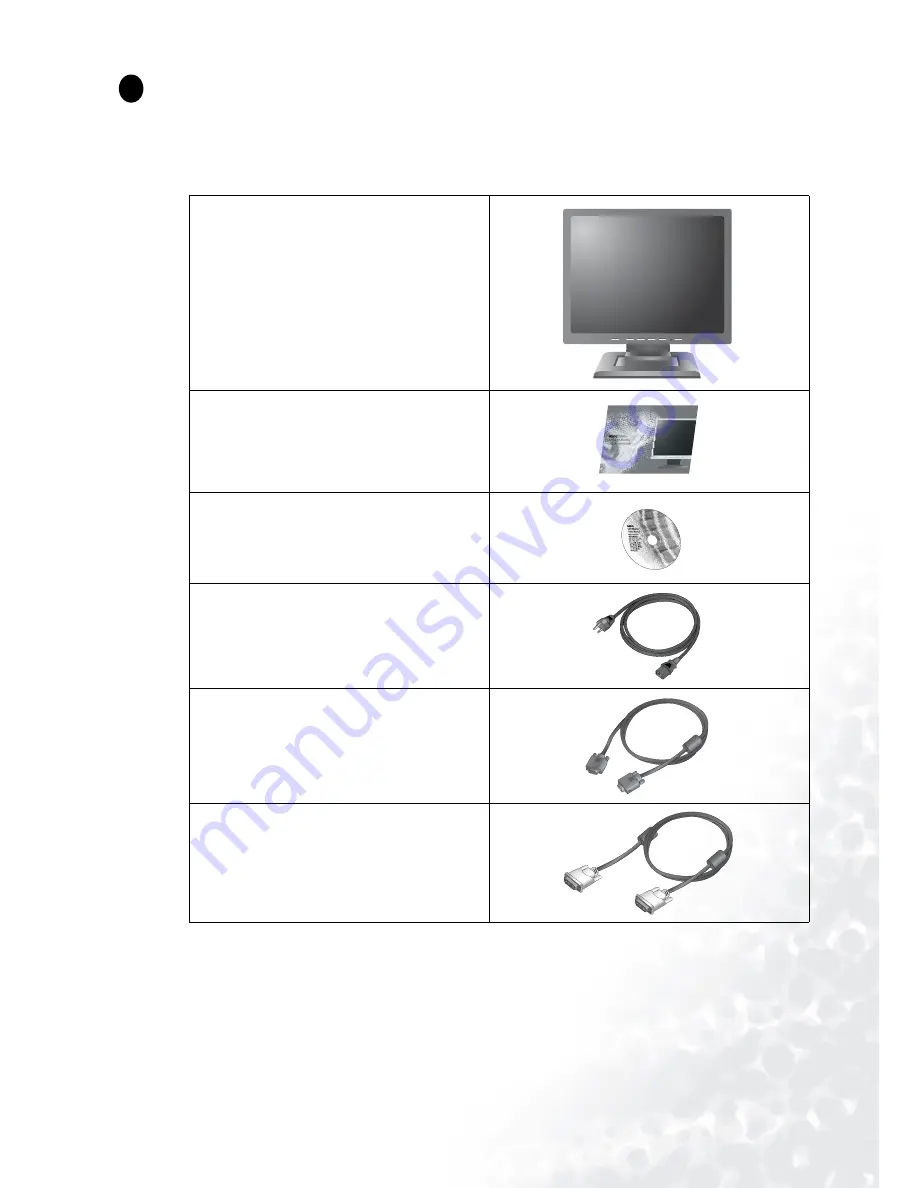
When unpacking please check you have the following items. If they are missing or are damaged, 
please immediately contact the dealer at which you purchased the goods.


BenQ LCD Monitor


Quick Start Guide


CD-ROM Disk


Power cord

Signal cable: D-Sub


Signal cable: DVI-D (optional)


P/N:53.L9

00

3.

00

2

1

Содержание FP937S

Страница 1: ...FP937s FP937s LCD Color Monitor 19 0 48 26 cm LCD Panel Size User s Manual Welcome...

Страница 2: ...he AC supply The power supply cord serves as a power disconnect device for pluggable equipment The socket outlet should be installed near the equipment and be easily accessible This product should be...

Страница 3: ...How to install your monitor s software 10 Choosing the best picture resolution 14 How to choose the right Refresh Rate 16 How to set the Picture Optimization 19 How to adjust your Monitor 20 A Look at...

Страница 4: ...4...

Страница 5: ...you have the following items If they are missing or are damaged please immediately contact the dealer at which you purchased the goods BenQ LCD Monitor Quick Start Guide CD ROM Disk Power cord Signal...

Страница 6: ...6 Getting to know your Monitor Getting to know your Monitor Front View Back View 1 2...

Страница 7: ...7 Getting to know your Monitor Back View 2 Locations of plugs sockets 1 Power AC input jack 2 DVI D connector optional 3 D Sub connector...

Страница 8: ...ware Make sure that the computer and monitor s power are both turned off Please follow these seven steps to install your LCD monitor 1 Connect D Sub cable to the LCD monitor 2 Connect DVI D cable to y...

Страница 9: ...9 How to install your monitor hardware 4 Connect the other end of signal cable to the signal connector of your computer 5 Connect power cord to an AC power socket...

Страница 10: ...the Monitor tab Click the Change button in the top right corner 4 The Update Device Driver Wizard opens Confirm by clicking Next 5 Select Display a list of all drivers in a specific location so you c...

Страница 11: ...ht corner 5 Select Monitor then click Properties 6 Select Driver tab then click Update Driver 7 The Upgrade Device Driver Wizard will pop up Then click Next 8 Select Display a list of the known driver...

Страница 12: ...in a specific location so you can select the driver you want and click Next 6 Choose Monitor from the list and then click Next 7 Choose Display a list of all the drivers in a specific location so you...

Страница 13: ...operties 2 Select Driver tab and then click Update Driver 3 The Hardware Update Wizard will pop up Then click Next 4 Select Don t search I will choose the driver to install and then click Next 5 In th...

Страница 14: ...est picture Lower resolutions are displayed on a full screen through an interpolation circuit However flaws do occur with the interpolated resolution So if you want to have all the advantages of LCD t...

Страница 15: ...15 Choosing the best picture resolution 3 Select a resolution of 1280x1024 Then click Apply 4 In the subsequent windows press OK and Yes 5 You can now close Display Properties...

Страница 16: ...ble for an LCD display to flicker The best results are obtained by using the factory modes already set in your computer There is a table with the factory modes in this user s guide Youc an choose 60 7...

Страница 17: ...17 How to choose the right Refresh Rate 2 From the Display Properties window select the Settings tab Click the Advanced button in the bottom right corner...

Страница 18: ...n field is located in the center at the bottom of the window 4 Choose a refresh rate from the table with the factory modes which can be found in the user s guide and select this in the settings field...

Страница 19: ...SD 3 If there is vertical noise observed press W or X key to select Geometry and press Enter key Then press W or X key to select Pixel Clock and also press Enter key again Now press W or X key to adju...

Страница 20: ...k to previous menu or exit OSD 4 Enter key Activate OSD enter sub menu select items confirm selection and hot key for OSD Lock 5 W Left key For Left Decrease adjustment Left key is the hot key for Bri...

Страница 21: ...ol Functions Available in Main Menu Main Menu Luminance sub menu Press W or X key to adjust the degree of Brightness press Exit to return to the previous menu Press W or X key to adjust the degree of...

Страница 22: ...s Exit to return to previous menu Press W or X key to adjust the Vertical Position press Exit key to return to previous menu Press W or X key to adjust the value of the Pixel Clock press Exit to retur...

Страница 23: ...23 How to adjust your Monitor Color sub menu User Preset User may set the color balance of Red Green and Blue...

Страница 24: ...st the Horizontal Position of the OSD press Exit to return to previous menu Press W or X key to adjust the Vertical Position of the OSD press Exit to return to previous menu Press W or X key to adjust...

Страница 25: ...25 How to adjust your Monitor Languages Sub menu...

Страница 26: ...sition settings or press Exit to return to previous menu Press W or X key to confirm Color Recall press Enter to recall color settings or press Exit to return to previous menu Press W or X key to conf...

Страница 27: ...27 How to adjust your Monitor Miscellaneous sub menu Input Select Selects either D sub analog or DVI digital inputs Sharpness Press W or X key to adjust the degree of Sharpness Display Information...

Страница 28: ...more pixels are permanently red green blue or another color Clean the LCD screen Cycle power on off These are pixels that are permanently on or off and is a natural defect that occurs in LCD tech nol...

Страница 29: ...power supply mains socket the external power supply and the mains switch The image is distorted flashes or flickers Read the Choosing the best picture resolution section and then select the correct r...

Страница 30: ...roduct we recommend that you use your computer s power management function 10 Incoming display mode Input timing Resolution Horizontal Frequency KHz Vertical Frequency Hz Pixel Frequency MHz Comment 6...

Страница 31: ...ogy iKey automatic image setting 5 buttons and iKey Contrast brightness vert hor image position phase pixel clock color balance color palette choice of language 8 language OSD OSD position status indi...

Страница 32: ...32 Specifications Operating voltage Dimensions W x H x D Weight Automatic switched mode power supply 90 264 V 47 63Hz 415 2 x 426 3 x 180 mm 7 4 kg...

Страница 33: ...t hor image position phase pixel clock color balance color palette choice of language 8 language OSD OSD position status indicator Power Management Max power consumption Power saving mode VESA DPMS EP...

Страница 34: ...34 Specifications...

Отзывы: