BenQ DC 5530 User’s Manual
Eng
lish
Using the DC E53+
7
3.1.2 Changing Camera Settings
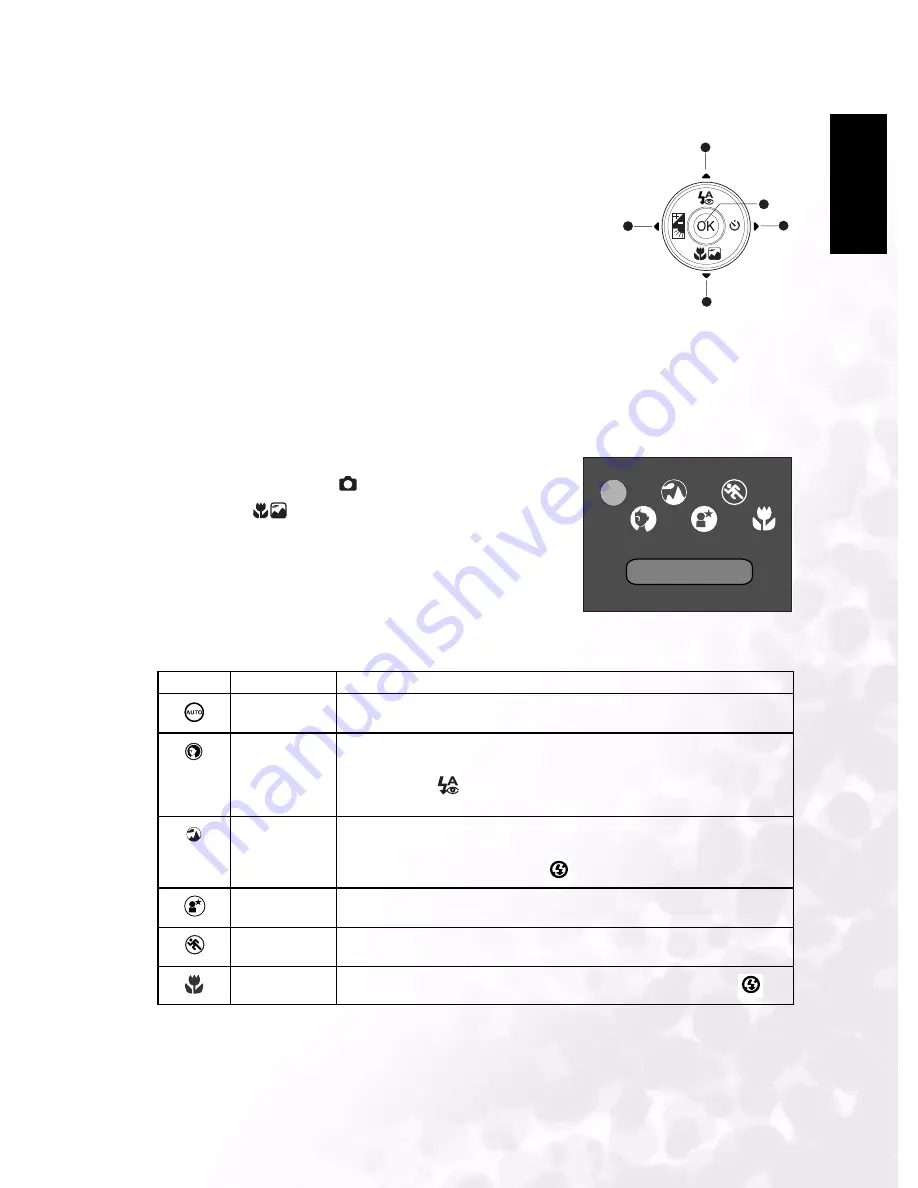
Camera settings can be changed with the five-way button.
1. Up/Flash: Scrolls upwards in menus and enables you to
choose the appropriate flash setting.
2. Left/Exposure compensation/Backlight correction: Scrolls
left in menus and enables you to activate exposure
compensation/backlight correction function.
3. Down/Scene: Scrolls downwards in menus and enables you
to choose the scene setting.
4. Right / Self-Timer: Scrolls right in menus and toggles
through the self-timer settings.
5. OK: Enables you to view the last picture that was captured and confirms the chosen
setting.
3.1.2.1
Setting the Scene Mode
This sets the scene mode for capturing images.
1. Press the
POWER
button to turn on the camera. Make
sure the camera is in [
] mode.
2. Press the
button.
The scene mode menu is displayed.
3. Use the
W
/
X
buttons to select the desired scene mode,
then press the
OK
button to confirm.
To cancel the selection and exit from the scene mode
menu, press the
S
/
T
buttons.
The table below will help you choose the appropriate scene
mode:
Icon
Scene mode
Description
Auto
Select this mode when you want to leave the settings up to the camera to
capture images with ease.
Portrait
Select this mode when you want to capture an image that makes the person
stand out against a defocused (blurred) background. The default flash
mode is set to [
] which is effective in reducing the red-eye phenome-
non.
Landscape
Select this mode to enhance the color saturation in mountains, forests and
other landscape scenery or to take portraits that feature a landmark in the
background. The flash is fixed at [
].
Night Scene
Select this mode when you want to photograph people with an evening or
night scene background.
Sports
Select this mode when you want to capture fast-moving subjects.
Macro
Select this mode to capture close-up subjects. The flash is fixed at [
].
1
2
3
4
5
AUTO
AUTO


