4. Using the program card, refer to the section marked
CENTER MARKS for the list of measurements in
inches where the different bends will be made. Each
CENTER MARK is measured from the left end of the
tubing. Mark and number the CENTER MARKS on
the tubing using a crayon or felt tip pen. The last
mark you make should be the cut off point shown in
the O/A LENGTH section. DO NOT CUT THE TUBING
at the last center mark until the final bend is
made. (See figure 1-B.)
5. Disengage the dies and reposition the tubing so that
the greater portion is now extending out the RIGHT
side of the bender and the first CENTER MARK is
lined up with the center of the two back shoes.
6. Engage the bending dies until the pusher block
springs are compressed and the tubing is held firmly.
(See figure 1-C)
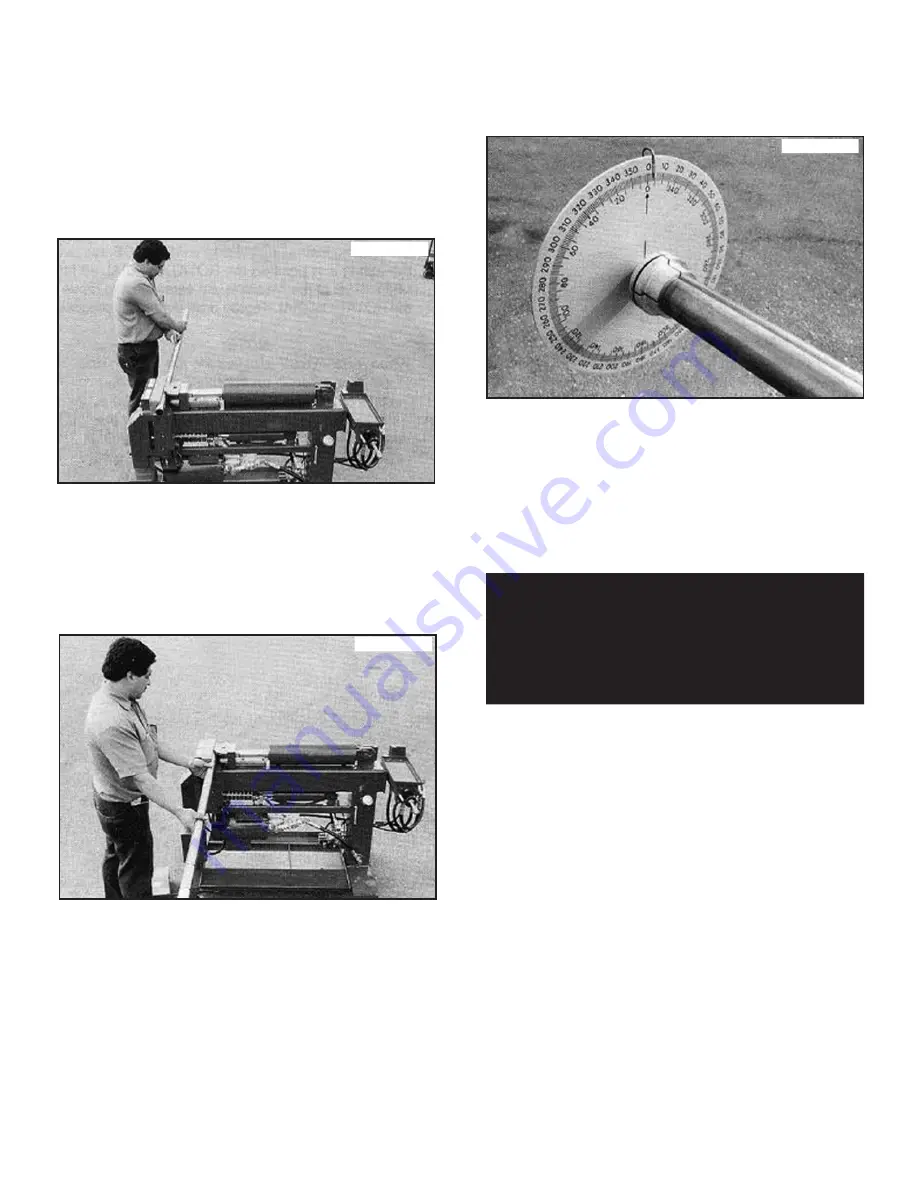
7. Rotate the tubing so that the weld seam on the tubing
is facing up or at the 12 o-cIock position. The
pusher block springs are designed to hold the
tubing secure but still allow rotation of the pipe.
Install the rotation dial on the RIGHT end of the
tubing. Loosen the butterfly nut if necessary and insert
the segmented expander inside the tubing end.
Tighten the butterfly nut until the rotation dial is secure.
8. With the rotation dial properly installed, rotate the
degree plate not the tubing so that the pendulum
pointer is showing ZERO. Make sure the butterfly nut
remains tight.
9. You are now ready to make your first bend. At this
time you may program your depth-of bends on the
digital board as described in the DIGITAL CONTROL
OPERATION section, position the depth-of bend
pointer on BAS models, or elect to use the electric
foot switches or manual knee control valve. For
beginning operators, we suggest that manual controls
are used until you become more familiar with the
operating features of your machine
10. As described in the BEND DEPTH section of the
card, advance the radius die to 17 DEGREES, then
retract the die to the original starting position. The
rotation dial should still show ZERO at this time.
11. Review the SYMBOLS section of the card and check
for any special instructions. On bend number two,
you will notice that a HALF SHOE is called for. Install
the HALF SHOE now. Unless a special instruction is
given to change the radius size, you will continue to
use the 3-1/2” radius through the remaining bends.
NOTE:
Always position the HALF SHOE or THREE QUARTER
SHOE on the same side as the previous bend.
12. For the second bend, slide the tubing to the LEFT so
that the second CENTER MARK is lined up with the
center of the shoes.
(See figure 2-B.)
NOTE:
The weld seam on the tubing should be directly in line
with the ZERO mark at this time. (See figure 2-A)
Bender Operation Manual 17
CAUTION!
Before advancing the radius die check your
circle-of-swing for allowable bending clearances.
Figure 1-B
Figure 2-A
Figure 1-C
Содержание 1302BA-302
Страница 49: ...Bender Operation Manual 49...
Страница 50: ...50 Bender Operation Manual...
Страница 64: ...64 Bender Operation Manual...
Страница 65: ...Bender Operation Manual 65...


