background image

2

8

Making Splice or Scarf Joint Cuts

Cutting a Left-Over-Right Splice Joint

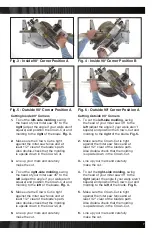
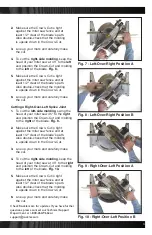
1.  To cut the left-side molding, swing the 

  head of your miter saw 45° to the left 

  and position the Crown-Cut and molding 

  to the right of the blade. Fig. 7.

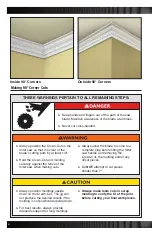
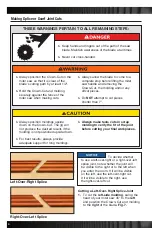
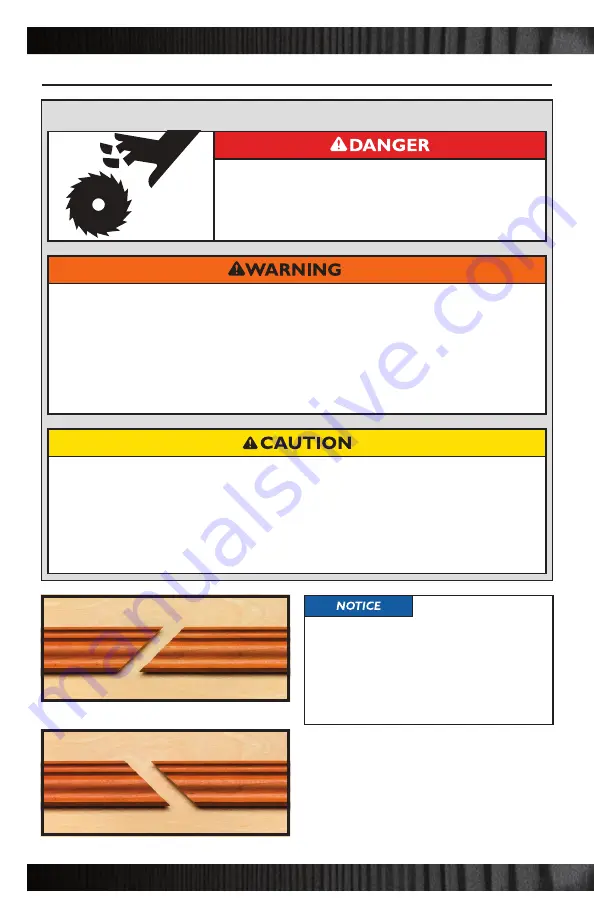
Right-Over-Left Splice

Left-Over-Right Splice


To decide whether 

to use a left-over-right or a right-over-left 

splice joint, note whether the joint will 

be visible to the right or to the left when 

you enter the room. If it will be visible 

on the left, use the left-over-right cut. 

If it will be visible to the right, use 

the right-over-left cut.

>  Always position the Crown-Cut on the 

  miter saw so that it is clear of the 

  blade’s cutting path by at least 1/2”.

>  Hold the Crown-Cut and molding 

  securely against the fence of the 

  miter saw when making cuts.

>  Always position moldings upside 

  down on the Crown-Cut. The jig will 

  not produce the desired results if the 

  molding is not positioned upside down.

>  For best results, always provide 

  adequate support for long moldings.

>  Always allow the blade to come to a 

  complete stop before lifting the miter 

  saw handle and removing the 

  Crown-Cut, the molding and/or any 

  offcut pieces.

>  Do NOT attempt to cut pieces 

  shorter than 7”.

>  Always make tests cuts in scrap 

  molding to verify the fit of the joint 

  before cutting your final workpieces.

THESE WARNINGS PERTAIN TO ALL REMAINING STEPS:

>  Keep hands and fingers out of the path of the saw 

  blade. Maintain awareness of the blade at all times.

>  Never cut cross-handed.

Содержание 23238

Страница 1: ...uctions prior to use for important safety information Always check Rockler com to confirm that you are using the most recent manual version for your product CROWN CUT CROWN COVE CUTTING JIG INSTRUCTIONS Effective October 2019 ...

Страница 2: ......

Страница 3: ...ately 5 Types of Cuts 5 Crown Cut Setup 5 Making 90 Corner Cuts Cutting Inside 90 Corners 6 Making 90 Corner Cuts Cutting Outside 90 Corners 6 Making Splice or Scarf Joint Cuts Cutting a Left Over Right Splice Joint 8 Making Splice or Scarf Joint Cuts Cutting a Right Over Left Splice Joint 8 ...

Страница 4: ...king Splice or Scarf Joint Cuts p 8 9 The user assumes all risk and responsibility for the proper and safe use of this product and for ensuring product suitability for the intended application It is the sole responsibility of the purchaser of this product to ensure that any anyone you allow to use this product reads and complies with all instructions and safety precautions outlined in this manual ...

Страница 5: ...arning indicates a hazardous situation that if not avoided could result in death or serious injury Caution indicates a hazardous situation that if not avoided may result in minor or moderate injury or property damage Notice indicates important or helpful information and or user tips SAFETY WARNING KEY ...

Страница 6: ... allow the blade to come to a complete stop before lifting the miter saw handle and removing the Crown Cut the molding and or any offcut pieces Do NOT attempt to cut pieces shorter than 7 Always position moldings upside down on the Crown Cut The jig will not produce the desired results if the molding is not positioned upside down For best results always provide adequate support for long moldings A...

Страница 7: ...ver right splice or scarf joints and right over left splice or scarf joints The latter two cuts are used to hide differences in moldings butted against each other in long straight runs Crown Cut Setup 1 Place your molding or a section of it upside down on the Crown Cut 2 From the back of the Crown Cut loosen the screws holding the three Fence Risers in Place and extend the Fence Risers enough to s...

Страница 8: ...For best results always provide adequate support for long moldings Always allow the blade to come to a complete stop before lifting the miter saw handle and removing the Crown Cut the molding and or any offcut pieces Do NOT attempt to cut pieces shorter than 7 Always make tests cuts in scrap molding to verify the fit of the joint before cutting your final workpieces THESE WARNINGS PERTAIN TO ALL R...

Страница 9: ...ter saw fence and at least 1 2 clear of the blade s path Also double check that the molding is upside down in the Crown Cut 6 Line up your mark and carefully make the cut Cutting Outside 90 Corners 1 To cut the left side molding swing the head of your miter saw 45 to the left adjust the angle if your walls aren t square and position the Crown Cut and molding to the right of the blade Fig 5 2 Make ...

Страница 10: ...s clear of the blade s cutting path by at least 1 2 Hold the Crown Cut and molding securely against the fence of the miter saw when making cuts Always position moldings upside down on the Crown Cut The jig will not produce the desired results if the molding is not positioned upside down For best results always provide adequate support for long moldings Always allow the blade to come to a complete ...

Страница 11: ... Crown Cut and molding to the right of the blade Fig 9 2 Make sure the Crown Cut is tight against the miter saw fence and at least 1 2 clear of the blade s path Also double check that the molding is upside down in the Crown Cut 3 Line up your mark and carefully make the cut 4 To cut the right side molding keep the head of your miter saw at 45 to the right and position the Crown Cut and molding to ...

Страница 12: ...Distributed by Rockler Companies Inc Medina MN 55340 23238 Rev 10 19 ...

Отзывы: