background image

4

5

IMPORTANT SAFEGUARDS

When using electrical products, especially when children are 

present, basic safety precautions should always be followed, 

including the following: 

READ ALL INSTRUCTIONS BEFORE USING

DANGER - To reduce the risk of electrocution:


Do not use while bathing.


Do not place or store product where it can fall or be pulled into  
a tub or sink.


Do not place in or drop into water or other liquid.


Do not reach for a product that has fallen into water. Unplug immediately.

WARNING - To reduce the risk of burns, electrocution,  

fire, or injury to the persons


Close supervision is necessary when this product is used by, on, or near 
children or invalids.


Use this product only for its intended use as described in this manual. Do 
not use attachments not recommended by the manufacturer.


Never operate this product if it has a damaged cord or plug, if it is not 
working properly, if it has been dropped or damaged or dropped into 
water. Return the product to a service center for examination and repair. 


Keep the cord away from heated surfaces. 


Never block the air openings of the product or place it on a soft surface 
such as a bed or couch, where the air openings may be blocked. Keep 
the air openings free of lint, hair, and the like. 


Never use while sleeping or drowsy.


Never drop or insert any object into any opening or hose.


Do not use outdoors or operate where aerosol (spray) products are 
being used or where oxygen is being administered. 


Connect this product to a properly grounded outlet only.  
See Grounding Instructions. 

SAVE THESE INSTRUCTIONS

Grounding Instructions. 

This product should be grounded. In the event of an electrical short circuit 
grounding reduces the risk of electric shock by providing an escape wire for 
the electric current. This product is equipped with a cord having a grounding 
wire with a grounding plug. The plug must be plugged into an outlet that is 
properly installed and grounded. 

DANGER

Improper use of the grounding plug can result in a risk of electric shock. If 
repair or replacement of the cord or plug is necessary, do not connect the 
grounding wire to either flat blade terminal. The wire with insulation having an 
outer surface that is green with or without yellow stripes is the grounding wire.  
Check with a qualified electrician or serviceman if the grounding instructions 
are not completely understood, or in doubt as to whether the product is 
properly grounded. 

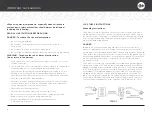
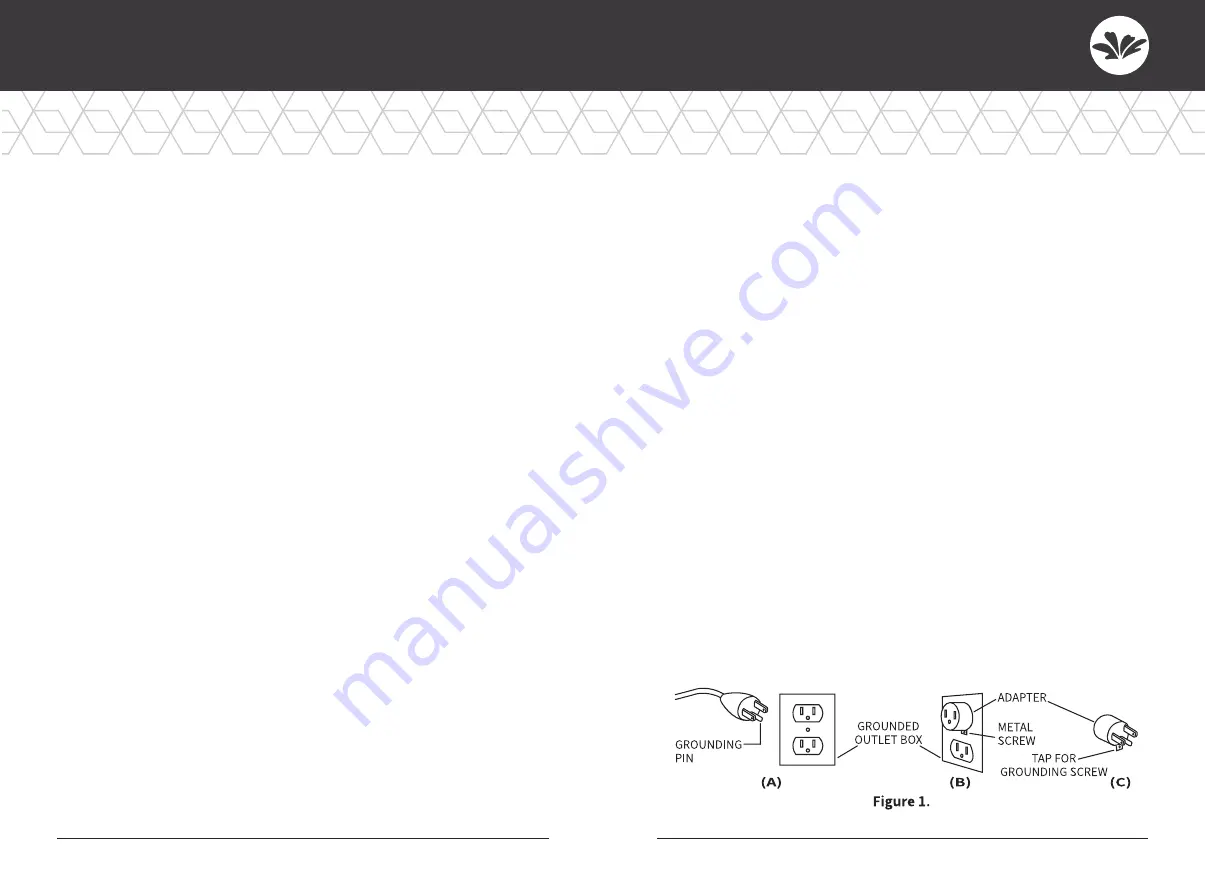
This product is for use on a nominal 120V circuit, and has a grounding plug 
illustrated in sketch A in Figure 1. A temporary adapter, which looks like the 
adapter illustrated in sketches B and C, may be used to connected this plug 
to a 2-pole receptacle as shown in sketch B if a properly grounded outlet is 
not available. The temporary adapter should be used only until a properly 
grounded outlet (sketch A) can be installed by a qualified electrician. The 
green colored rigid ear lug and the like extending from the adapter must be 
connected to a permanent ground such as a properly grounded outlet box 
cover. Whenever the adapter is used, it must be held in place by the screw. 

Содержание bioBidet Prodigy P700

Страница 1: ...OWNER S MANUAL PRODIGY ...

Страница 2: ...Safeguards 5 Safety Guidelines 7 Functions 9 Economy Features 10 Parts 11 Remote Control 13 PRODUCT OPERATION Preparing for Use 15 How to Use 19 Maintenance 29 Troubleshooting 31 Specifications 37 WARRANTY Warranty 39 TABLE OF CONTENTS ...

Страница 3: ...Connect this product to a properly grounded outlet only See Grounding Instructions SAVE THESE INSTRUCTIONS Grounding Instructions This product should be grounded In the event of an electrical short circuit grounding reduces the risk of electric shock by providing an escape wire for the electric current This product is equipped with a cord having a grounding wire with a grounding plug The plug must...

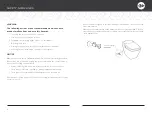
Страница 4: ...rly grounded Discontinue use of the unit unplug the power cable and the shutoff valve in any of the following circumstances Water is leaking from the main body or from the hose connections The product is broken cracked or producing an unusual sound The product is overheating or emitting smoke or a foul odor Continued use of the unit when it is not functioning properly can cause leaks or electric s...

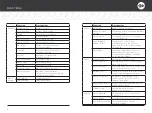
Страница 5: ...ushing Automatically flushes the toilet when the user stands up Auto lid OPEN CLOSE P770 Stand in front of the toilet to automatically open the lid Move away from the toilet to automatically close the lid Night Light Automatic sensors detect motion and activate the night light This function can be enabled or disabled on the remote control Safety Power Saving Saves power when not in use Anti short ...

Страница 6: ...ive the temperature will be maintained at 86 F Using the seat disables this feature for one hour Use the preferred flush button Save water by pressing the appropriate flush button for each use Turn off the power during extended travel to save energy 2 days ...

Страница 7: ...12 13 REMOTE CONTROL ...

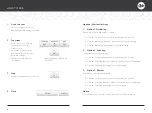
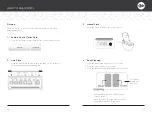
Страница 8: ...des and lifting up 2 Open the battery cover on the back 3 Put 3 AA batteries in order 4 Close the cover 2 Proper Battery Care Observe the following to prevent battery breakage or leaks Remove batteries not using the remote control for a long time Do not use rechargeable batteries Settings temperature auto flush may reset after replacing the batteries Configure the settings again Check if the power...

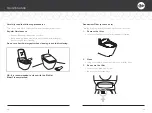
Страница 9: ...en flushing the toilet Turn the water shutoff valve clockwise to reduce pressure 4 Check the display panel 1 Is the operation light on If not on press the Power button to turn on the light 2 Is the seat light on If not on open the remote control cover and press Seat Temperature to turn it on PREPARING FOR USE CONT ...

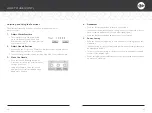
Страница 10: ...m water more rhythmically 1 Press the Posterior Wash or Feminine Wash button to wash 2 Press the Oscillating Button to move the nozzle while washing 3 Press the Oscillating button again to stop Oscillating 1 Press the Posterior Wash or Feminine Wash button to wash 2 Press the Pulsating Button to make the spray pulsate while washing 3 Press the Pulsating button again to stop Pulsating 1 Press the P...

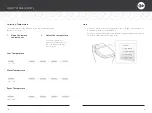
Страница 11: ...mperature Use the button to adjust the temperature of the seat water and dryer up to 3 levels Seat Temperature Water Temperature Dryer Temperature Note When you activate the seat temperature the seat light will be turned on in the display area of the main body When you activate the water temperature the water light will be turned on in the display area of the main body ...

Страница 12: ...to extend the nozzle without sitting on the seat Using a toothbrush clean the nozzle and press the Nozzle Cleaning button again when finished 4 Deodorant Press the Deodorant button to turn on the function It deodorizes automatically when sitting It works for up to 20 minutes while occupied and another 1 minute after standing up Press the Deodorant button again to turn off the function 5 Power Savi...

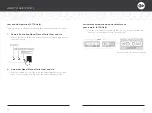
Страница 13: ... and when you move away from the toilet the lid automatically closes 1 Remote Controlled Open Close of Toilet Seat and Lid Choose the seat or lid function by pressing the corresponding button on the remote control Activate the automatic open close feature on your remote P770 Only Press the auto lid button to turn the function on The light indicates the function is on Press again to turn the functi...

Страница 14: ...tton to turn the light on The toilet will automatically flush after standing up 3 Manual Flush Press the Flush button on the control panel 4 Bowl Cleaning Press the Bowl cleaning button for 3 seconds Press the Flush button for 5 seconds Press the Bowl Cleaning button again for 3 seconds Secondary Main Body Controls Bowl cleaning function cleans the inner ceramic bowl Flush functions jets high pres...

Страница 15: ...er cleaning Do not use harsh detergents when cleaning to avoid discoloring OR It is recommended to clean with the BioMist Bidet Cleaner method Deodorizer Filter as necessary Take the following steps when cleaning the deodorizer filter 1 Remove the filter Locate the filter beneath the bidet and pull it forward 2 Clean Using a toothbrush remove dust particles from the filter 3 Re secure the filter P...

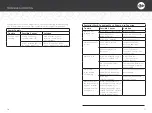
Страница 16: ...Reposition the hose Water pressure is too low Is the water pressure set too low Increase the water pressure and clean the nozzle Is there any debris in the hose Turn off the water shutoff valve and clean the hose out Water is cold Is the temperature set to a low level or turned off Adjust with the buttons on the remote control Is power saving mode turned on The water temperature is set lower and i...

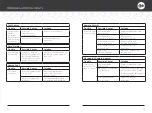
Страница 17: ...l is off Press auto flushing button on the remote control again to turn it on Remote Control Trouble Possible Causes Solution Remote Control is not working Are the batteries running low Replace old batteries with new ones Are the batteries inserted incorrectly Re insert the batteries correctly Is the transmitter or receiver blocked Remove the objects blocking transmitters Is the transmitter or rec...

Страница 18: ...efer to the location of Seat Sensor on page 11 The warm air drying function is not working at all Is the seat sensor activated Refer to the location of the Seat Sensor on page 11 Power Saving Trouble Possible Causes Solution Power saving is not working Is it unplugged Did you change the batteries The setting may take up to 24 hours to function normally Did you change the batteries Did the power go...

Страница 19: ...min flow Max 7 5 kgf cm2 0 75 Mpa Model No P700 P770 Waterproof rating IPX4 Inlet water Temp 41 F 95 F Ambient Temp 41 F 104 F Dimension W 410mm x L 720mm x H 525mm Weight 58 lbs Bidet 16 lbs Toilet 42lbs 59 lbs Bidet 17 lbs Toilet 42lbs This marking shown on the product or its literature indicates that it should not be disposed with other household wastes at the end of its working life To prevent...

Страница 20: ...nce or improper maintenance 3 Damage or loss from improper installation removal repair or modification 4 Damage or loss resulting from sediment or other matters contained in your water system WARRANTY For more warranty service information please contact Bio Bidet Only the original purchaser may submit a claim under this warranty This warranty is our only warranty covering your product Repair or re...

Страница 21: ...Thank You Technical Support Customer Service 7900 S Route 31 Crystal Lake IL 60014 T 847 458 2334 U S TOLL FREE 877 339 5214 support biobidet com www biobidet com ...

Отзывы: