background image

INSTALLATION

• 

We recommend that you install this 

appliance in a work top which is a 

minimum 38mm deep.

•  The hob can be fitted into a work top 

less than 38mm deep, but the 20mm 

gap between hob base and appliance 

or cabinet partition must be main-

tained.

Worktop

25mm

Oven

Hob

INSTALLATION ABOVE AN OVEN

Worktop

25mm

Partician

Hob

Partition

INSTALLATION ABOVE A UNIT  WITH

            A DRAWER OR DOOR

Installation above an oven

Refer to the manufacturer’s instructions 

for clearances above the oven. We recom-

mend a 20mm gap between the bottom 

of the hob and appliance, should the work 

surface be less than 38mm deep.

In the case of a pyrolytic oven

If installing the hob above a pyrolytic

oven, additional provision for air circula-

tion / ventilation may be required. Due to 

the excessive temperatures attained dur-

ing pyrolysis, using the hob at the same 

time may cause the thermal safety device 

within the hob to operate.

General information
Installation should only be carried out by 

a qualified installer or engineer.

Please keep to the following points most-

carefully;

Although every care has been taken to

ensure this appliance has no burrs, or

sharp edges, we recommend that you

wear protective gloves when install-

ing and moving this appliance. This will 

prevent injury.

The hob should not be fitted above a

washing machine, a fridge or a freezer.

Wall surfaces above the work surface and

in the immediate vicinity of the cooking

hob must be heat resistant.

Laminated surfaces and the adhesive 

used for fixing them must be heat resis

-

tant in order to avoid any damage.

The space for air circulation, located

underneath and at the back of the hob

improves its reliability by ensuring that it

will cool down, efficiently.

Installations should be carried out in line

with the National Regulations applicable

with this product type.

Choosing your installation
Make sure that the air inlets through the

ventilator grids underneath the hob are

never blocked.

Installation above a unit with a 

drawer or door
The Hob’s air outlet is underneath work 

surface. If necessary, remove the front 

crosspiece of the unit to allow suitable 

ventilation.

40mm

Hob

Worktop

Screw

50mm

Hob

Worktop

Screw

30mm

Hob

Worktop

Screw

Worktop

20mm

oven or partition

Hob

5mm

Содержание IHK80

Страница 1: ...Belling IHK80 90 UK AU Part No 083364500 Date 14 07 2014 Users Guide Installation Handbook ...

Страница 2: ...card and post it off to the address shown below AUSTRALIA GLEN DIMPLEX AUSTRALIA Pty Ltd Reply Paid 84780 Mount Waverley Vic 3149 NEW ZEALAND GLEN DIMPLEX AUSTRALASIA P L 38 Harris Road East Tamaki Auckland 2013 WARRANTY During the period of guarantee as specified on your warranty registration card your appliance is protected against electrical and mechanical breakdown To register your appliance p...

Страница 3: ...any objects coming into contact with it Installation pipes leads etc Care must also be taken that there is sufficient air flow at the rear of the appliance for the cooling fan to run at its optimum efficiency particularly built in appliances see clearance dimensions in the installation section of the booklet During use the appliance must never be disconnected from the mains supply as this will ser...

Страница 4: ...hey have been given supervision or instruction concerning the use of the appliance in a safe way and understand the hazards involved Children shall not play with the appliance Cleaning and user maintenance shall not be made by children without supervision WARNING Unattended cooking on a hob with fat or oil can be dangerous and may result in fire NEVER try to extinguish a fire with water but switch...

Страница 5: ... the vicinity of this appliance WARNING Do not modify this appliance WARNING Do not operate the appliance without the glass panel correctly fitted WARNING There is a risk of electric shock so always make sure you have turned off and unplugged your appliance before starting Always allow the product to cool down before you change a bulb WARNING Do not modify the outer panels of this appliance in any...

Страница 6: ...nsure you switch off the appropriate cook zone individually or by the central on off key if touch control when you have finished cooking do not rely upon the automatic pan detection system as your means of switching off the appliance This induction hob complies with the applicable EMC and EMF standards Therefore it should not interfere with other electronic units Persons fitted with a pacemaker or...

Страница 7: ...e the kitchen even if you think it will only be for a moment while you answer the door or phone If you use a griddle plate ensure it is completely cool before attempting to lift it from the hob as residual heat may cause burns Always use oven gloves to protect your hands The appliance has a glass hob top make sure you do not drag pans across the ceramic surface as this will lead to scratches and d...

Страница 8: ... with water but switch off the appliance and then cover flame e g with a lid or a fire blanket WARNING If a pan catches fire Do not move it it is likely to be extremely hot Turn off the heat if it s safe to do so but never lean over a pan to reach the controls If you have a fire blanket put it over the pan If you have put the fire out leave the pan to cool completely Deep fat frying presents more ...

Страница 9: ...oint for the recycling of electrical and electronic equipment You will by ensuring the appliance is cor rectly disposed of help prevent potential negative consequences for the environ ment and human health For additional details regarding the recy cling of this product please contact your local government office your household waste disposal service or the retailer where you purchased the product ...

Страница 10: ... avoid marks and scratch es If you use a wet paper towel to remove spills from a warm heating area of the hob be careful to avoid steam burns Do not use abrasive powder cleaners metal wire wool pads impregnated plastic pads detergents bleaches bath stain removers or chemical oven cleaners all these types of products will damage the ceramic glass The functions of the hob comply with the applicable ...

Страница 11: ...oking with one touch cuts power Minute Minder To a maximum time of 9 hours 99 minutes you can time anything Auto Time Switch s Off all 5 zones Yes All five zones can be simultaneously timed to turn off automatically Key Lock To prevent accidentally changing settings press the key graphic to lock the controls Pan Detection Lets you know if the correct pans are being used and helps to save energy Wh...

Страница 12: ...ys it s individual power setting Using the Touch Controls To select a cook zone or the timer simply touch the graphic slider using the flat of your finger not the tip The controls respond to touch so you don t need to apply any pressure Once you have powered on the induc tion hob you have 10 seconds to set the power or use the timer If the red displays disappear simply press the power button again...

Страница 13: ...r Boost is activated by sliding or touching the P Note The Power Boost function will only operate for a limited time and is also under thermal control This means the power boost will deactivate automati cally if the product is hot to protect the internal electronic components of the hob and to prevent the cookware from overheating Cook Zone Normal Max Power 9 kW Boosted Power kW Smallest Recommend...

Страница 14: ...key The key needs to be pressed for at least 1 second to acti vate this is to ensure that the hob cannot be activated unintentionally Note All other keys only need to be pressed for 0 3 seconds to be activated deactivated Note H will appear on any cook zone display that is still hot to touch Using the Timer min The timer has up to 7 timers 6 timers to be assigned to the cooking zones and one indep...

Страница 15: ...alue can be set to 0 Pressing Plus and Minus simul taneously for 2 seconds also resets the timer value to 0 00 Minute Minder The minute minder buzzes when the time set has expired It does not switch off any zone To operate 1 Turn on the hob using the on off key 2 Select the timer by pressing the and keys together do not activate any cook zone 3 Set the right hand digit up to 9 minutes Single Minut...

Страница 16: ... cooking zones must be made of metal and have magnetic properties The base must also be the correct diameter Suitable Cookware for Induction Hobs Unsuitable Cookware Enamelled steel pots with a thick base Pots made of copper stainless steel aluminium oven proof glass wood ceramic and terra cotta Cast iron pots with an enamelled base Pots made of multi layer stainless steel rustproof ferrite steel ...

Страница 17: ...onducting heat back onto the hob glass Overheat Pan Protection The hob is equipped with additional safety systems that help to prevent cookware from overheating providing an additional level of safety not available on conven tional hobs such as gas and ceramic hobs Approximate Glass Surface Temperature o C Intelligent hob safety system 200 Reduces Power Boost setting to Power Level 9 250 Reduces p...

Страница 18: ...s Thick flour based Buttery containing eggs Vegetables Spinach Pulses Boiled potatoes Carrots Saute potatoes Frozen vegetables Meat Thin cuts of meat Fried steak Other types of cooking Deep frying frozen chips Deep frying fresh chips Pressure cooking Stewed fruit Pancakes Custard To melt chocolate Jam Milk Fried eggs Pasta Re heating baby food Rice pudding Keeping food warm Stews ...

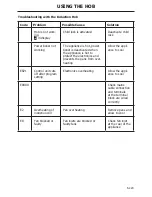
Страница 19: ...o protect the electronics and prevents the pans from over heating Allow the appli ance to cool ER21 Control unit cuts off after program setting Electronics overheating Allow the appli ance to cool ER400 Check mains cable connection and terminals at the terminal block are wired correctly E2 Overheating of induction coil Pan overheating Remove pans and allow to cool E8 Fan blocked or faulty Fan inle...

Страница 20: ... pressure cleaning equipment Regular cleaning will prevent any salts or minerals from accumulating on your hob and discolouring the glass Wipe any spillage as soon as pos sible Clean the hob top as regularly as possible this will prevent any build up of grease which may be a fire hazard Foods with high sugar content tof fee fruit juice jam etc that boil over while cooking or spattered sugar stains...

Страница 21: ...aller or engineer Please keep to the following points most carefully Although every care has been taken to ensure this appliance has no burrs or sharp edges we recommend that you wear protective gloves when install ing and moving this appliance This will prevent injury The hob should not be fitted above a washing machine a fridge or a freezer Wall surfaces above the work surface and in the immedia...

Страница 22: ...nstructions Cutout Required 80 Width 735mm Depth 455mm Clearance Required Side Wall 50mm Rear Wall 50mm Cutout Required 90 Width 855mm Depth 455mm Clearance Required Side Wall 50mm Rear Wall 50mm Fitting into worktop Cut a hole in the work surface to the required size See table for relevant dimensions A clearance of at least 50mm should be maintained between the cutout and any rear or side wall Th...

Страница 23: ... pulled down firmly against the worktop thus ensuring a good seal Recessed Method selected models Recess the work top to the appropriate depth Approx 5mm and shape to fit the hob add 1mm to overall glass size Apply the self adhesive seal to the underside of the hob glass For best results the seal should be adhered along each joint in turn as close to the edge as possible and trimmed at each corner...

Страница 24: ...Depending on the cabinets the worktop thickness and the hob positioning it is possible for the hob base and or the clamp brackets to interfere with parts of the cabinet Cut away cabinetry and use appropriate fixing brackets for your instal lation Important Clamps may be reversed to fit either 30mm or 40mm deep work top ...

Страница 25: ...petent Person Scheme who will comply with the re quired local regulations Connection should be made with a suitable cable Important Ensure that you route all mains electrical cables well away from any adjacent heat source such as an oven or grill Strip the wires connect to the terminal block as shown in the diagram table below Fit the cable clamp secure with the screw provided Close the terminal b...

Страница 26: ...Prevents build up of mineral deposits Best used with Ceramic Hob Scraper Kit 300ml bottle Ceramic Hob Scraper kit All Ceramic glass hobs including Induction Ideal for removing cooked on marks from ceramic glass hobs Best used with Ceramic Hob Cleaner Sealed Hotplate Conditioner All sealed solid plate hobs Restores the sleek matt black finish to solid hotplates Multipurpose Kitchen Cleaner General ...

Страница 27: ...0 90 MAX Total Power Rating 220 240V 50Hz kW 7 4kW Individual Cook Zone Power Ratings Cook Zone 80 90 Normal Power Rating kW 80 90 Power Boost Rating kW LH Front 1 6 3 0 LH Rear 1 6 3 0 RH Rear 1 4 3 0 RH Front 1 1 2 2 Middle 2 7 3 7 ...

Страница 28: ...ealand Ph 09 274 8265 Fx 09 274 8472 Web www glendimplex com au E mail sales glendimplex com au Before you contact us make sure that you have the following information to hand Model Number Serial Number Date of Purchase Postcode Calling for a service If you should experience any problems with your appliance please contact us on the numbers below Important note Service work is to be conducted by au...

Отзывы: