background image

 6

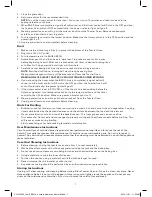
Warm 

1.   Make sure the crumb tray is firmly in place in the bottom of the Toaster Oven.
3.   Plug into a 120 V AC outlet.
4.   Turn temperature control to the warm setting.
5.   Rotate the timer past 10 minutes and then back to the desired time.


CAUTION:

 As soon as the timer control is engaged, the Toaster Oven will turn on. Both the top and bottom 

heating elements may cycle on and off to maintain temperature for the entire warming time.

7.   When WARM time is completed, a signal bell will sound, and the timer control will finish in the OFF 

position; the Toaster Oven will shut off automatically; the power indicator light will go off.


NOTE:

 If warming is interrupted before the timer control shuts the Toaster Oven off, you may shut the 

Toaster Oven off manually by turning the timer control to the OFF position. The power indicator light will 
go off. This function is designed to keep food warm after it has been cooked. This function should be used 
for short periods of time. If not using the oven timer, turn the oven to OFF when not in use.

8.   Open the glass door. Wearing protective oven mitts pull the oven rack out from the Toaster Oven. Be 

careful when removing food from the back of the oven rack. The inside of the Toaster Oven is very hot. 
Close glass door.

9.   Unplug unit and allow to cool before cleaning.


WARNING: DO NOT LEAVE TOASTER OVEN UNATTENDED DURING TOASTING.

10.  Unplug when not in use.

Hints For Warming

•   Remove all protective wrappings from food before placing in Toaster Oven. 

Follow toaster food directions.


NOTE:

 For food with runny-type frosting or open fillings. Use baking pan.

•   When warming, condensation may escape from the oven door. The moisture will slowly escape from the 

enclosed oven.

•   Place food in the middle of oven rack to get even warming on top and bottom.
•   For best results, clean crumb tray frequently.

Bake 

1.   Make sure the crumb tray is firmly in place in the bottom of the Toaster Oven.
2.   Plug into a 120 V AC outlet.
3.   Turn temperature control to the desired temperature setting.
4.   Rotate timer past 10 and then back to ‘dark toast’ to preheat oven for 5 minutes before beginning to bake. 

After oven is preheated, set timer to desired baking time or to STAY ON. The power indicator light will 
illuminate.


NOTE:

 The Toaster Oven will shut off automatically if timer is set.

5.   Carefully center baking dish directly on wire rack and close the glass door. You may place foods such as 

biscuits directly onto bake/broil pan.

6.   If you are using the timer, when the BAKE time is completed, a signal bell will sound, and the timer control 

will finish in the OFF position; the Toaster Oven will shut off automatically; the power light will go off.

11.  If the timer control is set to STAY ON, or if the food is finished cooking before the timer has signaled, turn 

temperature control to the lowest position and the timer control to the OFF position. Make sure power 
indicator light is off.

12. Wearing protective oven mitts pull the wire rack out from the Toaster Oven.
13.  Unplug and allow to cool completely before cleaning.

Hints For Baking

•   Do not totally enclose foods in aluminum foil. Foil can insulate foods and slow down heating.
•   To reheat rolls or biscuits, place on baking pan and heat at 300°F for 10 minutes.
•   Reheat leftover roasts or casseroles at 350°F for 20 to 30 minutes or until heated through.
•   Bake foods such as whole chicken on the low rack position. Place food in baking pan.

Pizza

Your Toaster Oven has been specially designed to accommodate a 9” (22.7 cm) fresh or frozen pizza. It is best to 
use the BAKE function.
1.   Make sure the crumb tray is firmly in place in the bottom of the Toaster Oven.
2.   Set the temperature control to the suggested temperature listed on pizza box. 

Allow the Toaster Oven to preheat for 5 minutes.

4.   Place pizza directly on wire rack provided.

SO-312093_14413_BELLA 4 slice toaster oven_Khols-IM.indd   6

2014-11-21   11:35 AM

Содержание 14413

Страница 1: ...al Manuel d instructions Manual de instrucciones Register your product and get support at Pour vous inscrire et obtenir l aide de votre produit Para registrar y obtener asistencia de su producto ir www bellahousewares com SO 312093_14413_BELLA 4 slice toaster oven_Khols IM indd 1 2014 11 21 11 35 AM ...

Страница 2: ...SO 312093_14413_BELLA 4 slice toaster oven_Khols IM indd 2 2014 11 21 11 35 AM ...

Страница 3: ... Réglage de la minuterie 11 Modification de la durée de cuisson 11 Réglage de la température 11 Fonctionnement en continu 11 Fonctions 12 Mode d emploi 12 13 14 Réparation 14 Entretien et nettoyage 15 Rangement 15 Garantie 16 Índice Medidas de seguridad importantes 17 18 Notas sobre el enchufe 18 Notas sobre el cable 18 Advertencia sobre plastificantes 18 Corriente eléctrica 18 Descripción del hor...

Страница 4: ...isposing of hot grease 15 Oversize foods or metal utensils must not be inserted in a toaster oven as they may create a fire or risk of electric shock 16 A fire may occur if the toaster oven is covered or touching flammable material including curtains draperies walls and the like when in operation 17 Do not store any item on top of the appliance when in operation 18 Do not clean with metal scouring...

Страница 5: ...wer supply cord or extension cord is used 1 The marked electrical rating of the cord set or extension cord should be at least as great as the electrical rating of the appliance and 2 The cord should be arranged so that it will not drape over the countertop or tabletop where it can be pulled on by children or tripped over unintentionally Plasticizer Warning CAUTION To prevent Plasticizers from migr...

Страница 6: ...set up to 30 minutes When the time knob is in the OFF position the oven will not operate To set the time turn the knob clockwise to the desired time The indicator light is lit only when time has been set When the timer has reached the OFF position a signal bell will sound and the timer control will finish in the OFF position the Toaster Oven will shut off automatically the power indicator light wi...

Страница 7: ...toast through the glass door until desired color is achieved 8 When the TOAST time is complete a signal bell will sound and the timer control will finish in the OFF position the Toaster Oven will shut off automatically the power indicator light will go off NOTE If toasting is completed before the timer control shuts the Toaster Oven off you may shut the Toaster Oven off manually by turning the tim...

Страница 8: ...e sure the crumb tray is firmly in place in the bottom of the Toaster Oven 2 Plug into a 120 V AC outlet 3 Turn temperature control to the desired temperature setting 4 Rotate timer past 10 and then back to dark toast to preheat oven for 5 minutes before beginning to bake After oven is preheated set timer to desired baking time or to STAY ON The power indicator light will illuminate NOTE The Toast...

Страница 9: ...ndicator light is off 8 Wearing protective oven mitts pull the wire rack out from the Toaster Oven 9 Unplug and allow to cool completely before cleaning Hints For Broiling Broiling is used for tender cuts of meats or marinated meats fish and some fruits and vegetables Cooking time is determined by the desired doneness and the distance between the food and the element Do not place aluminum foil on ...

Страница 10: ...sed by the breach of any express or implied warranty Apart from the extent prohibited by applicable law any implied warranty of merchantability or fitness for a particular purpose is limited in time to the duration of the warranty Some states provinces or jurisdictions do not allow the exclusion or limitation of incidental or consequential damages or limitations on how long an implied warranty las...

Страница 11: ...utres liquides chauds 12 Raccorder toujours la fiche à l appareil avant de brancher le cordon d alimentation dans la prise de courant murale Pour débrancher l appareil placer toutes les fonctions à la position ARRÊT puis retirer la fiche de la prise de courant 13 Ne pas utiliser l appareil à une fin autre que celle pour laquelle il a été conçu 14 Faire preuve d extrême prudence au moment de retire...

Страница 12: ...vrait être utilisé afin de réduire le risque d emmêlement ou de trébuchement que présente un cordon long Les cordons amovibles plus longs et les rallonges courantes offerts sur le marché peuvent être utilisés à condition d user de prudence Si l on utilise un cordon amovible long ou une rallonge courante tenir compte des éléments suivants 1 Les caractéristiques électriques du cordon ou de la rallon...

Страница 13: ...umée s en échappe pendant cette opération Cela ne devrait pas durer plus de 10 à 15 minutes Réglage de la minuterie 0 à 30 MINUTES La minuterie maximale est de 30 minutes Il ne fonctionne pas lorsque la minuterie est réglée sur la position Pour régler la minuterie tourner le bouton vers la droite jusqu à la durée désirée Le voyant ne s allume qu une fois la minuterie réglée Lorsque le bouton de mi...

Страница 14: ...c à d lorsque la minuterie atteint la position d arrêt un signal sonore retentit le grillage s arrête automatiquement et le voyant s éteint REMARQUE Si les rôties sont brunies à point avant que la minuterie arrête le grillage arrêter manuellement le four en tournant le bouton de minuterie à la position d arrêt Un signal sonore retentit et le voyant s éteint 9 Ouvrir la porte vitrée Mettre des gant...

Страница 15: ... qui s échappe lentement du four Placer les aliments au milieu de la grille pour les garder au chaud uniformément des deux côtés Pour des résultats optimaux nettoyer fréquemment le ramasse miettes Cuisson 1 Confirmer que le ramasse miettes est bien en place au bas du four 2 Brancher l appareil sur une prise c a de 120 V 3 Tourner le bouton de température à la température désirée 4 Tourner le bouto...

Страница 16: ...ent lorsque la minuterie s arrête 6 Lorsque la durée de cuisson est terminée c à d lorsque la minuterie atteint la position d arrêt un signal sonore retentit le four s arrête automatiquement et le voyant s éteint 7 Lorsque le four fonctionne en continu ou que les aliments sont cuits avant l arrêt de la minuterie tourner le bouton de température à la température la plus basse et le bouton de la min...

Страница 17: ...n chiffon mouillé imbibé de détergent ou de savon 6 Ne jamais immerger l appareil dans de l eau ou d autres liquides 7 Tout autre entretien doit être confié à un centre de service autorisé Rangement Débrancher l appareil le laisser refroidir et le nettoyer avant de le ranger Le ranger dans sa boîte dans un endroit propre et sec Ne jamais ranger l appareil lorsqu il chaud ou encore branché Toujours...

Страница 18: ... garantie explicite ou implicite Sauf dans la mesure où cela est interdit par la loi toute garantie implicite concernant la valeur commerciale ou l adéquation à la fin visée se limite à la durée de la garantie Certains États et certaines provinces ou compétences administratives ne permettent pas l exclusion ou la limitation des dommages indirects ou accessoires ou les limitations quant à la durée ...

Страница 19: ...s calientes 12 Siempre coloque el enchufe en el aparato en primer lugar luego enchufe el cable al tomacorriente de pared Para desconectarlo cambie los controles a la posición de apagado OFF luego quite el enchufe del tomacorriente de pared 13 No le dé al aparato otro uso que no sea el indicado 14 Tenga sumo cuidado cuando extraiga la bandeja o deseche la grasa caliente 15 No se deben introducir al...

Страница 20: ...l cable Se debe usar el cable de alimentación corto provisto o un cable de alimentación desmontable para reducir el riesgo de enredarse o tropezarse con un cable más largo Existen cables de alimentación desmontables más largos o prolongadores y pueden usarse si se hace con precaución Si se utiliza un cable de alimentación desmontable más largo o un prolongador 1 La clasificación eléctrica indicada...

Страница 21: ...mporizador puede cambiarse durante el ciclo de cocción Simplemente gire la perilla del temporizador hacia el tiempo deseado y continúe con la cocción NOTA al ajustar la perilla del temporizador para un ajuste menor que 5 minutos siempre gire el temporizador hacia más de 10 minutos y luego gire hacia atrás hasta el tiempo deseado Esto asegurará un ajuste seguro y preciso del temporizador Ajuste del...

Страница 22: ...l elemento de calentamiento superior como el inferior pueden encenderse y apagarse para mantener la temperatura durante todo el tiempo de cocción 6 Observe las tostadas a través de la puerta de vidrio hasta lograr el color deseado 7 Una vez completado el tiempo de TOSTADO sonará una señal y el control del temporizador finalizará en la posición OFF Apagado el horno tostador se apagará automáticamen...

Страница 23: ...rno tostador Siga las instrucciones de los alimentos para tostar NOTA para alimentos con glaseado líquido o rellenos abiertos Utilice una bandeja para hornear Al calentar puede escapar condensación por la puerta del horno La humedad saldrá lentamente del horno cerrado Coloque los alimentos en el medio de la rejilla del horno para obtener un calentamiento parejo en ambos lados Para obtener resultad...

Страница 24: ...en la posición OFF Apagado y que la luz de encendido esté apagada 9 Desenchufe y deje enfriar por completo antes de limpiar Asar a la parrilla 1 Asegúrese de que la bandeja para migas esté colocada de manera firme en la parte inferior del horno tostador 2 Enchúfelo en un tomacorriente de CA de 120 V 3 Gire el selector de temperatura hacia BROIL BAGEL Asar a la parrilla Cocinar roscas 4 Gire el tem...

Страница 25: ...ento aparte de la limpieza para el que sea necesario desarmar el aparato debe ser realizado por un técnico autorizado para reparar electrodomésticos Instrucciones de ciudado y limpieza 1 Antes de limpiar desenchufe el horno tostador y déjelo enfriar por completo 2 Lave todos los accesorios con agua y jabón neutro incluyendo la rejilla y la bandeja para hornear 3 No use limpiadores abrasivos cepill...

Страница 26: ...la violación de cualquier garantía expresa o implícita Salvo en la medida en que lo prohíban las leyes aplicables cualquier garantía implícita de comerciabilidad o aptitud para un propósito particular se limita temporalmente a la duración de la garantía Algunos estados provincias o jurisdicciones no permiten la exclusión ni la limitación de daños incidentales o resultantes o limitaciones sobre la ...

Страница 27: ...SO 312093_14413_BELLA 4 slice toaster oven_Khols IM indd 25 2014 11 21 11 35 AM ...

Страница 28: ...al cliente 1 866 832 4843 www sensioinc com BELLA is a registered trademark of Sensio Inc BELLA est un marque déposée de Sensio Inc BELLA es una marca registrada de Sensio Inc Montréal Canada H3B 3X9 BellaLife BellaLife bellahousewares com BellaLifestyle BellaLifestyle SO_312093 SO 312093_14413_BELLA 4 slice toaster oven_Khols IM indd 26 2014 11 21 11 35 AM ...

Отзывы: