background image

11

Installing and Setting up the Card

11

se

ct

io

n

1

2

3

4

5

6

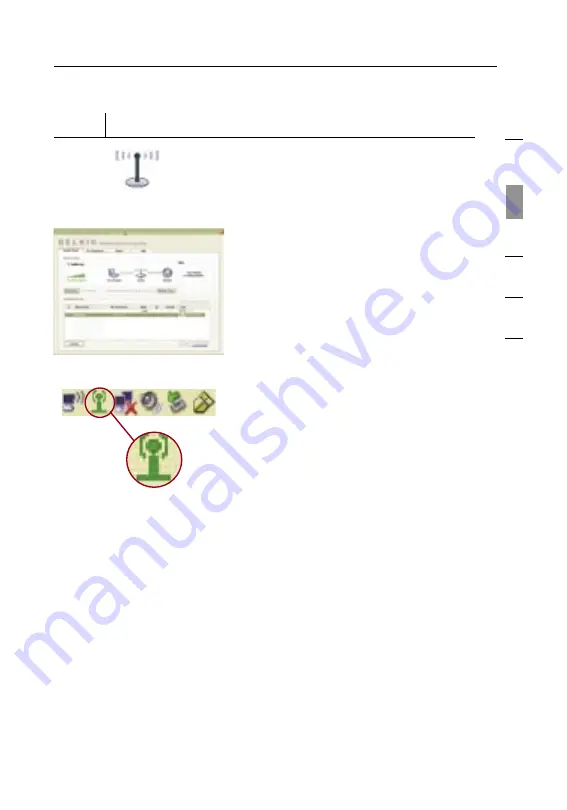
Step 3      Use the Belkin Wireless Networking Utility

3.1 

After restarting your computer, 
double-click the Belkin Wireless 
Networking Utility (WNU) icon 
located on the desktop screen.

3.2 

The WNU screen will appear. 
Select a network to connect to 
by selecting a network from the 
“Available Networks” list. Then, 
click “Connect”.

Note: 

In order to see your available 

networks, you must be near a 
working wireless router.

3.3 

The WNU icon can also be found 
on the system tray.

Note: 

Double-clicking on the WNU 

icon on the system tray will bring 
up the “Utility” screen.

Содержание Wireless Gplus Notebook Card

Страница 1: ...501 West Walnut Street Los Angeles CA 90220 5221 USA 310 898 1100 310 898 1111 fax Belkin Ltd Express Business Park Shipton Way Rushden NN10 6GL United Kingdom 44 0 1933 35 2000 44 0 1933 31 2000 fax...

Страница 2: ...User Manual F5D7001 Connect your desktop computer to a wireless network Wireless G Plus Desktop Card...

Страница 3: ...Installing and Setting up the Card 8 Step 1 Install the Software 8 Step 2 Insert the Card into an Available PCI Slot on your Desktop 9 Step 3 Use the Belkin Wireless Networking Utility 11 4 Using the...

Страница 4: ...me Share a single printer with the entire family Share documents music video and digital pictures Store retrieve and copy files from one computer to another Simultaneously play games online check Inte...

Страница 5: ...lties persist even at close range please contact Belkin Technical Support Note While some of the items listed below can affect network performance they will not prohibit your wireless network from fun...

Страница 6: ...ss network is impaired after attending to the above issues and you have a cordless phone Try moving cordless phones away from the wireless router and your wireless enabled computers Unplug and remove...

Страница 7: ...here security is important Secure connections include Virtual Private Network VPN connections often used to connect remotely to an office network The Bring Your Own Access program from America Online...

Страница 8: ...interface for operation in virtually any desktop computer WPA WPA2 64 bit WEP Wired Equivalent Privacy or 128 bit encryption Wireless access to networked resources Support for both Infrastructure and...

Страница 9: ...tions Temporary LANs for special projects or peak time Sets up temporary networks such as at trade shows exhibitions and construction sites which need networks on a short term basis also companies who...

Страница 10: ...when the Card is active c Card Connector Fits securely into your computer s PCI slot d Antenna System Requirements PC compatible desktop computer with one available PCI slot and CD ROM drive Windows 9...

Страница 11: ...automatically appear may take 15 20 seconds to appear Note If the WNU screen does not appear within 20 seconds access your CD ROM by double clicking on the My Computer icon then double click on the CD...

Страница 12: ...o discharge static electricity to avoid damage to the product or your computer 2 3 Locate an empty PCI expansion slot It is usually white in color Confirm that the Card will fit into the slot you have...

Страница 13: ...Card Turn the antenna until it is vertical and pointing up 2 8 Replace the computer s cover Now that the Card is installed you can reconnect the power cord and turn it back on 2 9 After restarting the...

Страница 14: ...icon located on the desktop screen 3 2 The WNU screen will appear Select a network to connect to by selecting a network from the Available Networks list Then click Connect Note In order to see your av...

Страница 15: ...cks away Accessing the WNU from the Windows System Tray To access the WNU simply place your mouse pointer and right click over the WNU icon on the Windows system tray on the lower right hand corner of...

Страница 16: ...Internet In the event of a problem use the Network Status window to determine the source e g computer router or Internet modem Available Networks This window displays the available networks at the cur...

Страница 17: ...ing click Stop and to reattempt connection click Retry Network Status and Solution Tips To further understand the current Network Status click Open Wireless Utility The default screen will be the Curr...

Страница 18: ...ions tab on the WNU allows you to add edit and delete connection profiles It also displays signal strength security and network type Securing your Wi Fi Network If you choose to connect to a secure ne...

Страница 19: ...or 128 bit the user will be asked to input a 10 or 26 character hex key A hex key is a combination of letters a f and numbers 0 9 Wi Fi Protected Access WPA is the new standard in the wireless securi...

Страница 20: ...ore secure than 64 bit WEP using a key length of 104 bits plus 24 additional bits of system generated data TKIP Temporal Key Integrity Protocol added so that keys are rotated and encryption is strengt...

Страница 21: ...o create a key A hex hexadecimal key is a combination of numbers and letters from A F and 0 9 For 64 bit WEP you need to enter 10 hex keys For 128 bit WEP you need to enter 26 hex keys For instance AF...

Страница 22: ...must now set all wireless network cards adapters to match these settings Configuring your Wireless G Plus Desktop Card to use Security At this point you should already have your wireless router set t...

Страница 23: ...key manually or you can type in a passphrase in the Passphrase field and click Generate to create a key A hex hexadecimal key is a combination of numbers and letters from A F and 0 9 For 64 bit WEP y...

Страница 24: ...r If you don t remember the hex key your client will be locked out of the wireless router 128 Bit WEP Encryption 1 Select WEP from the drop down menu 2 After selecting your WEP encryption mode you can...

Страница 25: ...n your wireless client Please record the key prior to applying changes in the wireless router If you don t remember the hex key your client will be locked out of the wireless router WPA PSK or WPA2 PS...

Страница 26: ...ts network cards to match these settings Wireless Networking Utility Options The Options tab on the Wireless Networking Utility WNU provides the user the ability to customize his or her WNU settings W...

Страница 27: ...ion is the central control panel for all the settings of the hardware and software components of the wireless network It provides an array of tests and connectivity services to ensure optimal network...

Страница 28: ...ess Router consult that router manufacturer s user guide 2 Open your Wireless Networking Utility WNU software by clicking on the icon in the system tray at the bottom right hand corner of the screen T...

Страница 29: ...vailable Networks If the correct network name is not listed under Available Networks in the WNU please attempt the following troubleshooting steps 1 Temporarily move computer if possible to five to 10...

Страница 30: ...placed in to start the installation Then double click on the folder named Files Next double click on the icon named Setup exe Power LED does not come ON Card is not working If the LED indicators are n...

Страница 31: ...works screen Click Add if you do not see the network you are trying to connect to and type in the SSID For more information about setting up an SSID please refer to your router manufacturer s user man...

Страница 32: ...reless router Please see the section titled Placement of your Wireless Networking Hardware for Optimal Performance in this manual If issues persist even at close range please contact Belkin Technical...

Страница 33: ...ow Step 3 From the Advanced tab uncheck Use Windows to configure my wireless network Once the box is unchecked click OK to close the window You are now using the WNU to configure the Card The Card is...

Страница 34: ...d to the computer later 7 Push the Card firmly into the PCI slot that you have chosen Apply pressure as needed until the connector is fully seated 8 Now secure the Card with the screw that you previou...

Страница 35: ...32 Information 32 Information Wi Fi Interoperability Certificate...

Страница 36: ...off and on the user is encouraged to try and correct the interference by one or more of the following measures Reorient or relocate the receiving antenna Increase the distance between the equipment a...

Страница 37: ...ent ETS 300 826 General EMC requirements for radio equipment To determine the type of transmitter check the identification label on your Belkin product Products with the CE marking comply with the EMC...

Страница 38: ...Contact Belkin Corporation at 501 W Walnut St Compton CA 90220 Attn Customer Service or call 800 223 5546 within 15 days of the Occurrence Be prepared to provide the following information a The part n...

Страница 39: ...ns on how long an implied warranty lasts so the above limitations may not apply to you IN NO EVENT SHALL BELKIN CORPORATION BE LIABLE FOR INCIDENTAL SPECIAL DIRECT INDIRECT CONSEQUENTIAL OR MULTIPLE D...

Отзывы: