13
12
Connecting and Configuring your Router
13
12
Connecting and Configuring your Router
Step 2 Connect the Router to your modem and computer
The Wizard will walk you through connecting your Router to your
computer and modem. Follow the steps on the screen using the
pictures as a guide.
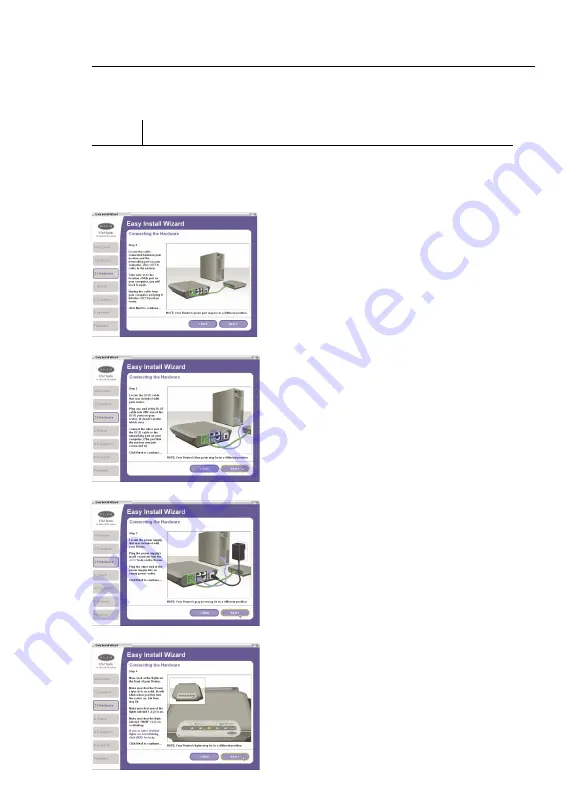
2.1
This step instructs you to locate
the cable connected between
your modem and the networking
port on your computer. Unplug
this cable from the computer and
plug it into the GREEN port on the
Router. Click “Next” to continue.
2.2
This step instructs you to locate
the BLUE cable that is included
with your Router. Plug one end
of this cable into ANY one of the
BLUE ports on your Router. Plug
the other end of the cable into the
networking port on your computer.
Click “Next” to continue.
2.3
This step instructs you to locate
the power supply that is included
with your Router. Plug the power
supply’s small connector into the
GRAY port on the Router. Plug the
power supply into an empty power
outlet. Click “Next” to continue.
2.4
This step instructs you to look
at the lights on the front of your
Router. Make sure the appropriate
lights are ON. Refer to the Easy
Install Wizard software on your
computer’s screen for more
details. Click “Next” to continue.


