16
Belkin Advanced Secure 2-port Flip KVM Switch User Manual
SECTIONS
Table of Contents
1
2
4
5
6
InsTallaTIon
3
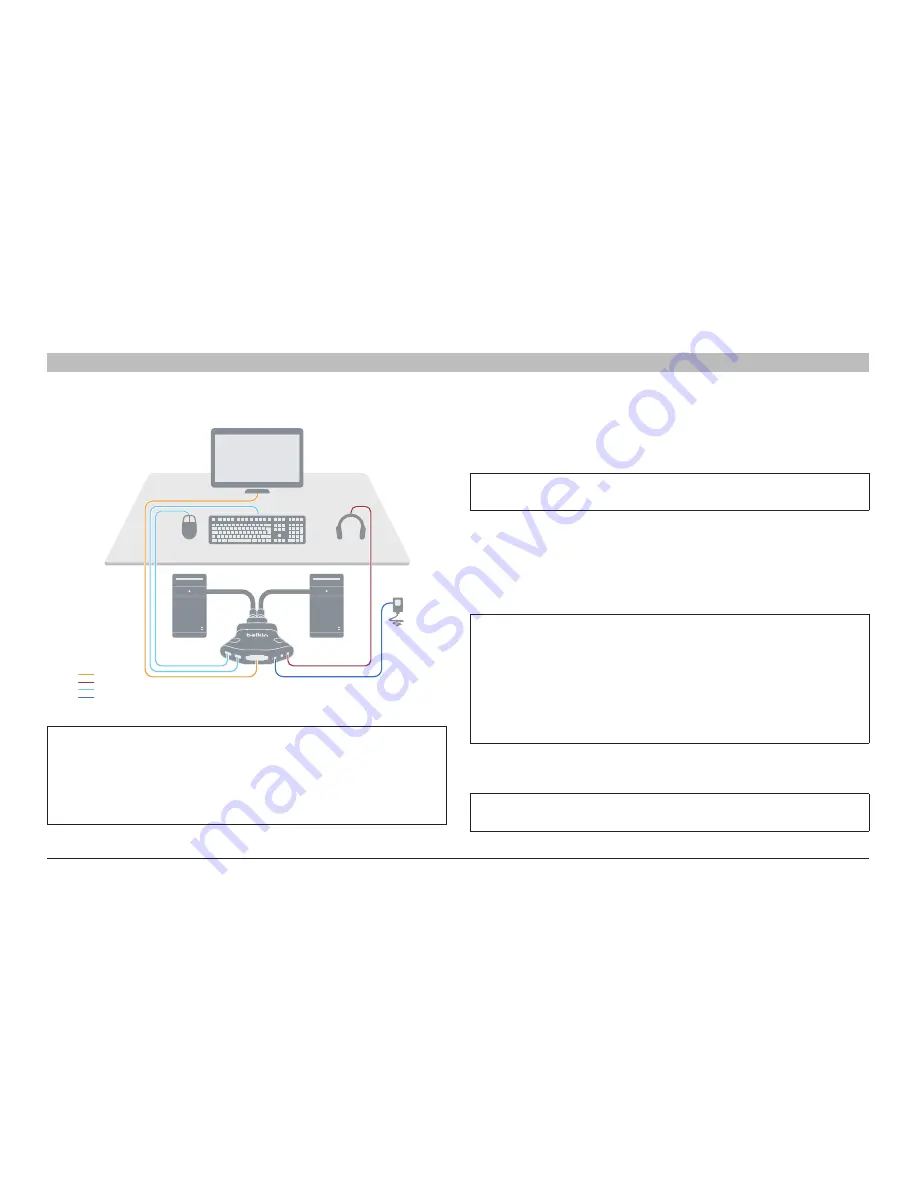
Belkin Advanced Secure 2-Port Flip KVM
PC 1
PC 2
User’s Desktop
User Display
Keyboard
Mouse
Audio
USB Keyboard/Mouse
12V, 1A Power
Connections
Video
Audio
1
2
Power
Supply
Port 1
Cable
Port 2
Cable
1. Computers are connected to the Switch ports 1 & 2
2. Monitor is connected to the DVI-D port on the console section of the Switch
3. USB Keyboard and Mouse are connected to the console section of the
switch
4. User headphones or amplified speakers are connected to audio-out port on
the console section of the Switch
setup
step 1 – Connecting Peripherals to the secure KVM switch
Warning:
Before attempting to connect anything to the Switch or
computers, please ensure all devices are powered off.
1.1 Connect monitor to the Console video port. For easier referencing,
you can label each computer and monitor coupled together (e.g.
PC1-Monitor1, etc.).
1.2 Connect USB keyboards to the USB port marked “Keyboard.”
1.3 Connect USB mouse to the USB port marked “Mouse”.
note:
1. The Switch will not operate properly if the keyboard and mouse
are not connected to their respective ports. The mouse USB
console port supports both keyboard and mouse.
2. For security reasons, only standard keyboard functions are
supported. Keyboards functions such as integrated USB hubs,
card-readers, storage devices or multimedia extensions are not
supported.
1.4 Connect user headphone or amplified speakers to the console
audio output port marked “Audio”.
Caution:
Do not connect a microphone to the audio output port. It is
not supported for security reasons.


