background image

 1 

 
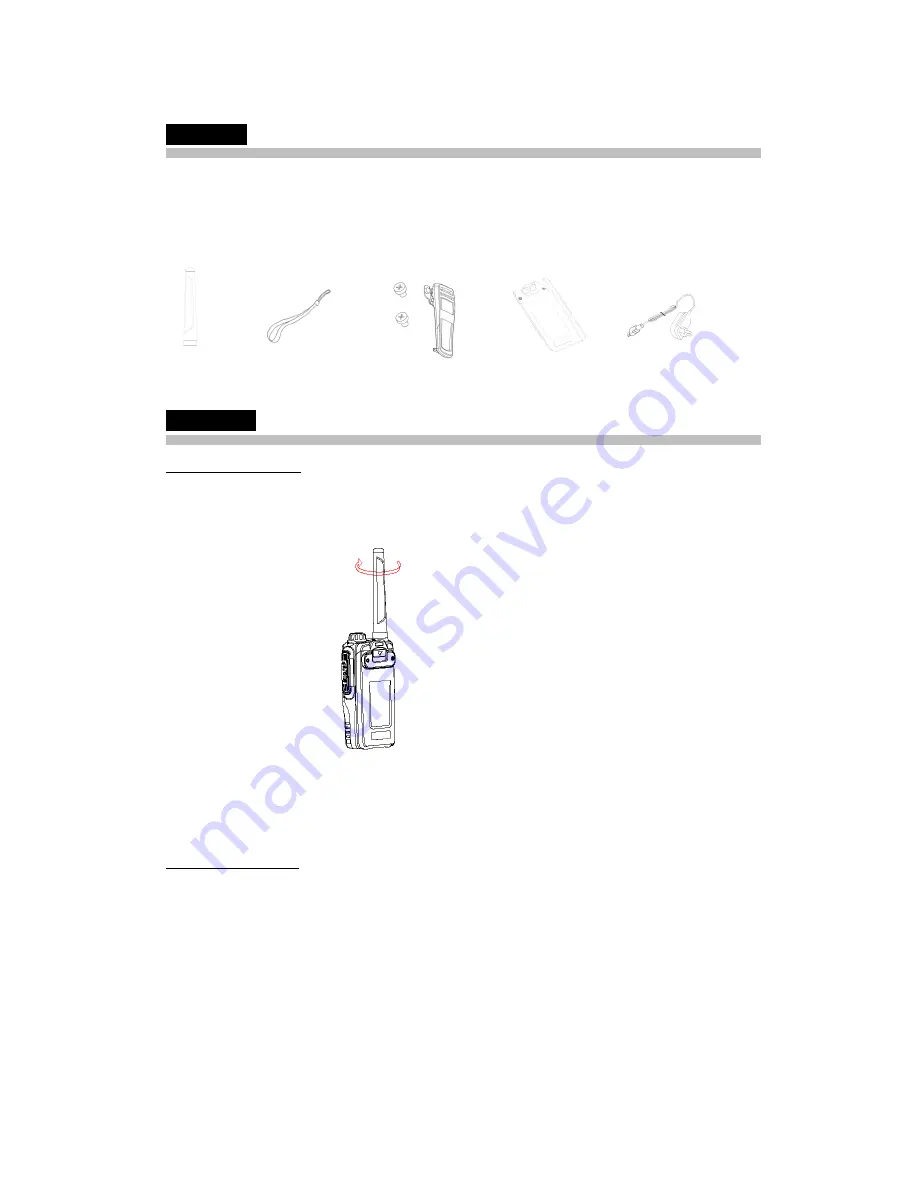
Accessories 


Please unpack carefully and check that all items listed below are received. If any item is missing 
or damaged, please contact your dealer. 


Antenna   


Strap 


Belt Clip   


Battery   

      Charger 


Getting Start 


Attaching the Antenna 
Turn the antenna clockwise to fasten it. 


To remove the antenna, rotate it counter-clockwise. 
 
Attaching the Belt Clip 
Use screws to tighten Belt Clip with the radio. 

Содержание ProChat BF-CM632

Страница 1: ...BelFone ProChat PoC User s Manual ...

Страница 2: ... panel of the radio to contact surface of a plastic object Do not let the radio placed in direct sunlight for a long time or place it near a heating source Do not place the radio in a extremely dusty moist or splash place or on a unstable surface If unusual odor or smoke is found power the radio off Then contact your local BelFone dealer In no circumstances can the product be modified without auth...

Страница 3: ...ne accessory 4 Control Buttons 4 LCD icons Guide 6 Basic Operations 7 Call 7 Individual Call 7 Group Call 8 All Call 8 Functions and Operations 9 Address Book 9 Call History 9 Utilities 10 1 Device Setting 10 Ringtone Indicator 10 Backlight 10 Language 10 GPS 10 2 Device Info 10 Device S N 10 Device Name 11 Device PTT ID 11 Hardware ver 11 Software ver 11 Dispatcher Notice 12 Specifications 13 Sta...

Страница 4: ...any item is missing or damaged please contact your dealer Antenna Strap Belt Clip Battery Charger Getting Start Attaching the Antenna Turn the antenna clockwise to fasten it To remove the antenna rotate it counter clockwise Attaching the Belt Clip Use screws to tighten Belt Clip with the radio ...

Страница 5: ...sten Strap on the radio Attaching the Battery 1 Insert the battery into bottom of the radio 2 Slightly press the top of the battery until a clip is heard To remove the battery the battery turn off the radio first Slide the battery latch downwards to unlock the battery ...

Страница 6: ...e golden contact area on the card is downward 4 Close the SIM card cover and slide it back Charging the battery Use only the charger and battery specified by BelFone 1 Connect the charger to radio s Mini USB interface 2 Plug the charger to AC source 3 The charging process initiates when charger LED glows yellow and is complete when LED glows green Other Charger to choose ...

Страница 7: ... accessory 1 Open the accessory jack cover 2 Plug earphone to the accessory jack Control Buttons Warning The screen should be face up while operating device 1 Power On Off Volume 2 Contacts Short Press Individual Contacts ...

Страница 8: ... connect to a WLAN network do as follows 1 Preset WI FI name and password by programming software 2 Check whether WLAN is on If yes wait for it to connect Wi Fi If no press Wi Fi switch button to turn it on When WLAN is turned on the radio automatically scans for available networks and displays them 4 Simplex Duplex Mode Short Press Simplex mode Individual Call Mode Long Press Duplex Mode 5 LED In...

Страница 9: ...g playing Call Logs Yellow LED always on Radio is in Individual Call standby state 6 Back 7 Menu OK 8 Up Down 9 Numbers buttons 10 Push to Talk 11 Programmable button 1 There are 4 functions can be set to the button a Voice prompts radio name b Voice prompts current Group name c Voice Recording Download d Voice prompts battery level 12 Programmable button 2 Functions are same to Programmable butto...

Страница 10: ... will automatically lock or lock by key when the keypad is not used In the main interface long press key for a few seconds to lock unlock the keypad Call To transmit please hold the radio approximately 3 to 4 centimeters away from your mouth Individual Call Transmitting a Individual Call There are two ways 1 Manual Dial In standby mode Press key input Individual Call number then press PTT to talk ...

Страница 11: ...roup Call 2 Contact List In standby mode Press Menu key enter Address Book Groups Select a Group from the Group list then press PTT to talk Receiving and Responding to a Group Call Receiving a Group Call don t need any operation and Press PTT key within the preset time period to respond it All Call Transmitting a All Call 1 If the default call is All Call Press PTT to make a All Call 2 In standby ...

Страница 12: ...ed exactly when they re needed Note The transmitting time limit is 30 seconds If it time out the call will automatically end Functions and Operations Address Book Click Menu Address Book The contact list is preset on the server It includes Group Call Individual Call All Call Select a contact then Press PTT to make a call Call History Click Menu Call History This is to check the call history It inc...

Страница 13: ... to turn on off All Tones If it turns on all operations on radio will have prompt voice and if it turns off all prompt voices are off except PTT Talk Permit If it turns on the receiving radio will have a prompt voice after the transmitting radio release PTT If it turns off no prompt voice ...

Страница 14: ...ht Click Menu OK key to turn on off Language Two optional Languages Chinese English GPS To turn on off the GPS Click Menu OK key to turn on off 2 Device Info Device S N Check the Device S N Server identifies different devices only by Device S N ...

Страница 15: ...e will display on LCD of the receiving device Device PTT ID Check the PTT ID Note Each device s PTT ID is unique If two devices have the same PTT ID then them don t work Hardware ver Check the hardware version Software ver Check the software version ...

Страница 16: ...12 Dispatcher Notice Click Menu Dispatcher Notice The device will receive text notice from Dispatcher and automatically play it by voice Text to speech ...

Страница 17: ...piled to be accurate and complete For any doubt please contact us We will give you professional answers As radio communication technologies develop rapidly BelFone reserves the right to change product design and specification without prior notice ...

Страница 18: ...d This device complies with part 15 of the FCC Rules the user s authority to operate the equipment Operation is subject to the following two conditions 1 This device may not cause harmful interference and 2 this device must accept any interference received including interference that may cause undesired operation ...

Страница 19: ...f the FCC Rules These limits are designed to provide reasonable protection against harmful interference in a residential installation This equipment generates uses and can radiate radio frequency energy and if not installed and used in accordance with the instructions may cause harmful interference to radio communications However there is no guarantee that interference will not occur in a particul...

Отзывы: