background image

BEL0050 Sewing Machine

4

Содержание BEL0050

Страница 1: ......

Страница 2: ...THE SCIENCE BEHIND CLEAN BEL0050 Sewing Machine 3 ...

Страница 3: ...BEL0050 Sewing Machine 4 ...

Страница 4: ...THE SCIENCE BEHIND CLEAN BEL0050 Sewing Machine 5 ...

Страница 5: ...BEL0050 Sewing Machine 6 1 21 19 14 12 11 10 9 8 4 2 23 22 18 17 15 13 7 6 5 3 21 ...

Страница 6: ...THE SCIENCE BEHIND CLEAN BEL0050 Sewing Machine 7 16 22 Foot Pedal Auto High Auto Low ...

Страница 7: ...BEL0050 Sewing Machine 8 ...

Страница 8: ...THE SCIENCE BEHIND CLEAN BEL0050 Sewing Machine 9 ...

Страница 9: ...BEL0050 Sewing Machine 10 ...

Страница 10: ...THE SCIENCE BEHIND CLEAN BEL0050 Sewing Machine 11 ...

Страница 11: ...BEL0050 Sewing Machine 12 ...

Страница 12: ...THE SCIENCE BEHIND CLEAN BEL0050 Sewing Machine 13 ...

Страница 13: ...BEL0050 Sewing Machine 14 3 ...

Страница 14: ...THE SCIENCE BEHIND CLEAN BEL0050 Sewing Machine 15 Foot Pedal Auto High Auto Low ...

Страница 15: ...BEL0050 Sewing Machine 16 ...

Страница 16: ...THE SCIENCE BEHIND CLEAN BEL0050 Sewing Machine 17 ...

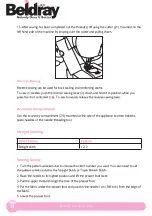
Страница 17: ...ory compartment 24 mounted at the side of the appliance to store bobbins spare needles or the needle threading tool Straight Stitching Stitch Name Pattern Straight stitch 1 2 3 Starting Sewing 1 Turn the pattern selection dial to choose the stitch number you want You also need to set the pattern selection dial to the Straight Stitch or Triple Stretch Stitch 2 Raise the needle to its highest positi...

Страница 18: ...THE SCIENCE BEHIND CLEAN BEL0050 Sewing Machine 19 ...

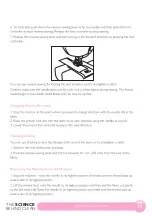
Страница 19: ...itch 4 5 6 Turn the pattern selection dial to the zigzag stitch and then start sewing It is recommended that you sew using the straight stitch at the beginning and end of zigzag stitches to act as a reinforcement stitch Built In Stitches Stitch Name Pattern Blind hem stitch 9 Stretch blind hem stitch 10 You can use the Blind Hem Stitch to finish the edge of a project like the hem of a pair of trou...

Страница 20: ...ovides reliable results 1 Using tailor s chalk mark the position and length of the buttonhole on the fabric 2 You need to sew the left bar tack first Lower the presser foot to align the marks on the foot with the mark on the fabric 3 The bar tacks of the buttonhole are sewn in the order shown 4 Sew the required length using setting 11 or 12 then turn the material 90 degrees 5 Switch to setting 1 a...

Страница 21: ...switch is turned off The bobbin winder shaft is pushed to the right You have not used the foot controller properly Plug the machine in Turn on the main power switch Move the bobbin winder shaft to the left Use the foot controller properly The needle breaks The needle is not fitted properly The needle clamp screw is loose The needle is bent or blunt You have not used the right combination of fabric...

Страница 22: ...gled in the bobbin case clean the bobbin case Replace the needle Insert the needle properly The lower thread is tangled or breaks You have not wound the bobbin thread properly The bobbin is scratched or does not turn smoothly The thread is tangled Bobbin is set incorrectly Wind the bobbin properly Replace the bobbin Remove the tangled thread and clean the bobbin case Reset the bobbin thread correc...

Страница 23: ... inserted the needle properly Correct the upper threading Replace the needle Insert the needle properly The stitch is not sewn correctly The thread tension is incorrect The thread is tangled Adjust the tension of the upper thread Remove the tangled thread If the thread is tangled in the bobbin case clean the bobbin case The fabric does not feed The thread is tangled Remove the tangled thread If th...

Страница 24: ......

Страница 25: ......

Отзывы: