background image


E

N

G

L

IS

H


Time: setting this method of the end 
drying, the cycle will end when the time set 
will be elapsed. Also you can end the cycle 
manually at any time by tapping the "Stop
key. 
Enter the value of time and press the "OK
button to confirm 


Autostop %: setting this method of the 
end drying, the cycle will end when the 
variation of humidity loss will be less than 
0.1% for a time interval of 30 seconds. 
Also you can end the cycle manually at any 
time by tapping the "Stop" key. 
 
 
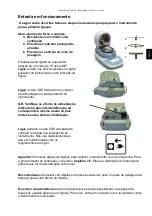
Start: tapping “Start”, you will enable the 
procedure for the humidity content 
analysis. 
 
Load the test pan on the weighing plate 
and close the oven. You will automatically 
tare the test plate. 


Load the substance to analyze and close 
the oven. 
 
N.B. The minimum amount of substance 
required for the drying cycle based on 
the balance resolution: 
0.01g      Min  500mg 
0.001g    Min  500mg 
0.0001g  Min  50mg 


Содержание i-Thermo M5 Series

Страница 1: ... Déclaration de conformité Nous déclarons avec cela responsabilité que le produit auquel se rapporte la présente déclaration est conforme aux normes citées ci après I Dichiarazione di conformità Dichiariamo con ciò che il prodotto al quale la presente dichiarazione si riferisce è conforme alle norme di seguito citate E Declarção de conformidade Manifestamos en la presente que el product al que se ...

Страница 2: ...sure anymore the safety of the product 1 INSTALLATION INSTRUCTIONS Remove the balance the calibration weight if included and the accessories from the package and check if any visible damage of the instrument Do not install the balance in places with air flows heavy thermal changes and vibrations Place the support pan and weighing pan on the balance Level the balances using the levelling feet and l...

Страница 3: ...xisting in your country This instrument must be used only by qualified personell who knows the features and characheristics of the sample under test Before starting to work with the instrument for the first time please check that voltage is the same of your electric mains To get the instrument free from tension remove the power supply cable Place straight the power supply cable so that to avoid co...

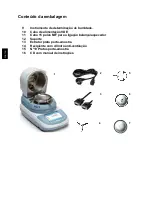
Страница 4: ...r humidity determination 2 VDE power cable 3 15 pin M F cable for connecting the balance heater 4 Tablemat 5 Sample holder plate pan 6 Pan with antiventilation cylinder 7 10 sample holder plates 8 CD with instruction manual 1 2 3 4 5 6 7 ...

Страница 5: ...e N B Verify that the power supply indicated on the device nameplate matches the one in use in the country where you are installing the unit So connect the VDE cable to the outlet in the vicinity of the device Do not use cables extensions non compliant with current regulations Wait 30 minutes after the start up and calibrate the device prior its leveling For the calibration procedure refer to Chap...

Страница 6: ...data related to humidity during and at the end of the drying cycle g Display of the measurement unit tapping the symbol you can access the menu of the measurement units and select the ones desired Stability value display T Tare value display 0 100 Analog bar showing the magnitude being measured 2 Area showing the heating operation status 60 C Value display of the heater temperature Stb 60 C Value ...

Страница 7: ... you access the weighting menu settings the viewing preferences the devices and user customization setup By tapping this area you access the switching off menu or enable the standby status of the device By tapping this area you access the user menu to make your selection quickly than desired 4 Bar to display the function keys By tapping the keys displayed in this area the relative function will be...

Страница 8: ...y is turned off so that only the bottom right command to turn on the system will be enabled Tapping the symbol you will return to the basic weighing screen Logout Selecting the logout mode you will disable the current user Tapping Start it will activate the user and in the case of password protected user it will be asked you to enter it Tapping you can select another user by which you want to swit...

Страница 9: ... in the menu Functions The display screen allows you to start a drying cycle by tapping the Start button with the temperature parameters and modalities of the drying end displayed to the right of the function Temperature Enter the desired temperature and tap the OK key The temperature values that can be set range from a minimum of 35 C to a maximum of 160 C with step of 1 C Drying end The end dryi...

Страница 10: ...humidity loss will be less than 0 1 for a time interval of 30 seconds Also you can end the cycle manually at any time by tapping the Stop key Start tapping Start you will enable the procedure for the humidity content analysis Load the test pan on the weighing plate and close the oven You will automatically tare the test plate Load the substance to analyze and close the oven N B The minimum amount ...

Страница 11: ...ycle will automatically start and the analysis screen will appear During drying they are displayed all the parameters related to the test and through a real time graph you can see the trend of drying For all the details related to the phase of drying and the final result management refer to Chapter 11 ...

Страница 12: ... non garantisce più la sicurezza del prodotto ISTRUZIONI PER L INSTALLAZIONE Togliere la bilancia ed il relativo peso di calibrazione ove previsto dall imballo e verificare eventuali danni visibili dello strumento Non installare la bilancia in ambienti in cui vi siano correnti d aria forti sbalzi termici e vibrazioni Porre sulla bilancia il sottopiatto ed il piatto Mettere in bolla la bilancia reg...

Страница 13: ...onale qualificato che conosca le proprietà caratteristiche del campione utilizzato Prima di mettere in funzione per la prima volta l apparecchio controllare se il voltaggio di alimentazione corrisponde alla tensione di rete Per disconnettere l apparecchio dalla tensione di rete staccare il cavo di alimentazione Stendere il cavo di alimentazione in modo tale da evitare il contatto con superfici mol...

Страница 14: ...ne dell umidità 2 Cavo alimentazione VDE 3 Cavo 15 poli M F per collegamento bilancia riscaldatore 4 Sottopiatto 5 Estrattore piattello porta campione 6 Vaschetta con cilindro anti ventilazione 7 N 10 Piattelli porta campione 8 CD con manuale d istruzioni 1 2 3 4 5 6 7 ...

Страница 15: ...tichetta di targa dello strumento corrisponda a quella in uso nel paese in cui si sta effettuando l installazione Collegare quindi il cavo VDE alla presa di corrente posta nelle vicinanze dello strumento Non utilizzare cavi prolunghe non conformi alle normative vigenti Attendere 30 minuti dall accensione e calibrare lo strumento previa messa in bolla dello stesso Per le procedure di calibrazione f...

Страница 16: ...relativi all umidità durante e a fine ciclo d essicazione g Indicazione unità di misura toccando il simbolo sarà possibile accedere al menu delle unità di misura e selezionare quella desiderata Indicatore di stabilità T Indicatore valore di tara 0 100 Barra indicatrice analogica della grandezza sotto misura 2 Area d indicazione stato funzionamento riscaldatore 60 C Indicatore valore temperatura de...

Страница 17: ...e al menù delle impostazioni di pesata preferenze di visualizzazione setup periferiche e personalizzazione utenti Toccando quest area si accede al menù di spegnimento o attivazione stato di standby dello strumento Toccando quest area si accede al menu degli utenti per effettuare la selezione in modo rapido di quello desiderato 4 Barra visualizzazione tasti funzione Toccando i tasti visualizzati in...

Страница 18: ... rimarrà solo in basso a destra attivo il comando per riaccendere il sistema Toccando il simbolo si tornerà nella schermata base di pesatura Logout Selezionando la modalità logout verrà disattivato l utente in uso Toccando il tasto Start verrà riattivato l utente e nel caso di utente protetto da password ne verrà richiesta l inserimento Toccando il tasto si potrà selezionare un altro utente con il...

Страница 19: ...na Semplice La schermata visualizzata consente di avviare un ciclo d essicazione toccando il tasto Avvia con i parametri di temperatura e modalità di fine essicazione visualizzati alla destra della funzione Temperatura Inserire il valore di temperatura desiderato e toccare il tasto OK I valori di temperatura impostabili vanno da un minimo di 35 C a un massimo di 160 C con step di 1 C Fine essicazi...

Страница 20: ...rà inferiore al 0 1 per un intervallo di tempo di 30secondi Sarà inoltre possibile far terminare il ciclo manualmente in qualunque momento toccando il tasto Stop Avvia toccando il comando Avvia sarà attivata la procedura per l analisi del contenuto di umidità Caricare il piattello prova sulla stella di pesata e chiudere il fornetto Verrà eseguita automaticamente la tara del piattello prova Caricar...

Страница 21: ...omaticamente la schermata d analisi verrà visualizzata Durante l essicazione sono visualizzati tutti i parametri relativi alla prova e attraverso un grafico in tempo reale si potrà vedere l andamento dell essicazione Per tutti i dettagli relativi alla fase d essicazione e alla gestione del risultato finale fare riferimento al capitolo 11 ...

Страница 22: ...nte a segurança do produto 1 INSTRUÇÕES DE INSTALAÇÃO Retire a balança e seu peso de calibração se houver da embalagem e verifique se há qualquer dano visível no instrumento Não instale a balança em ambientes onde há correntes de ar choque térmico alta e vibração Coloque em nível a bolha na base ajustando o equilíbrio da balança Warm up da Balança aguarde 8 horas após a ligação para balanças anali...

Страница 23: ...ssoal qualificado que estejam familiarizados com as propriedades características da amostra utilizada Antes da colocação em funcionamento pela primeira vez verificar se a tensão de alimentação corresponde à tensão de rede Para desligar o aparelho da rede desconecte seu cabo de alimentação O cabo de alimentação deve ser instalado de forma a evitar o contacto com as superfícies quentes do aparelho U...

Страница 24: ...ção de humidade 10 Cabo de alimentação VDE 11 Cabo 15 polos M F para a ligação balança aquecedor 12 Suporte 13 Extrator prato porta amostra 14 Recipiente com cilindro anti ventilação 15 N 10 Pratos porta amostra 16 CD com manual de instruções 1 2 3 4 5 6 7 ...

Страница 25: ...e de alimentação indicada na placa de identificação do corresponde à mesma usada no país onde se está a efetuar a instalação Ligue portanto o cabo VDE à tomada de corrente colocada nas imediações do instrumento Não use cabos extensões não em conformidade com os regulamentos em vigor Aguarde 30 minutos depois da ligação para calibrar o instrumento com nivel de bolha Para o procedimento de calibraçã...

Страница 26: ...ados relacionados com a humidade durante e no final do ciclo de secagem g Indicação da unidade de medida tocando no símbolo pode aceder ao menu das unidades de medida e selecionar o que desejar Indicador de estabilidade T Indicador do valor de tara 0 100 Barra analógica que indica a grandeza sob medida 2 Área indicando o estado de funcionamento do aquecedor 60 C Indicador do valor de temperatura d...

Страница 27: ...cede se ao menu das configurações do modo de secagem preferâncias de exibição setup periféricas e personalização utilizadores Ao tocar nesta área acede se ao menu de desligação ou ativação do estado de standby do instrumento Ao tocar nesta área acede se ao menu dos utilizadores para efetuar a selezção de modo rápido do desejado 4 Barra de visualização das teclas de função Ao tocar nas teclas exibi...

Страница 28: ...desligado e apenas permence ativo o comando inferior no canto direito para ligar novamente o sistema Tocando o símbolo retorna se à página base de pesagem Logout Selecionando o modo de logout será disativado o utilizador em uso Tocando na tecla Start será reativado o utilizador e no caso de utilizador protegido por senha será pedida a inserção da mesma Tocando na tecla pode se selecionar um outro ...

Страница 29: ...Filename QUICK_GUIDE_BILANCE_M5_EN IT POR_rev11 April16 PORTOG remover a ficha de alimentação e inseri la novamente ...

Страница 30: ...a exibida permite iniciar um ciclo de secagem tocando na tecla Iniciar com os parâmetros de temperatura e as modos de fim da secagem exibidos à direita da função Temperatura Insira o valor de temperatura desejado e toque na tecla OK Os valores de temperatura configuráveis vão de um mínimo de 35 C a um máximo de 160 C com etapas de 1 C Fim secagem O parâmetro de fim de secagem é a configuração que ...

Страница 31: ...variação da perda de humidade será inferior a 0 1 por um intervalo de tempo de 30 segundos Também será possível terminar o ciclo manualmente a qualquer momento tocando na tecla Stop Iniciar tocando no comando Iniciar será ativado o procedimento para a análise do conteúdo de humidade Carregar o prato e fechar na estrela de pesagem e fechar o forno Será efetuada automaticamente a tara do prato de pr...

Страница 32: ...tampa do aquecedor o ciclo inicia automaticamente a página de análise será exibida Durante a secagem são exibidos todos os parâmetros relacionados com o teste e através de um gráfico em tempo real pode ver a tendência de secagem ...

Отзывы: