background image

6 / 57  EN

Vacuum cleaner / User manual

2.1 Overview

The values which are declared in the markings affixed on your appliance or the other printed documents supplied with it represent the values which 

were obtained in the laboratories pursuant to the pertinent standards. These values may vary according to the usage of the appliance and ambient 

conditions.

2

  Your vacuum cleaner

1.  Hose

2.  Power cable re-winding button

3.  Suction power adjustment and dust container 

removal button

4.  Carrying handle

5.  Park channel

6.  On/Off button

7.  Wheel

8.  Dust container

9.  The hose cap

10. Dust container carrying handle

11.  Upper cover

12. Parquet/carpet brush

13. Parquet/carpet brush adjustment latch

14. Telescopic tube

15. Telescopic tube adjustment latch

16. Accessory carrier

17. Suction control

18. Handle

2.2 Technical data

This appliance complies with the 

European Directives numbered 

2004/108/EC, 2006/95/EC, 

2009/125/EC and 2011/65/EU. 

Nom. power


:


1200 W

Supply voltage


:


230 V~, 50 Hz

Dust container volume


:


1.8 L

Rights to make technical and design changes are 

reserved.

1

2 3

4

5

6

7

8

9

10

11

12

13

14

15

16

18

17

Содержание BKS 5422 D

Страница 1: ...Vacuum Cleaner User Manual EN DE TR RO RU BG BKS 5422 D ...

Страница 2: ...eferenceforfutureuse If you handover the product to someone else give the user manual as well Follow all warnings and information in the user manual Meanings of the symbols Following symbols are used in the various section of this manual C Important information and useful hints about usage A Warnings for dangerous situations concerning the safety of life and property This product has been produced...

Страница 3: ...ed use 7 3 2 Attaching removing the hose 7 3 3 Attaching removing the telescopic tube 7 3 4 Attaching removing the parquet carpet brush 7 3 5 Adjusting the parquet carpet brush 7 3 6 Operation 7 3 6 1 Adjusting the suction power 8 3 7 Accessories 8 3 8 Switching off the vacuum cleaner and parking feature 8 4Cleaning and maintenance 9 4 1 Discharging the dust container 9 4 2 Cleaning the filters 9 ...

Страница 4: ...e itself is damaged Contact an authorized service Your mains power supply should comply with the information supplied on the rating plate of the appliance Themainssupplyoftheappliance must be secured with a minimum 16 A fuse Do not use the appliance with an extension cord Prevent damage to the power cable by not squeezing bending or rubbing it on sharp edges Do not touch the plug of the appliancew...

Страница 5: ...th the WEEE Directive This appliance has been manufactured with high quality parts and materials which can be reused and are suitable for recycling Therefore do not dispose the appliance with normal domestic waste at the end of its service life Take it to a collection point for the recycling of electrical and electronic equipment Ask the local authority in yourareaforthesecollectionpoints Contribu...

Страница 6: ...nd dust container removal button 4 Carrying handle 5 Park channel 6 On Off button 7 Wheel 8 Dust container 9 The hose cap 10 Dust container carrying handle 11 Upper cover 12 Parquet carpet brush 13 Parquet carpet brush adjustment latch 14 Telescopic tube 15 Telescopic tube adjustment latch 16 Accessory carrier 17 Suction control 18 Handle 2 2 Technical data This appliance complies with the Europea...

Страница 7: ...be 14 to adjust its length 3 4 Attaching removing the parquet carpet brush 1 Attach the parquet carpet brush 12 to the telescopic tube 14 in the direction of the arrow 2 You can remove the telescopic tube 14 from the parquet carpet brush 12 by pulling it 3 5 Adjusting the parquet carpet brush By pressing the adjustment latch 13 located on the parquet carpet brush 12 To vacuum on firm ground and pa...

Страница 8: ...niture Upholstery Brush Suitable for the cleaning of the floorings stair steps inside of the cars sofas armchairs etc Dust brush Suitable for the cleaning of curtains and sensitive and fragile objects A WARNING Donotmakecleaning by using the handle s 18 end part 3 8 Switching off the vacuum cleaner and parking feature 1 Switchofftheappliancewiththeon offbutton 6 and unplug it 2 Wind the electric c...

Страница 9: ...t container 8 and remove the dust container in the direction of the arrow by holdingfromtheDustcontainercarryinghandle 10 2 Remove the upper cover 11 from the dust container 8 by pushing it in the direction of the arrow 3 Grip the dust container from its carrying handle 10 and turn it upside down to discharge 4 Close the appliance s upper cover 11 5 Insert the dust container 8 into its place by ho...

Страница 10: ... the handle located on it 3 Reinstall it after shaking it off 4 2 2 Hepa filter 1 Remove the dust container 8 see 4 1 2 Remove the hepa filter by holding it from the handle located on it 3 Wash it under running water after shaking it off 4 Leave the hepa filter to dry after washing it 4 2 3 Foam filter 1 After removing the hepa filter you can see the foam filter located behind it 2 Remove and wash...

Страница 11: ...n Nachschlagen sicher auf Wenn Sie das Produkt an einen Dritten weitergeben händigen Sie bitte auch diese Anleitung aus Befolgen Sie alle Warnhinweise und Informationen in dieser Anleitung Symbole Folgende Symbole werden in verschiedenen Abschnitten dieser Anleitung verwendet C WichtigeInformationenundnützliche Tipps in Bezug auf die Verwendung A Warnhinweise zu gefährlichen Situationen im Hinblic...

Страница 12: ...15 3 Bedienung 16 17 3 1 Bestimmungsgemäße Verwendung 16 3 2 Schlauch anbringen und abnehmen 16 3 3 Teleskoprohr anbringen und abnehmen 16 3 4 Parkett Teppichbürste anbringen und abnehmen 16 3 5 Parkett Teppichbürste einstellen 16 3 6 Betrieb 16 3 6 1 Saugleistung anpassen 17 3 7 Zubehör 17 3 8 Staubsauger abschalten und parken 17 4Reinigung und Wartung 18 19 4 1 Auffangbehälter leeren 18 4 2 Filt...

Страница 13: ...rtung dürfen nicht durch Kinder durchgeführtwerden esseidenn sie sind beaufsichtigt Verwenden Sie das Produkt nicht falls Netzkabel oder Gerät selbst beschädigt sind Wenden Sie sich an einen autorisierten Servicemitarbeiter Ihre Stromversorgung muss mit den Angaben am Typenschild des Gerätes übereinstimmen Die Stromversorgung des Gerätes muss mit einer Sicherung von mindestens 16 A abgesichert wer...

Страница 14: ...eplanung ausgestellten Regulierung zur Überwachung von elektrischen und elektronischen Altgeräten angegebenen gefährlichen und verbotenen Materialien Dieses Gerät stimmt mit der WEEE Richtlinie überein Dieses Produkt wurde aus hochwertigen Teilen und Materialien hergestellt die wiederverwendet werden können und zum Recycling geeignet sind Deshalb darf das Gerät am Ende seiner Einsatzzeit nicht mit...

Страница 15: ...6 Ein Austaste 7 Rad 8 Auffangbehälter 9 Schlauchanschlussstück 10 Auffangbehälter Tragegriff 11 Obere Abdeckung 12 Parkett Teppichbürste 13 Einstellriegel der Parkett Teppich Bürste 14 Teleskoprohr 15 Teleskoprohrverstellung 16 Zubehörhalter 17 Saugregler 18 Griff 2 2 Technische Daten Dieses Gerät erfüllt die Vorgaben der europäischen Richtlinien 2004 108 EC 2006 95 EC 2009 125 EC und 2011 65 EU ...

Страница 16: ...cken und das Teleskoprohr 14 anschließend auf die gewünschte Länge ausziehen 3 4 Parkett Teppichbürste anbringen und abnehmen 1 Parkett Teppich Bürste 12 in Pfeilrichtung am Teleskoprohr 14 anbringen 2 Sie können das Teleskoprohr 14 durch Ziehen vonderParkett Teppich Bürste 12 entfernen 3 5 Parkett Teppichbürste einstellen DrückenSiedenEinstellriegel 13 aufderParkett Teppich Bürste 12 Fahren Sie d...

Страница 17: ...unter Möbeln Polsterdüse Geeignet zum Saugen von Böden Treppenstufen Fahrzeuginnenräumen Sofas Armlehnen etc Staubbürste Eignet sich für die Reinigung von Vorhängen empfindlichen und zerbrechlichen Gegenständen A WARNUNG Nicht mit Hilfe des Abschlussteils des Griffs 18 saugen 3 8 Staubsauger abschalten und parken 1 Gerät über die Ein Austaste 6 ausschalten und Netzstecker ziehen 2 Wickeln Sie das ...

Страница 18: ...s Auffangbehälters 8 drücken Auffangbehälter durch Halten am Auffangbehälter Tragegriff 10 in Pfeilrichtung herausnehmen 2 Entfernen Sie die obere Abdeckung 11 vom Auffangbehälter 8 indem Sie sie in Pfeilrichtung drücken 3 Nehmen Sie den Auffangbehälter vom Tragegriff 10 und drehen Sie ihn zum Entleeren um 4 Schließen Sie die obere Abdeckung 11 des Gerätes 5 Auffangbehälter 8 einsetzen dabei am Gr...

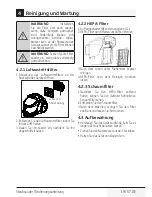
Страница 19: ...ie ihn am Griff halten 3 Bauen Sie ihn wieder ein nachdem Sie ihn abgeschüttelt haben 4 2 2 HEPA Filter 1 Auffangbehälter 8 entfernen siehe 4 1 2 HEPA Filter durch Halten am Griff entfernen 3 Nach dem Lösen unter fließendem Wasser reinigen 4 HEPA Filter nach dem Reinigen trocknen lassen 4 2 3 Schaumfilter 1 Nachdem Sie den HEPA Filter entfernt haben können Sie den dahinter befindlichen Schaumfilte...

Страница 20: ...rünü başka birisine verirseniz kullanma kılavuzunu da birlikte verin Kullanma kılavuzunda belirtilen tüm bilgi ve uyarıları dikkate alarak talimatlara uyun Sembollerin anlamları Bu kullanma kılavuzunun çeşitli kısımlarında aşağıdaki semboller kullanılmıştır C Cihazın kullanımıyla ilgili önemli bilgiler ve faydalı tavsiyeler A Can ve mal güvenliğiyle ilgili tehlikeli durumlar konusunda uyarılar Bu ...

Страница 21: ... Kullanım 25 26 3 1 Kullanım amacı 25 3 2 Hortumu takma çıkarma 25 3 3 Teleskobik boruyu takma çıkarma 25 3 4 Parke halı fırçasını takma çıkarma 25 3 5 Parke halı fırçasını ayarlama 25 3 6 Çalıştırma 25 3 6 1 Emiş gücünün ayarlanması 26 3 7 Aksesuarlar 26 3 8 Süpürgenin kapatılması ve park özelliği 26 4Temizlik ve bakım 27 28 4 1 Toz haznesinin boşaltılması 27 4 2 Filtrelerin temizlenmesi 27 4 2 1...

Страница 22: ... Yetkili servise başvurun Şebeke güç kaynağınız cihazın tip etiketinde belirtilen bilgilere uygun olmalıdır Cihazı kullanacağınız şebeke en az 16 A lık bir sigorta ile emniyete alınmış olmalıdır Cihazı uzatma kablosuyla kullanmayın Elektrik kablosunun hasar görmesiniönlemekiçinsıkışmasını kıvrılmasını veya keskin kenarlara sür tünmesini engelleyin Elleriniz nemli veya ıslakken cihazın fişine dokun...

Страница 23: ... maddeleri içermez AEEE Yönetmeliğine uygundur Bu ürün geri dönüşümlü ve tekrar kullanılabilir nitelikteki yüksek kaliteli parça ve malzemelerden üretilmiştir Bu nedenle ürünü hizmet ömrünün sonunda evsel veya diğer atıklarla birlikte atmayın Elektrikli ve elektronik cihazların geri dönüşümü için bir toplama noktasına götürün Bu toplama noktalarını bölgenizdeki yerel yönetime sorun Kullanılmış ürü...

Страница 24: ...esiçıkarmadüğmesi 4 Taşıma sapı 5 Park kanalıı 6 Açma Kapama düğmesi 7 Tekerlek 8 Toz haznesi 9 Hortum başlığı 10 Toz haznesi taşıma sapı 11 Üst kapak 12 Parke halı fırçası 13 Parke halı fırçası ayar mandalı 14 Teleskobik boru 15 Teleskobik boru ayar mandalı 16 Aksesuar taşıyıcı 17 Vakum ayar sürgüsü 18 Tutma sapı 2 2 Teknik veriler Bu ürün 2004 108 EC 2006 95 EC 2009 125 EC 2010 30 EU ve 2011 65 ...

Страница 25: ...4 uzunluğunuayarlamak için teleskobik boru ayar mandalını 15 itin ve ucundan çekin 3 4 Parke halı fırçasını takma çıkarma 1 Parke halı fırçasına 12 teleskobik boruya 14 ok yönünde takın 2 Parke halı fırçasından 12 teleskobik boruyu 14 çekerek çıkarabilirsiniz 3 5 Parke halı fırçasını ayarlama Parke halı fırçasının 12 üzerinde bulunan ayar mandalına 13 basarak Sert zemin ve parke için kıl fırçalar ...

Страница 26: ...zor bölgelerin süpürülmesi için uygundur Geniş ağızlı uç Döşemelerin merdiven basamaklarının otomobil içinin kanepelerin koltukların vb süpürülmesi için uygundur Toz fırçası Perde hassas ve kırılabilir cisimlerin süpürülmesi için uygundur A UYARI Tutma sapının 18 uç kısmınıkullanaraktemizlikyapmayın 3 8 Süpürgenin kapatılması ve park özelliği 1 Açma kapama düğmesinden 6 cihazı kapatın ve fişini pr...

Страница 27: ...ünde çıkartın 2 Üst kapağı 11 ok yönünde iterek toz haznesinden 8 çıkartın 3 Toz haznesi taşıma sapından 10 tutup ters çevirerek içini boşaltın 4 Cihazın üst kapağını 11 kapatın 5 Toz haznesi tutma sapından 18 tutarak toz haznesini 8 yerine yerleştirin 4 2 Filtrelerin temizlenmesi Sünger filtre Hava çıkış filtresi Hepa filtre A UYARI Filtreleri kurutmak için saç kurutma makinesi soba vb sıcak hava...

Страница 28: ...filtreyi üzerindeki tutma yerinden tutarak çıkartın 3 Silkeledikten sonra akan suyun altında tutarak yıkayın 4 Yıkadıktan sonra hepa filtreyi kurumaya bırakın 4 2 3 Sünger filtre 1 Hepa filtreyi çıkardıktan sonra arkasında bulunan sünger filtreyi görebilirsiniz 2 Sünger filtreyi çıkarıp yıkayın 3 Yıkadıktansonrasüngerihafifçesıkıpkurumaya bırakın 4 3 Saklama Cihazı uzun süre kullanmayı düşünmüyors...

Страница 29: ...ntru consultări ulterioare Dacă transmiteţi produsul altei persoane oferiţi i şi manualul de utilizare Respectaţi toate avertismentele şi informaţiile din manualul de utilizare Semnificaţia simbolurilor Următoarele simboluri sunt utilizate în diverse părţi ale acestui manual de utilizare C Informaţii importante sau sfaturi utile privind utilizarea A Avertismente pentru situaţii periculoase privito...

Страница 30: ...tilizare destinată 34 3 2 Ataşarea detaşarea furtunului 34 3 3 Ataşarea detaşarea tubului telescopic 34 3 4 Ataşarea detaşarea periei pentru parchet carpetă 34 3 5 Reglarea periei pentru parchet carpetă 34 3 6 Funcţionarea 34 3 6 1 Reglarea puterii de aspirare 35 3 7 Accesorii 35 3 8 Oprirea aspiratorului şi caracteristica de poziţionare 35 4Curăţarea şi întreţinerea 36 37 4 1 Descărcarea recipien...

Страница 31: ...ii de către un adult Nu utilizaţi produsul atunci când cablul de alimentare sau produsul este avariat Contactaţi un service autorizat Tensiunea de alimentare ale prizelor trebuie să corespundă cu informaţiile furnizate pe eticheta produsului Tensiunea de alimentare a produsului trebuie să fie securizatăcuosiguranţădeminim 16 A Nu utilizaţi produsul cu un prelungitor Preveniţi avarierea cablului de...

Страница 32: ...Mediului şi Planificării Urbane Conform Directivei WEEE Acest produs a fost fabricat folosind componente şi materiale de înaltă calitate care pot fi refolosite şi reciclate Aşadar la sfârşitul perioadei sale de utilizare nu aruncaţi produsul împreună cu gunoiulmenajer Duceţi llauncentrudecolectare pentru reciclarea echipamentelor electrice şi electronice Adresaţi vă autorităţii locale din zona dum...

Страница 33: ...re recipient de praf 4 Mâner de transport 5 Fantă de poziţionare 6 Buton Pornit Oprit 7 Roată 8 Recipient de praf 9 Racordul furtunului 10 Mâner de transport recipient de praf 11 Protecţie superioară 12 Perie parchet carpetă 13 Clemă reglare perie pentru parchet carpetă 14 Tub telescopic 15 Clemă reglare tub telescopic 16 Suport accesorii 17 Control de aspirare 18 Mâner 2 2 Date tehnice Acest prod...

Страница 34: ...ngimea 3 4 Ataşarea detaşarea periei pentru parchet carpetă 1 Ataşaţi peria pentru parchet carpetă 12 la tubul telescopic 14 în direcţia săgeţii 2 Dumneavoastră puteţi scoate tubul telescopic 14 din peria pentru parchet carpetă 12 prin tragerea acestuia 3 5 Reglarea periei pentru parchet carpetă Prin apăsarea clemei de reglare 13 localizată pe peria pentru parchet carpetă 12 Pentru a aspira pe o s...

Страница 35: ... de tapiţerie Potrivită pentru curăţarea pardoselilor treptelor scărilor interiorul maşiniilor canapelelor fotoliilor etc Peria pentru praf Potrivită pentru curăţarea perdelelor şi obiectelor sensibile şi fragile A AVERTISMENT Nu efectuaţi curăţarea prin utilizarea componentei finale ale 18 mânerului 3 8 Oprirea aspiratorului şi caracteristica de poziţionare 1 Opriţiprodusulutilizândbutonulpornit ...

Страница 36: ...a scoate recipientul de praf 8 şi scoateţi l în direcţia specificată de către săgeată prin prinderea mânerului de transport 10 2 Scoateţiprotecţiasuperioară 11 dinrecipientul de praf 8 prin apăsarea pe acesta în direcţia săgeţii 3 Apucaţi recipientul pentru praf de mânerul lui de transport 10 şi rotiţi l pentru a l descărca 4 Închideţi protecţia superioară a aparatului 11 5 Introduceţi recipientul...

Страница 37: ...izat pe acesta 3 Remontaţi l după ce l aţi agitat 4 2 2 Filtru Hepa 1 Scoateţi recipientul de praf 8 vezi 4 1 2 Scoateţi filtrul hepa prin apucarea acestuia de mânerul localizat pe acesta 3 Spălaţi l sub apă curentă după ce l aţi scuturat 4 După spălare lăsaţi filtru hepa să se usuce 4 2 3 Filtru de spumă 1 După ce aţi scos filtrul hepa dumneavoastră puteţivedeafiltruldespumălocalizatînspatele ace...

Страница 38: ...че изделия другому лицу передайте и это руководство Соблюдайте все предостережения и изучите всю информацию в руководстве пользователя Условные обозначения В разных разделах данного руководства по эксплуатации использованы следующие символы C Важная информация и полезные советы по эксплуатации A Предупреждения об опасности травмирования или повреждения имущества Это изделие изготовлено на экологич...

Страница 39: ...ция 44 45 3 1 Назначение изделия 44 3 2 Присоединение снятие шланга 44 3 3 Присоединение снятие телескопической трубки 44 3 4 Присоединение снятие щетки для паркета ковров 44 3 5 Настройка щетки для паркета ковров44 3 6 Эксплуатация 44 3 6 1 Настройка мощности всасывания 45 3 7 Аксессуары 45 3 8 Выключение и хранение пылесоса 45 4 Чистка и уход 46 47 4 1 Очистка пылесборника 46 4 2 Очистка фильтро...

Страница 40: ...что они находятся под надзором либо понимают инструкции по безопасной эксплуата ции или осознают риски от пользования прибором Не позволяйте детям играть с прибором Чистка и работы по техническому обслуживанию не должны выполняться детьми без присмотра взрослых Ни в коем случае не поль зуйтесь электроприбором если шнур питания или электроприбор повреж дены В таком случае следует обратиться в ав то...

Страница 41: ...троприбор от воздей ствия дождя влажности а также держать вдали от источников тепла Запрещается пользо ваться электроприбором во взрывоопасных местах и вблизи легковоспламе няющихся и горючих мате риалов П е р е д ч и с т к о й и т е х н и ч е с к и м обслуживанием отключите прибор от электрической сети Д л я о ч и с т к и электроприбора или его кабеля не следует опускать их в воду Необходимо регу...

Страница 42: ...сококачественных материалов и компо нентов которые пригодны для повторного использования и подлежат вторичной пере работке В связи с этим не следует утилизи ровать изделие с обычными бытовыми отхо дами по истечении срока его эксплуатации Его следует сдать в пункт сбора отходов электрического и электронного оборудова ния За сведениями о местонахождении пун ктов сбора обратитесь в местные органы вла...

Страница 43: ...ски 5 Канал для хранения 6 Выключатель 7 Колесико 8 Контейнер пылесборника 9 Крышка шланга 10 Ручка для переноски контейнера пылесборника 11 Верхняя крышка 12 Щетка для паркета ковра 13 Фиксатор настройки щетки для пар кета ковра 14 Телескопическая трубка 15 Фиксатор регулировки телескопиче ской трубки 16 Держатель насадок 17 Регулятор всасывания 18 Ручка 2 1 2 Технические характеристики Данный пр...

Страница 44: ...2 Потяните телескопическую трубку 14 с ручки 18 и снимите ее 3 Нажмите на фиксатор регулировки телескопической трубки 15 и перемещая трубку 14 отрегулируйте ее длину 3 4 Присоединение снятие щетки для паркета ковров 1 Присоедините щетку для паркета ковра 12 к телескопической трубке 14 в на правлении указанном стрелкой 2 Извлечь телескопическую трубку 14 из щетки для паркета ковра 12 можно по тянув...

Страница 45: ... отверните его с помощью от вертки и снимите с телескопи ческой трубки 14 Щелевая насадка Подходит для очистки по верхностей сложных для уборки например про странства под диванами и шкафами Щетка для мягкой мебели Подходит для уборки ков ровых покрытий ступеней лестницы внутренней ча сти автомобиля диванов кресел и т п Щетка для пыли Подходит для уборки штор а также хрупких предме тов A ПРЕДОСТЕРЕ...

Страница 46: ...итепылесборник в направлении указанном стрелкой держа его за ручку для переноски 10 2 Снимите верхнюю крышку 11 с пылесборника 8 нажав на него в направлении указанном стрелкой 3 Снять пылесборник с ручки 10 после чего перевернуть его и вытрусить мусор 4 Закрыть верхнюю крышку электроприбора 11 5 Установить пылесборник 8 обратно на место придерживая за ручку 18 4 2 Очистка фильтров Фильтр из пенома...

Страница 47: ...выпускного отверстия придерживая за ручки предусмотренные на нем 3 Вытрусить фильтр и установить обратно на место 4 2 2 Фильтр HЕРА 1 Извлечь пылесборник 8 см 4 1 2 Извлечь фильтр hepa придерживая за ручку предусмотренную на нем 4 Чистка и уход 2 Вытрусить фильтр и промыть под струей воды 3 После промывки дать фильтру hepa высохнуть 4 2 3 Фильтр из пеноматериала 1 После извлечения фильтра hepa вы ...

Страница 48: ... като ги запазите за справка в бъдеще Ако продуктът смени собственика си в бъдеще то предоставете и ръководството за употреба заедно с уреда Следвайте всички предупреждения и указания от ръководството за употреба Значение на символите В различните раздели на ръководството са използвани следните символи C Важна информация и полезни съвети за употребата A Предупреждения за опасни ситуации за здравет...

Страница 49: ...назначение 54 3 2 Прикрепване отстраняване на маркуча54 3 3 Поставяне отстраняване на телескопичната тръба 54 3 4 Прикрепване отстраняване на четката за паркет килим 54 3 5 Регулиране на четката за паркет килим 54 3 6 Работа 54 3 6 1 Регулиране на смукателната мощност 55 3 7 Аксесоари 55 3 8 Функция за изключване и паркиране на прахосмукачката 55 4 Почистване и поддръжка 56 57 4 1 Изпразване на ко...

Страница 50: ...опит ако те бъдат наблюдавани по отношение на безо пасното му използване или са инструктирани и разбират рисковете от използването на проду кта Децата не трябва да играят с уреда Про цедурите за почистване и потребителска под дръжка не трябва да се извършват от деца освен ако не са контро лирани от възрастни Никога не използвайте уреда ако захранва щият кабел или самия уред е повреден Свър жете се...

Страница 51: ...ъжд и източници на влага и топлина Никога не използвайте уреда в или в близост до избухливи възпла меними места и матери али Изключвайте уреда преди почистване и под дръжка Не потапяйте уреда или кабела във вода за да ги почистите Редовно проверявайте маркуча на уреда Не из ползвайте уреда ако е повреден и се свържете с упълномощен сервиз Не правете опити да разглобявате уреда Използвайте само ори...

Страница 52: ...ли рани Затова в края на оперативния му живот не изхвърляйте уреда с обикно вените битови отпадъци Занесете го в събирателен пункт за рециклиране на електрическо и електронно оборудване Питайте местните власти за пуктове за събиране Дайте своя принос към опаз ването на околната среда и природните ресурси като предавате използваните продукти в пунктове за рециклиране 1 3 Информация за опаковката Оп...

Страница 53: ...ах 4 Дръжка за носене 5 Канал за паркиране 6 Бутон за вкл изкл 7 Колело 8 Контейнер за прах 9 Капачка на маркуча 10 Дръжка на контейнера за прах 11 Горен капак 12 Четка за паркет килим 13 Регулируема блокировка на четката за паркет килим 14 Телескопична тръба 15 Телескопична тръба и регулируема блокировка 16 Носач на аксесоари 17 Управление на засмукването 18 Дръжка 2 1 2 Технически данни Този уре...

Страница 54: ...от дръжката 18 за да я отстраните 3 Притиснете телескопичната тръба към регулиращото блокиране 15 и издърпайте тръбата 14 за да регулирате дължината 3 4 Прикрепване отстраняване на четката за паркет килим 1 Прикрепете четката за паркет килим 12 към телескопичната тръба 14 в посоката на стрелките 2 Можете да отстраните телескопичната тръба 14 от четката за паркет килим 12 като я издърпате 3 5 Регул...

Страница 55: ...та на от вертка и го отстранете от те лескопичната тръба 14 Накрайник с тесен процеп Подходящ за трудно по чистващи се повърхности като области под маси и мебели Четка за тапицерия Подходяща за почиства не на мокети стъпала на стълби вътрешността на автомобили дивани фо тьойли и други Четка за прах Подходяща за почистване на завеси и чувствителни и чупливи предмети A ПРЕДУПРЕЖДЕНИЕ Не почиствайте ...

Страница 56: ...за прах 3 за да отстраните контейнера 8 и извадете контейнера в посоката на стрелката като държите дръжката за носене на контейнера 10 2 Отстранете горния капак 11 от контейнера за прах 8 като го притиснете в посоката на стрелката 3 Хванете контейнера за прах за дръжката му за носене 10 и го обърнете за да изсипете съдържанието му 4 Затворете горния капак на уреда 11 5 Поставете контейнера за прах...

Страница 57: ...здух като го хванете за дръжката му 3 Поставете отново филтъра след като го почистите 4 2 2 Hepa филтър 1 Отстранете контейнера за прах 8 вижте 4 1 2 Отстранете филтъра на изхода за въздух като го хванете за дръжката му 4 Почистване и поддръжка 2 Измийте под течаща вода след като го изтупате 3 Оставете hepa филтъра да изсъхне след като го измиете 4 2 3 Филтър с пяна 1 След като отстраните hepa фил...

Страница 58: ......

Страница 59: ......

Страница 60: ...www beko com ...

Отзывы: