background image

EN

32

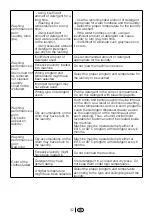
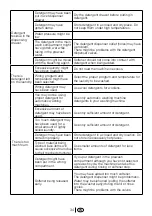
Washing 

performance is 

poor:

Laundry turns 

gray

 - Using insufficient 

amount of detergent for a 

long time,

 - Washing at low 

temperatures for a long 

time,

 - Using insufficient 

amount of detergent for 

hard waters (soil can stick 

to the laundry),

 - Using excessive amount 

of detergent (detergent 

can stick to the laundry).

 - Use the recommended amount of detergent 

appropriate for water hardness and the laundry.

 - Select the proper temperature for the laundry 

to be washed.

 - If the water hardness is high, using an 

insufficient amount of detergent can cause 

laundry to turn gray over time.

 - It is difficult to eliminate such grayness once 

it occurs.

Washing 

performance is 

poor:

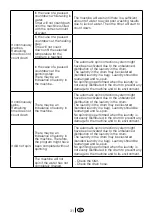
Stain could not 

be removed, 

not cleaned.

Laundry 

could not be 

whitened.

Insufficient amount of 

detergent used.

Use recommended amount of detergent 

appropriate for the laundry.

Excessive laundry loaded 

into machine

Do not load the machine in excess.

Wrong program and 

temperature might have 

been selected.

Select the proper program and temperature for 

the laundry to be washed.

Improper detergent may 

have been used.
Wrong type of detergent 

used.

Put the detergent in the correct compartment.

Do not mix detergent with bleaching agents.

Washing 

performance is 

poor:

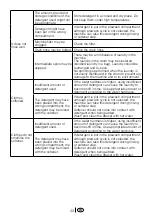
Oily stains 

appear on 

laundry.

Oily accumulations on the 

drum may have stuck to 

the laundry.

Such odors and bacteria layers may be formed 

on the drum as a result of continuous washing 

at lower temperatures and/or in short programs. 

Leave the detergent dispenser drawer as well 

as the loading door of the machine ajar after 

each washing. Thus, a humid environment 

favorable for bacteria cannot be created inside 

the machine.

Machine must be operated empty either at 

60°C or 90°C program with detergent every 6 

months.

Washing 

performance is 

poor:

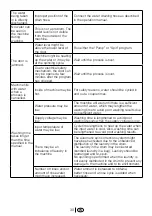
Bad odor

Oily accumulations on the 

drum may have stuck to 

the laundry.

Machine must be operated empty either at 

60°C or 90°C program with detergent every 6 

months.

Color of the 

clothes faded.

Excessive laundry might 

have been loaded in.

Do not overload the machine.

Detergent may have 

gotten damp.

Store detergent in a closed and dry place. Do 

not keep them under high temperatures.

A higher temperature 

might have been selected.

Select the proper program and temperature 

according to the type and soiling degree of the 

laundry.

Содержание AUTOMATIC WASHING MACHINE WMA 647 S

Страница 1: ...installation operating instructions and washing guidance get the best from your new washer WMA 657 W Automatic washing machine ...

Страница 2: ...odels will be identified in the manual Explanation of symbols Throughout this Operation Manual the following symbols are used C Important information or useful hints about usage A Warning for hazardous situations with regard to life and property B Warning for supply voltage This appliance s packaging material is recyclable Help recycle it and protect the environment by dropping it off in the munic...

Страница 3: ... 12 Loading door 13 Detergents and softeners 13 5 Selecting a program and operating your machine 15 Control panel 15 Display symbols 16 Turning the machine on 16 Program selection 16 Additional programs 17 Special programs 17 Temperature selection 17 Spin Speed selection 18 Program selection and consumption table 19 Auxiliary functions 20 Time screen 20 Starting the program 21 Progress of program ...

Страница 4: ...EN 4 Top Lid Detergent Drawer Control Panel Height adjustable Feet Door Filter Cap 1 2 3 4 5 6 Overview 1 Your Washing Machine Figure 1 1 2 3 4 5 6 ...

Страница 5: ...he machine labels or in the documentation accompanying it are obtained in laboratory in accordance with the relevant standards Depending on operational and environmental conditions of the appliance values may vary Models Maximum dry laundry capacity kg Height cm Width cm Depth cm Net Weight kg Electricity V Hz Total Current A Total Power W Spinning cycle rpm max WMA 657 W 6 84 60 54 72 230 V 50hz ...

Страница 6: ...rom the quality control process and is normal It is not harmful to your machine Some problems you may encounter may be caused by the software Press Start Pause Cancel button for 3 seconds to cancel the program set in your machine before calling the authorized service First Use To prepare your machine for washing carry out your first washing process without loading your machine and with detergent u...

Страница 7: ...e children Electrical connection Make sure that you have an earthed power outlet socket rated at 13 amps minimum Attention If you use your machine as built in the socket must be reachable after installation or a separate switch which can disconnect the two poles must be used in the installation Connect the power cord to the appropriate electrical socket with an equivalent current rating indicated ...

Страница 8: ...rrespond with the coloured markings identifying the terminals on your plug proceed as follows 1 Connect the green yellow or green earth wire to the terminal in the plug marked E or with the symbol f or coloured green and yellow or green 2 Connect the blue neutral wire to the terminal in the plug marked N or coloured black 3 Connect the brown live wire to the terminal in the plug marked L or colour...

Страница 9: ... moved again in the future C Never move the appliance without the transportation safety bolts properly fixed in place Appropriate installation location Install the appliance in environments which have no risk of freezing in a stable and level position C The floor must be capable of carrying the load on it C If the washing machine and a drier are placed on top of each other their approximate weight...

Страница 10: ...the machine Tighten the nuts of the hose well by hand never use wrenches to tighten the nuts Open the taps completely after making the hose connection to check if there is any water leakage at the connection points Turn off the tap and remove the nut in case of any leakage Retighten the nut carefully after checking the seal To prevent any water leakage and any other damage to be caused by it keep ...

Страница 11: ...d well with an appropriate clamp as not to come off and leak Electrical connection Connect the machine to an earthed outlet protected by a fuse of suitable capacity Important Connection should comply with national regulations Power cord plug must be within easy reach after installation The voltage and the allowed fuse protection are specified in the section Technical Specifications The specified v...

Страница 12: ...coloured cottons may release a lot of dye Wash them separately Tough stains must be treated properly before washing If you are not sure check with a dry cleaner Use only dyes colour changers and lime removers suitable for machine wash Always follow the instructions on the packaging Wash trousers and delicate clothes turned inside out Keep laundry items made of Angora wool in the freezer for a few ...

Страница 13: ...er while the washing program is running When using a program without pre wash no detergent should be put into the pre wash compartment Compartment no I A program without pre wash should not be selected if a detergent bag or a dispensing ball is going to be used You can place the detergent bag or the dispensing ball directly among the laundry in your machine Choosing the detergent type The type of ...

Страница 14: ...llowing The liquid detergent may leave stains on your laundry if time delay feature is selected Do not use liquid detergent if you want to wash using the time delay feature Do not use liquid detergent for the main wash in a cycle with pre wash Use the detergent manufacturer s measuring cup and follow the instructions on the package Starch Add liquid starch powder starch or the dyestuff into the so...

Страница 15: ...nt Button 10 Start Pause Cancel Button 11 Auxiliary Function Buttons a Prewash b Quick Wash c Rinse Plus d Anti creasing 12 Program Selection Knob 13 Display 14 On Off Button Control panel Figure 2 5 Selecting a program and operating your machine 1 4 1 2 1 0 11d 11c 11b 11a 8 7 1 3 9 ...

Страница 16: ...art Pause Cancel button Figure 2 10 to start the program Main programs Depending on the type of textile the following main programs are available Cottons You can wash your durable clothes at this program Your laundry shall be washed with intense washing movements during a longer washing cycle It is recommended for your cotton clothes such as bed sheets duvet and pillowcase sets bathrobes underclot...

Страница 17: ...r Clothing Increased hygiene is provided by a longer heating period and an additional rinse cycle It is recommended for baby clothes and clothes worn by allergic people A Class 40 This program washes for a longer period at 40 C and gives the same result as the Cottons 60 C program thus it saves energy It is suitable for clothes for which you cannot use the Cotton 60 C program Each of these main pr...

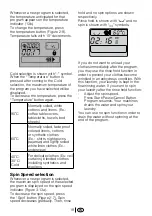
Страница 18: ... Ex veil curtains blended clothes including synthetics and woolens Spin Speed selection Whenever a new program is selected the maximum spin speed of the selected program is displayed on the spin speed indicator Figure 3 13a To decrease the spin speed press the Spin button Figure 2 7 Spin speed decreases gradually Then rinse hold and no spin options are shown respectively Rinse hold is shown with a...

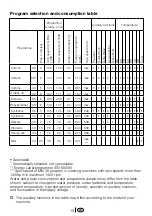
Страница 19: ...table may differ according to the model of your machine Programme Duration min Auxiliary functions Temperature Programme Max Load kg Spin speed rpm 600 1400 Spin speed rpm 1600 Water Consumption l Energy Consumption kWh Spin speed rpm Prewash Quick Wash Extra Rinse Anti Creasing Rinse Hold 90 80 70 60 50 40 30 Cold Cottons 90 6 156 165 55 2 30 max Cottons 60 6 144 153 49 1 14 max Cottons 40 6 134 ...

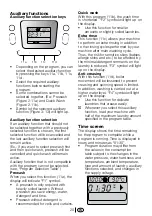
Страница 20: ...ash With this program 11b the wash time is shortened F2 symbol will light up on the display Use this function for smaller amounts or slightly soiled laundries Extra rinse This function 11c allows your machine to perform an extra rinsing in addition to the rinsing cycles performed by your machine after main washing cycle Thus the risk for sensitive skins babies allergic skins and etc to be effected...

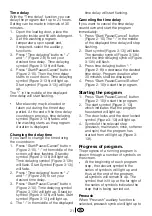
Страница 21: ...l light up Standby symbol Figure 3 13k will fade Start symbol Figure 3 13j will light up 4 The in the middle of the displayed time delay will start flashing Canceling the time delay If you want to cancel the time delay countdown and start the program immediately 1 Press Start Pause Cancel button Figure 2 10 The in the middle of the displayed time delay will stop flashing 2 Start symbol Figure 3 13...

Страница 22: ...dding taking out laundry in standby mode The door can be opened if the water level is suitable The door locked symbol Figure 3 13i will light up until the door is suitable for opening This symbol will fade out as soon as the door is allowed to open Laundry may be added taken out by opening the door Door lock Door Locked Symbol Figure 3 13i lights up when the loading door is locked This symbol will...

Страница 23: ...e 3 13k fades out and Start Symbol Figure 3 13j lights up If you want to discharge the water only without spinning Press Start Pause Cancel button Figure 2 10 Standby symbol Figure 3 13k will fade Start symbol Figure 3 13j will light up The program continues and only pumps out the water End of program When the program is finished the symbols of the relevant steps will remain lit up and the auxilia...

Страница 24: ... delay until the program starts At the beginning of a washing cycle machine allows adding more laundry during a future step only if the water level is low enough to open the loading door or if the temperature in the machine is low In order to add laundry after the start up of the program 1 Press Start Pause Cancel button Figure 2 10 2 Open the loading door and put in more laundry 3 Close the loadi...

Страница 25: ...will appear on the screen 1 Open the loading door and take out the laundry when the door locked symbol on the display Figure 3 13i fades out 2 Press the On Off button Figure 2 14 3 Turn the water tap off 4 Remove any folds in the rubber seal on the loading door and check for debris 5 Leave the loading door and detergent drawer open to dry ...

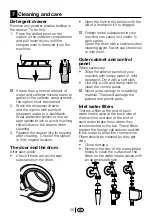
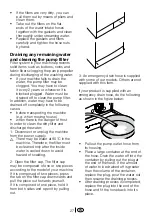
Страница 26: ...f a toothpick if it is clogged C Foreign metal substances in your machine can cause rust stains In such cases Clean the drum with a stainless steel cleaning agent Never use steel wool or wire wool Outer cabinet and control panel When necessary Wipe the exterior panels of your machine with soapy water or mild detergent Dry it with a soft cloth Use only a soft and damp cloth to clean the control pan...

Страница 27: ...r unplug the machine from the power supply A There may be water at 90 C in the machine Therefore the filter must be cleaned only after the inside water is cooled down to avoid hazard of scalding 2 Open the filter cap The filter cap may be composed of one or two pieces according to the model of your machine If it is composed of two pieces press the tab on the filter cap downwards and pull the piece...

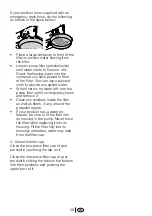
Страница 28: ...ater left turn the pump filter until it is completely loose and remove it Clean any residues inside the filter as well as fibers if any around the propeller region If your product has a water jet feature be sure to fit the filter into its housing in the pump Never force the filter while replacing it into its housing Fit the filter fully into its housing otherwise water may leak from the filter cap...

Страница 29: ...ater taps fully Water inlet hose might be bent Flatten the water intake hose Water inlet filter might be clogged Clean the water intake filter The door may be ajar Close the door Machine does not discharge water Water outlet hose might be clogged or twisted Clean or flatten the hose Pump filter may be clogged Clean the pump filter Machine vibrates or shakes Machine feet might require adjustment Ad...

Страница 30: ...al Water pressure may be low The machine will wait until there is a sufficient amount of water which may lengthen the washing time to avoid poor washing results due to insufficient water Supply voltage may be low Washing time is lengthened to avoid poor washing results when the supply voltage is low Input temperature of water may be low Cycle time lengthens to heat up the water when the input wate...

Страница 31: ... damage to the machine and to its environment It continuously spins Remaining time does not count down There may be an imbalance of laundry in the machine The automatic spin correction system might have been activated due to the unbalanced distribution of the laundry in the drum The laundry in the drum may be clustered bundled laundry in a bag Laundry should be rearranged and re spun No spinning i...

Страница 32: ... detergent may have been used Wrong type of detergent used Put the detergent in the correct compartment Do not mix detergent with bleaching agents Washing performance is poor Oily stains appear on laundry Oily accumulations on the drum may have stuck to the laundry Such odors and bacteria layers may be formed on the drum as a result of continuous washing at lower temperatures and or in short progr...

Страница 33: ...t amount of detergent can cause the laundry to become stiff in time Use appropriate amount of detergent according to the water hardness The detergent may have been placed into the wrong compartment the detergent may be mixed with the softener If detergent is put in the prewash compartment although prewash cycle is not selected the machine can take this detergent during rinsing or softener step Sof...

Страница 34: ...nts for woolens There is too much foam You may not be using proper detergent for automatic washing machines Use only automatic washing machine detergents in your washing machine Excessive amount of detergent may have been used Use only sufficient amount of detergent Too much detergent may have been used for a small amount of lightly soiled laundry Use only sufficient amount of detergent Detergent ...

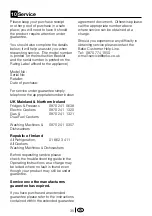
Страница 35: ...0870 241 1321 Dual Fuel Cookers Washing Machines 0870 241 0357 Dishwashers Republic of Ireland All Refrigeration 01 862 3411 All Cookers Washing Machines Dishwashers Before requesting service please check the trouble shooting guide in the Operating Instructions as a charge may be levied where no fault is found even though your product may still be under guarantee Service once the manufacturers gua...

Страница 36: ......

Страница 37: ......

Страница 38: ......

Отзывы: