background image


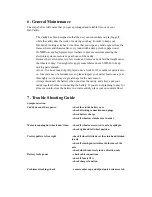
6. General Maintenance   

The steps below will ensure that you get a prolonged and reliable life out of your 

Bat-Caddy. 


-


The Caddy has been designed so that the user can concentrate on playing golf, 

while the caddy does the work of carrying your bag. In order to keep your 

Bat-Caddy looking at its best, we advise that you wipe any mud or grass from the 

frame, wheels and chassis after every round with a damp cloth or paper towel. 

-


Do 

NOT 

use any high-pressure jet washers to prevent moisture entering the 

electronic systems, motors or gear boxes of the caddy.   

-


Remove the rear wheels every few weeks and remove any debris that might cause 

the wheels to drag. You might also apply some lubricant, such WD-40 to keep 

moving parts smooth.   

-


A four - five hour round of golf played once a week for 12 months is equivalent to 

ca. four years use of a lawnmower, so please inspect your cart at least once a year 

thoroughly, so it’s always in great shape for the new season. 

-


Always disconnect the battery when you store the caddy, and always put your 

caddy together before re-connecting the battery. If you are not planning to play for 

at least a month, store the battery in a warm and dry place (not on concrete floor).   


7. Trouble Shooting Guide 


Symptom Action 


Caddy does not have power:   


- check fuse in the battery case   

- check all wiring connections and plugs 


- check battery charge 


- check if wheels & clutches are in order 


Motor is running but wheels don’t turn    - check if wheels are secured to axle by split pin 


- check right and left wheel position 


Trolley pulls to left or right   

- check if wheel is fitted over the clutch and latched 

to axle 


- check if clutch pin is visible at both sides of the         

axle 


- check clutch turn freely in one direction only   

Battery lacks power     


– check cable connections 

- check if fuse is 30 A 

- check charger function 


Problems 

attaching 

wheels 


   – 

remove outer cap and adjust quick release catch


Содержание 106E Pro

Страница 1: ...Electric Golf Caddy 106E Pro User Manual WARNING PLEASE FOLLOW ALL ASSEMBLY INSTRUCTIONS AND READ AND UNDERSTAND THE OPERATING INSTRUCTIONS BEFORE YOU OPERATE THE CADDY ...

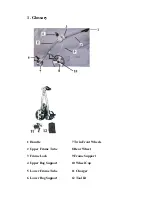
Страница 2: ...1 Glossary 1 Handle 7 Twin Front Wheels 2 Upper Frame Tube 8 Rear Wheel 3 Frame Lock 9 Frame Support 4 Upper Bag Support 10 Wheel Cap 5 Lower Frame Tube 11 Charger 6 Lower Bag Support 12 Tool kit ...

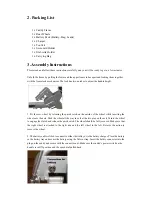
Страница 3: ...he outside of the wheel while inserting the wheel onto the axle Push the wheel all the way in so that the two pins on the axle fit into the wheel to engage the clutch and release the quick catch The wheel should be fully secured Make sure that the right wheel is attached to the right side and the left wheel to the left Reverse the action to remove the wheel 2 The battery cable is fitted to connect...

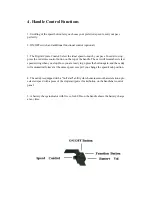
Страница 4: ...top of the handle The cart will remember its last speed setting when you stop Once you are ready to go press the button again and the caddy will automatically travel at the same speed except if you change the speed knob position 4 The caddy is equipped with a Soft start ability which ensures smooth acceleration up to selected speed with a press of the stop start power brake button on the handlebar...

Страница 5: ... battery s poles red color stands for positive and the black for negative In case of battery replacement please reconnect the poles of the battery correctly Otherwise your caddy could suffer severe damage Please do not disassemble the battery or throw it into a fire EXPLOSION NEVER TOUCH THE ELECTRIC POLES OF THE BATTERY SAFETY HAZARD How to Charge the Battery Charge the battery by plugging the ch...

Страница 6: ...ower so please inspect your cart at least once a year thoroughly so it s always in great shape for the new season Always disconnect the battery when you store the caddy and always put your caddy together before re connecting the battery If you are not planning to play for at least a month store the battery in a warm and dry place not on concrete floor 7 Trouble Shooting Guide Symptom Action Caddy ...

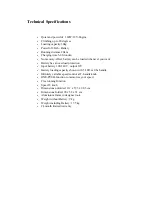
Страница 7: ...ry has an overload protection Input battery 100 240V output 12V Battery loading capacity shown with 5 LEDs at the handle Infinitely variable speed control at T handle knob ONE PUSH function to memorize your speed Free running function Speed 8 km h Dimensions unfolded 112 x 57 5 x 98 5 cm Dimensions folded 90 x 58 x 31 cm Aluminium frame in designer look Weight without Battery 9 kg Weight including...

Отзывы:

Похожие инструкции для 106E Pro