background image

5. Operating Instructions 


5.1. Operating your Caddy 


In order to turn the caddy on push the On/Off switch to On. The battery charge LED should light up.   


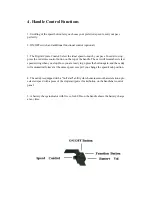
While holding on to the handle start dialing the speed control with your index finger slowly forward 

or clockwise. The caddy will start moving forward. Adjust the speed seamlessly to the desired pace.   

To stop or slow the caddy down either dial the speed control knob backwards or use the cruise 

control or On/Off buttons as described previously.   

5.2. Battery Use and Care 


PLEASE OBEY THESE PRECAUTIONS FOR BATTERY USE & CHARGING 


-


Please do not charge the battery in a sealed container or in upside down position. It is                   

recommended to charge the battery in a well ventilated area.   

-


Please do not charge the battery near a heater, or where heat accumulation may occur or in 

direct sunshine. 

-


In order to prolong the service life of the battery, please avoid complete discharge and 

charge the battery after every use. When the trolley is not in use for an extended period of 

time, it is recommended to charge the battery once a month.. 

-


The battery’s poles red color stands for positive, and the black for negative. In case of 

battery replacement please reconnect the poles of the battery correctly. Otherwise your 

caddy could suffer severe damage. 

-


Please do not disassemble the battery or throw it into a fire

. EXPLOSION!!! 


NEVER TOUCH THE ELECTRIC POLES OF THE BATTERY!! SAFETY HAZARD!! 


How to Charge the Battery :   


Charge the battery by plugging the charger into the battery and then plug the charger into 

the main electricity supply. Charge the battery after each round of golf. Charging is complete 

when charger light (See type of charger) changes color. Battery charging takes anywhere 

between 5 - 12 hours.   


Once the battery is charged there is no need to leave it plugged into the charger .There are 

two types of battery chargers. The changes in LED in colors for these different chargers are 

as follows:   


1) The LED turns green when connecting the battery and changes to red once connected to an 

outlet indicating that the battery is being charged. The LED will revert to green once the 

battery is fully charged. 


2) the LED light starts as steady green. If the battery requires charge and while charging the 

LEDs will revert to flashing green. When the battery is fully charged, the LED will stop 

flashing and revert to steady green.   


Содержание 106E Pro

Страница 1: ...Electric Golf Caddy 106E Pro User Manual WARNING PLEASE FOLLOW ALL ASSEMBLY INSTRUCTIONS AND READ AND UNDERSTAND THE OPERATING INSTRUCTIONS BEFORE YOU OPERATE THE CADDY ...

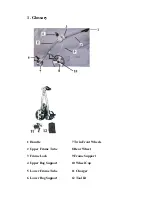
Страница 2: ...1 Glossary 1 Handle 7 Twin Front Wheels 2 Upper Frame Tube 8 Rear Wheel 3 Frame Lock 9 Frame Support 4 Upper Bag Support 10 Wheel Cap 5 Lower Frame Tube 11 Charger 6 Lower Bag Support 12 Tool kit ...

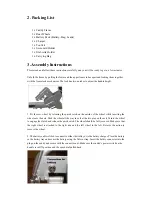
Страница 3: ...he outside of the wheel while inserting the wheel onto the axle Push the wheel all the way in so that the two pins on the axle fit into the wheel to engage the clutch and release the quick catch The wheel should be fully secured Make sure that the right wheel is attached to the right side and the left wheel to the left Reverse the action to remove the wheel 2 The battery cable is fitted to connect...

Страница 4: ...top of the handle The cart will remember its last speed setting when you stop Once you are ready to go press the button again and the caddy will automatically travel at the same speed except if you change the speed knob position 4 The caddy is equipped with a Soft start ability which ensures smooth acceleration up to selected speed with a press of the stop start power brake button on the handlebar...

Страница 5: ... battery s poles red color stands for positive and the black for negative In case of battery replacement please reconnect the poles of the battery correctly Otherwise your caddy could suffer severe damage Please do not disassemble the battery or throw it into a fire EXPLOSION NEVER TOUCH THE ELECTRIC POLES OF THE BATTERY SAFETY HAZARD How to Charge the Battery Charge the battery by plugging the ch...

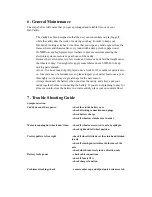
Страница 6: ...ower so please inspect your cart at least once a year thoroughly so it s always in great shape for the new season Always disconnect the battery when you store the caddy and always put your caddy together before re connecting the battery If you are not planning to play for at least a month store the battery in a warm and dry place not on concrete floor 7 Trouble Shooting Guide Symptom Action Caddy ...

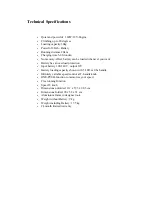
Страница 7: ...ry has an overload protection Input battery 100 240V output 12V Battery loading capacity shown with 5 LEDs at the handle Infinitely variable speed control at T handle knob ONE PUSH function to memorize your speed Free running function Speed 8 km h Dimensions unfolded 112 x 57 5 x 98 5 cm Dimensions folded 90 x 58 x 31 cm Aluminium frame in designer look Weight without Battery 9 kg Weight including...

Отзывы:

Похожие инструкции для 106E Pro