background image

9

>>>

GENERAL OPERATION

> EN

General operation

Maintenance and care

The unit is maintenance-free.
For proper care, a commercially available
cleansing fluid for electrical devices may
be applied using a soft damp cloth.

Your unit was designed and manufactured
with great care and should be treated with
equal care. You will enjoy your unit for a
long time to come if you observe the rec-
ommendations listed below:
• Protect your unit and the accessories 

from water and moisture. If your unit 
has been exposed to moisture, switch it 
off immediately and disconnect the 
power supply. Allow to dry at room 
temperature.

• Do not store and operate your unit in a 

dusty or dirty environment.

• Do not store your unit in hot environ-

ments. High temperatures can shorten 
the service life of electronic components 
in your unit, damage the rechargeable 
batteries and cause certain plastics to 
warp or melt.

• Do not store your unit in cold environ-

ments. During operation, when the 
unit warms up to operating tempera-
ture, moisture may form internally, 
causing damage to electronic compo-
nents.

• Do not drop your unit, protect it from 

shocks and do not shake it. Improper 
handling can damage components 
within the unit.

• Never use corrosive or aggressive chem-

icals, cleaning solutions or aggressive 
detergents for cleaning.

All the above information applies equally
to the unit, the rechargeable battery and
all accessories. Should one of these parts
not work properly, please contact your au-
thorised dealer.


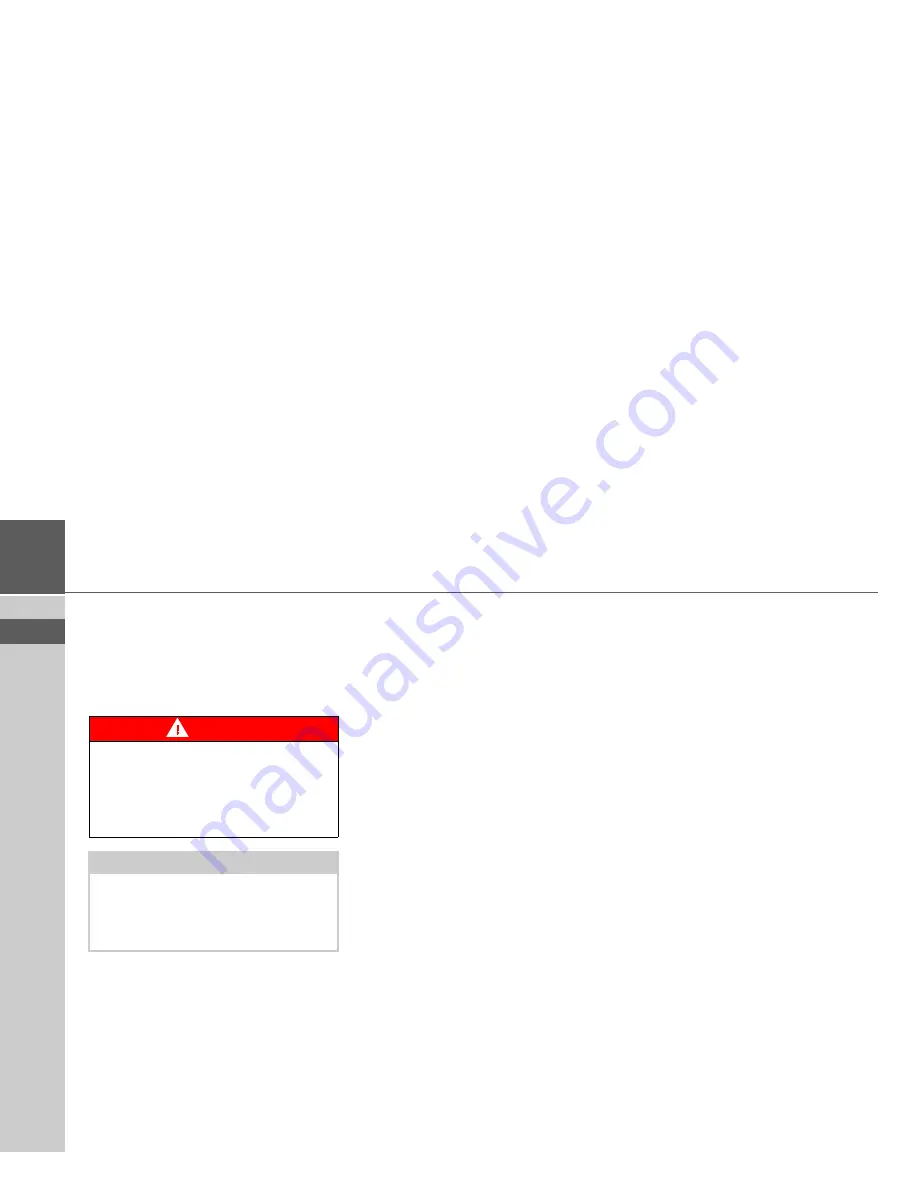
DANGER

Danger to life by electrocution. Always
switch off the unit and disconnect the
mains power supply unit before clean-
ing the unit, supplied components or ac-
cessories.

Note:

Do not use any aggressive or abrasive
substances or cloths which may damage
the surface.
The unit must not be exposed to water.

Содержание MAP PILOT

Страница 1: ...Operating guide Becker MAP PILOT en_OC_V2 5_A ...

Страница 2: ...T DANGER The warnings contain safety information regarding hazardous situations which if not avoided will result in death or seri ous injury WARNING These warnings contain safety informa tion regarding hazardous situations which if not avoided could result in death or serious injury CAUTION These warnings contain safety informa tion regarding hazardous situations which if not avoided could result ...

Страница 3: ...ting with existing destination 18 Displaying or editing a destination 18 Home address 19 Destination input 20 Structure of the destination input menu 20 Entering an address 20 Selecting a country 21 Selecting an address and starting route guid ance 21 Points of interest 26 POI nearby POI near destination 26 POI near address 27 Entering a POI directly 28 Entering a POI directly by phone number 28 S...

Страница 4: ...Pin protection 50 Map update reminder 51 Information 51 Factory reset 51 Glossary 52 Index 53 NOTICE 55 CE declaration of conformity 55 Disposal 56 Disposal of the battery 57 Duty to supply information according to bat tery legislation BattV 57 Removing the battery 57 The information and data contained in this document is subject to change with out notice No part of this document may be repro duce...

Страница 5: ...e driver Applicable traffic regulations must be observed at all times Destinations may only be input when the vehicle is stationary The unit may only be used for its intended purpose The volume of the navigational unit should be set so that noises outside the vehicle can still be heard The SD memory card can be removed Small children could swallow it Insufficient attention to the road traffic cont...

Страница 6: ...bility The unit should be switched off immediately if faults occur e g development of smoke or smells For safety reasons the unit may only be opened by a specialist Please refer to your dealer for repair Never open the unit with the exception of the battery compartment or the rechargeable battery Any modification to the unit is also impermissible and renders the type approval invalid Use only genu...

Страница 7: ...raffic announcements You will then be informed of any traffic problems The system plans an alternative route au tomatically or on request to avoid traffic problems depending on the setting Unpacking the Becker MAP PILOT Checking the delivery Before starting up the Becker MAP PILOT the delivery contents must be checked to ensure they are complete and in good order Carefully unpack the packaging con...

Страница 8: ... of the Becker MAP PILOT and any SD card can then be ad dressed via the PC like a removable stor age medium Map update Additional func tions The road network is constantly changing but having a fresh map ensures you have the wealth of information you need to find your destination with ease It is also possible that in the course of fur ther development of your device new functions will be available...

Страница 9: ...ou of any new updates and other news You can register online on the Becker homepage www beckermappilot com Repairs The unit must not be opened in the event of damage Please contact your dealer Emissions and disposal Information on emissions electromagnet ic compatibility and disposal can be found in NOTICE on page 55 ...

Страница 10: ...s in your unit damage the rechargeable batteries and cause certain plastics to warp or melt Do not store your unit in cold environ ments During operation when the unit warms up to operating tempera ture moisture may form internally causing damage to electronic compo nents Do not drop your unit protect it from shocks and do not shake it Improper handling can damage components within the unit Never ...

Страница 11: ...for it to be charged and discharged after 6 months of operation of your unit Commissioning Once the Becker MAP PILOT has been unpacked and checked to ensure it is free of damage the unit can be started up The battery is already deployed To avoid a premature discharge is the contact to the device interrupted by a slide Press the battery cover on the underside of the unit lightly and push the bat te...

Страница 12: ... now re move the Becker MAP PILOT from the holder When inserting the Becker MAP PILOT make shure that it is pushed until it stops Note Note that if the battery is completely dis charged it may take up to a minute be fore the Becker MAP PILOT can be activated again WARNING Risk of accident Do not remove or insert the Becker MAP PILOT while the vehicle is in mo tion Remove or insert the Becker MAP P...

Страница 13: ...his is done using the rotary control push button of the installed audio system Turn the rotary control push button to toggle between the various menu items This op erating manual describes the process of highlighting To select a menu item you must first turn the rotary control push button to high light the item and then press the rotary control push button Back function At all menu levels you can ...

Страница 14: ...ing sections In addition to the individual functions the main menu also contains further in formation and operating options The navigation satellites currently availa ble are shown in the bottom right corner If route guidance is already active the cur rent destination address is displayed in the bottom line To cancel route guidance push the rotary control push button downwards and then press the r...

Страница 15: ...ly appears Select the desired entry from the list using the rotary con trol push button Selecting from a list Once a few letters of the desired selection have been entered you can select your destination from the selection list In the input menu push the rotary con trol push button downwards Select the desired entry from the list us ing the rotary control push button The entry is accepted and the ...

Страница 16: ...de This means that on entry the first letter is automatically in upper case and subse quently changes automatically to lower case represents the entry of lower case letters Malfunctions Should there be a malfunction in the op erating system or in the unit they will be displayed accordingly You can even try to correct the malfunc tion Remove as described under Unit holder on page 11 the Becker MAP ...

Страница 17: ...llowing steps Connect the USB interface of the Becker MAP PILOT directly to the USB port of the computer using the USB cable provided After a short time the Becker MAP PILOT is displayed as a removable storage medium on the computer Installation should start automatically Follow the instructions of the software The Content Manager Becker MAP PILOT can be started immediately after installation This...

Страница 18: ...ed to determine your position your height above sea level can be calculated if signals are received from four or more sat ellites The Becker MAP PILOT determines the direction and distance from the desti nation using a navigation computer and a digital street map held in its internal memory For safety reasons route guidance is given predominantly in spoken form This is supported by a direction ind...

Страница 19: ...sired entry from the list us ing the rotary control push button to start route calculation The calculation begins When the calculation is complete the map appears and the route guidance be gins Displaying or editing a destination Any destination stored in the last destina tions can be displayed and edited Highlight the desired entry using the rotary control push button Push the rotary control push...

Страница 20: ...ion is given a name it is automatically protected Protect entry The destination is pro tected against automatic deletion This function is only available in the case of unprotected destina tions Remove protection Protection of the destina tion is disabled This function is only available for protected destina tions Move up Move down The destination is moved forward back by one po sition If the desti...

Страница 21: ...e lected and route guidance started using Enter point of interest See Points of interest on page 26 Select on map With Select on map you can select a destination directly on the map and start route guidance See Selecting a destination from the map on page 28 Enter geo coordinates The geographical coordinates for a des tination can be entered and route guid ance started via Enter geo coordinates Se...

Страница 22: ...ribed under POI near address on page 27 save the destination with name in the last destinations show the route on the map Selecting the street In the Street menu field the street and house number can be entered separately The Becker MAP PILOT excludes all impossible letter combinations and acti vates only those letters that could give an existing street name A house number can only be chosen once ...

Страница 23: ...ssible letter combinations and postal codes and activates only those letters and numbers that could give the name of an existing city or postal code Select the letters of the destination city or the numbers of the postal code con secutively When sufficient letters have been entered it will automatically switch to a list from which you can select the city However you can switch to the list before t...

Страница 24: ... However you can switch to the list before this by pushing the rotary control push button downwards You can then select the city from the list Selecting the intersection After entering the destination city and street you can enter an intersection so as to further limit the choice Select Intersection The input menu for the name of the inter section will appear Select the letters of the intersection...

Страница 25: ...map The route is calculated You can start the route guidance directly from this screen by selecting Start The other options on this screen are de scribed under Display Entire route on page 40 In addition to these described functions you can also display alternative routes Select Options und then select Alternative routes After a short time the alternative routes will be displayed The area on the r...

Страница 26: ...g route calculation If no navigation is active yet and the function for alternate route selection is switched on See Route options on page 45 you can have alternate routes calculated in the next menu Select alternate routes for the Calculate alternative routes Then select one of the displayed routes or Select Use route to select the displayed route The map display appears and the navigation begins...

Страница 27: ... POI menu appears You can choose between a point of interest nearby a point of interest near an address a point of interest near a destination entering a point of interest directly or a point of interst search by phone num ber POI nearby POI near destination In the POI menu select POI nearby for a POI nearby or In the POI menu select POI near destination for a POI near the destina tion Select one ...

Страница 28: ... the POI menu select POI near address Select the desired country Enter the city and if necessary the street in which you wish to search for a point of interest Press the Select category button The points of interest categories available for the entered city are displayed Select the desired point of interest as de scribed under POI nearby POI near destination on page 26 Note Push the rotary control...

Страница 29: ...h you can select the point of interest However you can switch to the list before this by pushing the rotary control push button downwards You can then select the point of interest from the list Select the desired destination from the list Select Start guidance to begin route guidance to the point of interest straight away Selecting a destination from the map You can select a destination straight f...

Страница 30: ...sing geographical coordinates Select Enter geo coordinates from the destination input menu Select to set the direction required for the geographic latitude From the numbers indicated by se lect the required numbers Select Enter the geographical longitude as de scribed earlier Where possible an address matching the coordinates will be displayed Select Start guidance to begin route guidance to the d...

Страница 31: ...you wish to edit Push the rotary control push button to the right By selecting Rename route you can give the route a new name By selecting Delete route you can delete the route from the stored routes Selecting and starting a route Select the required route from the route menu The route is loaded and displayed in the stage menu Select Calculate Select the start point or your current position as the...

Страница 32: ... last destinations Select Add stage to enter further stage destinations as described above When you have entered all stage desti nations select Save route Assign the route a name Editing a route Select the route you wish to edit Highlight the stage that you wish to ed it Push the rotary control push button to the right The edit menu will be displayed The fol lowing options are available Option Mea...

Страница 33: ... Once you have connected the Becker MAP PILOT to the unit holder your Becker MAP PILOT will receive up to date traffic announcements and dynamic route calculation will be enabled traffic jam diversion You can also view traffic announcements directly Settings for TMC can be made as de scribed under TMC settings on page 49 Select TMC from the main menu The message list appears Reading a message Sele...

Страница 34: ...er under TMC settings on page 49 Automatic recalculation If your route is affected by a traffic prob lem the Becker MAP PILOT checks whether a diversion to bypass the problem is feasible If a diversion is feasible a de tour is calculated and you are guided via the detour Manual recalculation If a traffic announcement affects your route a window with detailed informa tion on the traffic announcemen...

Страница 35: ...xam ple to receive warnings about exceeding the speed limit Calling up the map display The map display is called up automatical ly when you start route guidance Without route guidance you can call up the map display using the main menu or by pressing and holding down button L in the main menus Select Map from the main menu The map display will then appear and if GPS reception is available will sho...

Страница 36: ... Driver alerts Number of satellites currently being received Display of TMC status Vehicle position Current road or Traffic lane recommendation only appears on some multi lane roads green arrows recommended lanes Distance to next driving manoeuvre Next driving manoeuvre Estimated time of arrival remaining journey time and remaining distance to destination Your current position is displayed on the ...

Страница 37: ...mit on the road currently be ing driven on display not available for all roads Driver alerts Number of satellites currently being received Display of TMC status Vehicle position Current road or Traffic lane recommendation only appears on some multi lane roads green arrows recommended lanes Distance to next driving manoeuvre Progress bar to illustrate the distance to the next driving manoeuvre Next...

Страница 38: ...e map at any time during route guid ance by turning the rotary control push button The Autozoom function is then disabled until the next maneuver is reached or for the duration of 60 seconds The current map scale is shown in the bottom right of the map display Map Toolbox You can set preferences for navigation the map display style and the route in the Map Toolbox Press rotary control push button ...

Страница 39: ...e menu select Delete stopover The stopover is deleted The route is recalculated TMC on your route You can view and process TMC messages that appear on your route In the route menu select TMC on route TMC messages that appear during your route are displayed After selecting a message you can decide for example whether or not you would like to be redirected around the traffic obstacle View the descri...

Страница 40: ... The next POIs in all three categories are displayed The mileage kilometre display indicates the distance to the POI In the left area the POIs are displayed on the map After selecting a POI navigation to that destination can start Set categories Select More Select Select POI categories Then select the desired categories Nearby all POIs Select More Select Search POI on route or Select Search POI ne...

Страница 41: ...outes that can be selected in Route options and select one if desired In the route menu select Show route The entire route is displayed In the left area you can see the remaining section and the expected trip time The destination address is displayed in the lower area Select Resume in order to continue with the destination navigation Display route list You can have the route displayed on a list Wh...

Страница 42: ...ur calculation will be attempted In the route menu select Block ahead By turning the rotary control push button you can select the starting point of the block Press the rotary control push button to confirm the starting point By turning the rotary control push button you can now select the end point of the block Press the rotary control push button to confirm the end point Select Yes to activate t...

Страница 43: ...n to the next destination starts Display destination list If a planned route with several destinations is active you can view and modify the planned route In the route menu select Itinerary A map with the stages of the route is displayed In the left area the total number of miles kilometres and the expected trip time is displayed Select Resume to continue with the destination navigation or select ...

Страница 44: ...or Turn By Turn as your primary display Select 2D or 3D as the map display style With the 3D display by selecting 3D Objects you can select whether you would like to see 3D attractions or not At the same time the building display is turned on off With the 2D display by selecting Heading up you can select whether you would like the map displayed facing the trip direction or facing North With Autozo...

Страница 45: ...control push button towards the right You can save the actual position of the last targets by selecting Save GPS reception information is displayed by selecting GPS Info You can see how many satellites can be linked to and if satellite reception is sufficient for navigation The current time and geolocation is also displayed Repeat announcement During navigation you can pull up the current announce...

Страница 46: ...idance settings The route guidance settings are displayed Route options You can set your driving profile The set tings made here have an effect on the route selection and on the calculation of the estimated journey times Select Route options in the route guid ance settings With select your mode of travel Unhurried Normal and Sporting This setting influences the calculation of your estimated time o...

Страница 47: ...he L button Realistic intersection displays When active and if available realistic views of current lane conditions at motorway intersections exits and tunnels will be displayed Select Reality view in the route guid ance settings Switch the function on or off Signposts When this function is enabled you will receive information if available at mo torway intersections and other roads re garding the ...

Страница 48: ...et name announcements on or off Select between All manoeuvre information and Short manoeuvre information in order to set the level of detail for turn off information Map settings The map settings contain the settings that are relevant to the map display In the settings menu select Map settings The map settings are displayed Autozoom You can select how the map changes when approaching an action poi...

Страница 49: ...mits are displayed in parallel to the navigation You can also receive an audible warning about exceeding the speed limit Select Speed limits in the map settings Switch the speed limits on or off with Speed limits After selecting Advanced you can specify whether speed limits are only to be dis played if the limit is exceeded or always displayed You can also set the minimum speed at which you would ...

Страница 50: ...decide which categories of alerts should be displayed TMC settings You can make settings for the reception and processing of TMC traffic announce ments In the settings menu select TMC settings With select whether traffic an nouncements are to be taken into ac count Automatically Manually or TMC off Select Advanced to make additional settings With specify whether new TMC messages are to be read out...

Страница 51: ...ction You can create a freely definable security code of between 4 and 10 digits in length and enable disable this security code Select PIN protection in the system set tings Select Enable PIN to enable a security code Enter the desired security code and con firm your entry with Enter the security code again and con firm your entry with The security code is now enabled Select Disable PIN to disabl...

Страница 52: ... system set tings The information display appears Always quote these details in enquiries to the service Map data versions displays information relating to the installed map data Factory reset You can reset your Becker MAP PILOT to the factory settings All settings apart from the language are re set to their factory settings The last desti nations and your home address are also deleted Select Fact...

Страница 53: ...ess can be spoken The address is then processed by the navigati on system SD card Secure Digital The SD card was developed in 2001 by SanDisk and is based on the older MMC standard An SD card is a rewriteable re movable memory card TMC Traffic Message Channel Traffic announcements transmitted by most FM stations via RDS Basis for dy namic navigation TMCpro Traffic Message Channel Professional A fr...

Страница 54: ...ute 24 E Economical route 45 Entering a city 22 23 Entering an address 21 F Fast access mode 18 Fast route 45 Ferries 46 G Geographical coordinates 29 GMT 52 GPS 52 GPS Reception 44 H Home address 19 House number 24 I Input lock 14 Intended use 4 Intersection 23 L Last destinations 18 M Main menu 13 Map Displaying 34 Zooming in 37 Zooming out 37 Map display 34 Map settings 47 Memory card 12 Motorw...

Страница 55: ... information 4 Safety instructions 17 Satellites 44 SD card 12 Selecting a city 22 23 Selecting a country 21 Selecting a destination Entering an address 21 Selecting the street 21 Set map display 43 Settings Map 47 Route guidance 45 System 50 TMC 49 Short route 46 Stop Navigation 43 System settings 50 T TMC 32 on your route 38 Recalculating routes 33 TMC settings 49 Toll roads 46 U USB 52 ...

Страница 56: ...prevented The EC type approval mark E13 issued by the Luxembourg s vehicle licensing au thority in accordance with European Directive ECE R10 governing the EMC of mo tor vehicles in its current version authorises installation and operation of the unit in motor vehicles classes L M N and O CE declaration of conformity Harman Becker Automotive Systems GmbH declares herewith that the Becker MAP PILOT...

Страница 57: ...ommunal collecting points or recycling centres for processing and salvage of materials The units will be accepted there free of charge The proper disposal of this product helps protect the environment and prevents harmful ef fects on humans and the environment which could result from improper handling More detailed information on the nearest collecting point or the nearest recycling centre can be ...

Страница 58: ...urn It is the duty of retail outlets and manufacturers to take back these batteries free of charge and to correctly recycle them or to dispose of them as hazardous waste statutory obligation to take back If you wish to return your batteries to us please send them with adequate postage to the following address Harman Becker Automotive Systems GmbH Battery recycling Becker Göring Str 16 D 76307 Karl...

Страница 59: ...Press the battery cover on the underside of the unit lightly and push the battery cover in the direction of the arrow Lift the battery by the tab Remove the battery Note Do not reconnect a unit that you have opened to the power supply 1 2 3 1 2 3 2 ...

Отзывы: