background image

Digital Video Baby Monitor 

EN

12


When the parent unit A

3

 is turned on, the following symbols will be shown in the upper part 

of the screen C

1

.

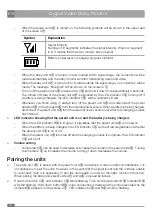
Symbol

Explanation

Signal intensity
Number of lit segments indicates the signal intensity. When no segment 
is lit, it means that the baby monitor has no signal.

Battery power level or charging progress indicator


When the baby unit A

1

 is turned on and located within signal range, the connection will be 

made automatically and the baby monitor will start transmitting audio and video.


When the baby unit A

1

 is turned off or located outside the signal range, no connection will be 

made. The message "No signal" will be shown on the screen C

1

.


To turn off the parent unit A

3

, press button C

5

 and hold it down for approximately 3 seconds. 

The turned off state of the parent unit A

3

 is signalled by the LED indicator C

3

 turning off. If 

a battery is being charged, the LED indicator C

3

 will be constantly lit red.


Whenever you finish using it, always turn off the parent unit A

3

 and disconnect the power 

adapter A

5

 or the charger A

6

 from the external power source. When a battery is being charged, 

disconnect the parent unit A

3

 from the external power source only after the charging process 

has finished.


LED indicator showing that the parent unit is on and the battery is being charged.


When the LED indicator B

3

 is lit green, it signalises that the parent unit A

3

 is turned on.


When the battery is being charged, the LED indicator C

3

 will be lit red irregardless of whether 

the parent unit A

3

 is on or off. 


When the parent unit A

3

 is turned off and the charging process is complete, the LED indicator 

C

3

 will be off.


Volume setting


Volume dial C

4

 can be used to decrease or increase the volume on the parent unit A

3

. Turning 

volume dial C

4

 up increases the volume, turning it down decreases the volume.

Pairing the units


The baby unit A

1

 is paired with the parent unit A

2

 in advance. Under normal circumstances, it is 

not necessary to pair the units. However, in the event that the signal is lost and the units are unable 
to reconnect, then it is necessary to pair the units again in order for the baby monitor to function. 
When pairing the baby and parent units A

1

 and A

3

, proceed as follows.


Hold down button C

5

, until indicator C

3

 starts flashing. Then hold down button B

6

. Indicator B

4


will start flashing. Hold down button B

6

 until a connection is made and the picture recorded by the 

camera B

3

 appears on the screen C

1

. LED indicators C

3

 and B

4

 will stop flashing.

Содержание BBM 7030

Страница 1: ...ption of the holder of the parent unit 8 Installation location and installation of the baby monitor 9 Power source 10 Using the baby monitor and its functions 11 Pairing the units 12 General informati...

Страница 2: ...s quality transmission up to a distance of 250 m in an open environment The baby monitor will inform you about interference or when the signal range is exceeded The encrypted wireless transmission and...

Страница 3: ...e only intended for powering this baby monitor Do not use it to power other appliances Never use the baby monitor with accessories that are not approved by the manufacturer Before connecting the power...

Страница 4: ...charging it and before cleaning it Do not disconnect the power adapter or the charger from the power source by pulling on the power cord This could damage the power cord or the socket Disconnect the a...

Страница 5: ...ital Video Baby Monitor EN Description of the accessories A 1 2 6 5 3 4 1 Baby unit 2 Baby unit holder with suction cup 3 Parent unit 4 Parent unit holder with suction cup 5 Power adapter 6 12V car ch...

Страница 6: ...D indicator showing that the baby unit is on and the battery is being charged 5 Microphone 6 Button for turning the baby unit on and off pairing button 7 Jack for connecting the power adapter connecto...

Страница 7: ...or car charger 3 LED indicator showing that the parent unit is on and the battery is being charged 4 Volume control dial 5 Button for turning the parent unit on and off pairing button 6 Holes for att...

Страница 8: ...g the baby unit 5 Clip for attaching or releasing the suction cup 6 Lip for removing the suction cup Description of the holder of the parent unit E 1 2 3 4 5 6 7 1 Lock screw of the swivel arm 2 Tilt...

Страница 9: ...e the suction cup D3 against a suitable surface and secure clip D5 This will attach the holder A2 Before connecting the baby unit A1 to the holder A2 make sure that the suction cup D3 has properly adh...

Страница 10: ...al power source Connect the plug on the power adapter A5 or the charger A6 to a corresponding power source Attention Before connecting the power adapter A5 to a power socket make sure the voltage stat...

Страница 11: ...you finish using it always turn off the baby unit A1 and disconnect the power adapter A5 or the charger A6 from the external power source When a battery is being charged disconnect the baby unit A1 fr...

Страница 12: ...rent unit A3 from the external power source only after the charging process has finished LED indicator showing that the parent unit is on and the battery is being charged When the LED indicator B3 is...

Страница 13: ...direction such as furniture interior and exterior walls of buildings trees etc weather events such as fog rain etc Troubleshooting Problem Solution No picture Check that the parent unit A3 is located...

Страница 14: ...one way communication Display type and size 3 5 LCD Voltage and power input 5 V 1 A Power source power adapter JF005WR 0500100VH input 100 240 V 50 60 Hz 0 18 A output 5 V 1 A or supplied 12V car char...

Страница 15: ...pose of electric or electronic appliances ask your retailer or supplier for the necessary information Disposal in other countries outside the European Union This symbol is valid in the European Union...

Отзывы: