

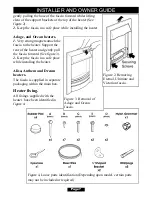
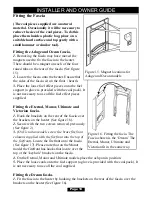


The heater must be fixed into position to prevent it from being tipped over
The following fixing options are available:
Screw Fixing
Wire Fixing
Spacer Frame
(As supplied with Adage(Not Adage blue), Alisa, Anthem,
Eternal and Victorian heaters or available as an optional extra for the Adage blue,
Manor, Ocean and Ultimate models).
If fitting the heater into a fireplace or surround opening, try the heater in the opening to
ensure that it will fit.
If fitting the heater onto a decorative hearth surface such as marble or tile it is advisable
to protect the hearth surface. Do not drag the heater across the surface of the hearth as
this may scratch the hearth surface.
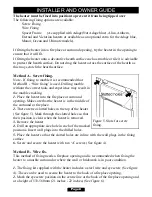
Method A - Screw fixing.
Note - If fixing to marble it is recommended that
Method B - ‘Wire fixing’ is used. Drilling marble
without the correct tools and experience may result in
the marble cracking.
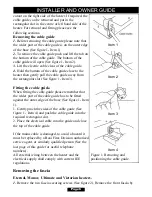
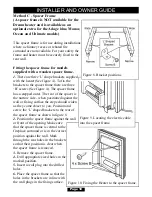
1.
Place the heater into the fireplace or surround
opening
.
Make sure that the heater is in the middle of
the surround or fireplace.
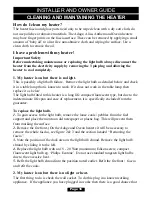
2.
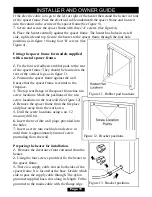
There are two slotted holes in the top of the heater
(See figure 5). Mark through the slotted holes so that
their position is clear when the heater is removed.
3.
Remove the heater
4.
Drill an appropriate size hole in each of the marked
positions. Insert wall plugs into the drilled holes.
5.
Place the heater so that the slotted holes are in line with the wall plugs in the fixing
surface.
6.
Screw and secure the heater with two ‘A’ screws (See figure 4).
Method B - Wire fix.
This method of fixing needs a fireplace opening and is recommended when fixing the
heater to a marble surround or where the wall or brickwork is in poor condition.
1.
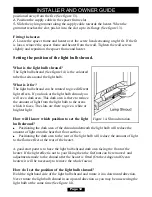
The fixing kit supplied with the heater includes a steel wire and eyescrew (See figure
4). These can be used to secure the heater to the back of a fireplace opening.
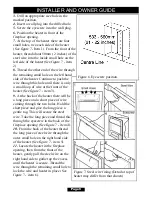
2.
Mark the eyescrew position on the centre line at the back of the fireplace opening and
at a height of 533-560mm (21 inches - 22 inches) (See figure 6).
Page 8
INSTALLER AND OWNER GUIDE
Figure 5. Slots for screw
fixing.