background image

1. SELECT THE LANGUAGE

You will need to set the language and the time 

when you switch on the appliance for the first 

time. ENGLISH will scroll along the display. Turn the 

adjustment knob

 to scroll through the list of available 

languages and select the one you require.

Press the 

selection/confirmation button

 to confirm 

your selection.

Please note: The language can subsequently be changed 

from the “Settings” menu.

2.

SET THE TIME

After selecting the language, you will need to set the 

current time: The two digits for the hour will flash on 

the display 

Turn the 

adjustment knob

 to set the correct hour and 

press the 

selection/confirmation button

: the minutes 

will flash on the display.

FIRST TIME

Turn the 

adjustment knob

 to set the minutes and press 

the 

selection/confirmation button

 to confirm 

Please note: You may need to set the time again following 

lengthy power outages.

3.

HEAT THE OVEN

A new oven may release odours that have been left 

behind during manufacturing: This is completely 

normal. Before starting to cook food, we therefore 

recommend heating the oven with it empty in order 

to remove any possible odours.

Remove any protective cardboard or transparent 

film from the oven and remove any accessories from 

inside it.

Heat the oven to 200 °C for around one hour, ideally 

using a function with air circulation (e.g. “Forced Air” 

or “Convection Bake”).

Follow the instructions for setting the function 

correctly.  

Please note: It is advisable to air the room after using the 

appliance for the first time.

3.

SET THE POWER CONSUMPTION

The oven is programmed to consume a level of

electrical power that is compatible with a domestic

network that has a rating of more than 3 kW: If your

household uses a lower power, you will need to

decrease this value.
Turn the selection knob until “SETTINGS” is shown on 

the display, then press 

 to confirm.

Turn the adjustment knob to select the “POWER” 

menu item and press 

 to confirm.

POWER

Turn the 

adjustment knob

 to select “Low” and press 

 to confirm.

LOw

Содержание HIR4 EP8V2 PT

Страница 1: ...element nicht sichtbar OFENBEDIENELEMENTE 1 AUSWAHLKNOPF Zum Einschalten des Ofens durch Funktionsauswahl Auf drehen um den Ofen auszuschalten 2 DISPLAY 3 WAHL BESTÄTIGUNGSTASTE Zum Bestätigen einer ausgewählten Funktion oder der Einstellung eines Wertes Bitte beachten Auf dem Display erscheint für die Einstellungen dieser Taste 4 EINSTELLKNOPF Zum Blättern durch die Menüs und zum Einsetzen oder Ä...

Страница 2: ... Für weitere Informationen die Gebrauchsanleitung auf docs bauknecht eu runterladen ROST FETTPFANNE BACKBLECH BACKAUSZÜGE FALLS VORHANDEN Die Anzahl und Art der Zubehörteile kann je nach gekauftem Modell variieren Nicht mitgelieferte Zubehörteile sind separat über den Kundendienst erhältlich ANBRINGEN DER BACKAUSZÜGE NUR BEI BESTIMMTEN MODELLEN Bitte beachten Die Backauszüge befinden sich mögliche...

Страница 3: ...ist und das kürzere Programm wenn die Funktion regelmäßig verwendet wird SCHNELLES VORHEIZEN Zum schnellen Vorheizen des Ofens Die Funktion wird als Bezug für die Energieeffizienzerklärung in Übereinstimmung mit der Verordnung EU Nr 65 2014 verwendet OFF Zum Ausschalten des Ofens LAMPEN Zum Ein Ausschalten der Ofenbeleuchtung SPEZIALFUNKTIONEN AUFTA AUFTAUEN Zur Beschleunigung des Auftauens von Sp...

Страница 4: ...chtig Stellen Sie vor dem Einschalten dieser Funktion einen Topf auf die entsprechende Kochzone um die Oberfläche des Kochfelds nicht zu beschädigen Die für diese Funktion angegebenen Leistungswerte werden für alle Glaskeramik Kochfelder garantiert Um die Funktion zu wählen stellen Sie einen Topf auf die gewählte Kochzone und drehen Sie den Bedienknopf auf Zum Abschalten der Funktion brauchen Sie ...

Страница 5: ...ENS Ein neuer Ofen kann Gerüche freisetzen die bei der Herstellung zurückgeblieben sind Das ist ganz normal Vor dem Garen von Speisen wird daher empfohlen den Ofen in leerem Zustand aufzuheizen um mögliche Gerüche zu entfernen Schutzkarton und Klarsichtfolie aus dem Ofen entfernen und die Zubehörteile entnehmen Den Ofen für ungefähr eine Stunde auf 200 C aufheizen ideal ist die Verwendung einer Fu...

Страница 6: ...gen und die Funktion zu aktivieren In diesem Fall kann kein Garzeitende durch Programmierung einer Startverzögerung eingestellt werden TURBO EINSTELLEN DES GARZEITENDES STARTVERZÖGERUNG Bei vielen Funktionen kann der Start der Funktion nach Einstellung der Garzeit verzögert werden indem ihr Garzeitende programmiert wird Das Display zeigt das eingestellte aktuelle Garzeitende an und das Symbol blin...

Страница 7: ...rzeit durch Einstellen einer neuen Dauer zu verlängern ANBRÄUNEN Mit einigen Funktionen des Ofens kann die Oberfläche der Speise durch Aktivierung des Grills nach Beendigung des Garvorgangs gebräunt werden OK F Wenn das Display die entsprechende Nachricht anzeigt bei Bedarf die Auswahl Bestätigungstaste drücken um einen fünfminütigen Bräunungszyklus zu starten Sie können die Funktion jederzeit bee...

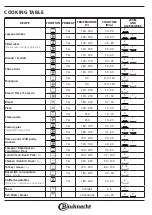
Страница 8: ... 1 Brot Ja 180 220 30 50 2 Pizza Ja 220 250 15 30 2 Tiefkühlpizza Ja 250 10 15 2 Ja 250 10 20 3 1 Herzhaftes Gebäck Gemüsetorte Quiche Ja 180 190 35 45 2 Ja 180 190 45 60 3 2 Blätterteigtörtchen Herzhaftes Blätterteiggebäck Ja 190 200 20 30 2 Ja 180 190 20 40 3 1 Lasagne überbackene Pasta Cannelloni Aufläufe Ja 190 200 45 65 2 Lamm Kalb Rind Schwein 1 kg Ja 190 200 70 100 2 Hähnchen Kaninchen Ente...

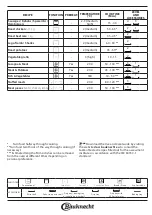
Страница 9: ...INSCHUBEBENE UND ZUBEHÖRTEILE Würstchen Fleischspieße Rippchen Hamburger 2 3 Mittel Hoch 15 40 4 3 Brathähnchen 1 1 3 kg 2 Mittel 50 65 2 1 Roastbeef englisch 1 kg 2 Mittel 35 45 2 Lammkeule Schweinshaxe 2 Mittel 60 90 2 Bratkartoffeln 2 Mittel 45 55 2 Gemüsegratin 3 hoch 10 15 2 Lasagne Fleisch Ja 200 50 100 3 1 Fleisch Kartoffeln Ja 200 45 100 3 1 Fisch Gemüse Ja 180 30 50 3 1 Gefüllte Braten EC...

Страница 10: ... dann mit einer Spülbürste oder einem Schwamm entfernt werden Vor dem Ausführen beliebiger Wartungs oder Reinigungsarbeiten sicherstellen dass der Ofen abgekühlt ist Verwenden Sie keine Dampfreiniger Keine Stahlwolle Scheuermittel oder aggressive ätzende Reinigungsmittel verwenden da diese die Flächen des Gerätes beschädigen können Schutzhandschuhe tragen Vor dem Ausführen beliebiger Wartungsarbei...

Страница 11: ...inden 5 Versuchen die Tür zu schließen und sicherstellen dass sie auf das Bedienfeld ausgerichtet ist Ist dies nicht der Fall die oben aufgeführten Schritte wiederholen Die Tür könnte beschädigt werden wenn dies nicht richtig funktioniert LÖSEN VON PROBLEMEN WWW Problem Mögliche Ursache Abhilfemaßnahme Der Ofen funktioniert nicht Stromausfall Trennung von der Stromversorgung Überprüfen ob das Stro...

Страница 12: ...werden aber es ist zu berücksichtigen dass sich die Garzeiten dadurch etwas verlängern GLEICHZEITIGES GAREN VERSCHIEDENER SPEISEN Bei der Verwendung der Funktion Heißluft lassen sich verschiedene Speisen welche die gleiche Gartemperatur erfordern z B Fisch und Gemüse auf verschiedenen Einschubebenen gleichzeitig garen Die Speise mit kürzerer Garzeit aus dem Ofen nehmen und die Speisen mit längerer...

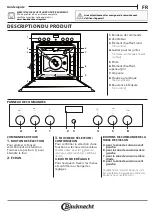
Страница 13: ...ottom heating element non visible OVEN CONTROLS 1 SELECTION KNOB For switching the oven on by selecting a function Turn to the position to switch the oven off 2 DISPLAY 3 SELECTION CONFIRMATION BUTTON For confirming a selected function or a set value Please note the display shows for indications regarding this button 4 ADJUSTMENT KNOB For scrolling through the menus and applying or changing settin...

Страница 14: ...W Download the Use and Care Guide from docs bauknecht eu for more information WIRE SHELF DRIP TRAY BAKING TRAY SLIDING RUNNERS IF PRESENT The number and the type of accessories may vary depending on which model is purchased Other accessories that are not supplied can be purchased separately from the After sales Service FITTING THE SLIDING RUNNERS ONLY IN SOME MODELS Please note The sliding runners...

Страница 15: ...n case of a very dirty oven and the shorter cycle if the function is used at regular intervals FAST PREHEATING For preheating the oven quickly Function used as reference for the energy efficiency declaration in accordance with Regulation EU No 65 2014 OFF For switching off the oven LIGHT To switch the oven light on off SPECIAL FUNCTIONS DEFRO DEFROST To speed up defrosting of food WARM WARM KEEPIN...

Страница 16: ... sure the pot is positioned on the selected hotplate in order to avoid any damage to the cooktop surface The stated performance values for this function are those guaranteed for all glass ceramic cooktops For this function place the pot on the selected hotplate and turn the knob to To deselect change the position of the knob MULTIZONE The multizone symbol featured on the knobs can only be switched...

Страница 17: ... A new oven may release odours that have been left behind during manufacturing This is completely normal Before starting to cook food we therefore recommend heating the oven with it empty in order to remove any possible odours Remove any protective cardboard or transparent film from the oven and remove any accessories from inside it Heat the oven to 200 C for around one hour ideally using a functi...

Страница 18: ...tion In this case you cannot set the end cooking time by programming a delayed start TURBO SETTING THE END COOKING TIME DELAYED START In many functions once you have set a cooking time you can delay starting the function by programming its end time The display shows the current end time that is set and the icon flashes Turn the adjustment knob to set the time you want cooking to end then press the...

Страница 19: ...b to extend the cooking time by setting a new duration BROWNING Some functions of the oven enable you to brown the surface of the food by activating the grill once cooking is complete PRESS When the display shows the relevant message if required press the selection confirmation button to start a five minute browning cycle You can stop the function at any time by turning the selection knob to to sw...

Страница 20: ...50 25 50 3 1 Bread Yes 180 220 30 50 2 Pizza Yes 220 250 15 30 2 Frozen pizza Yes 250 10 15 2 Yes 250 10 20 3 1 Savoury pies vegetable pie quiche Yes 180 190 35 45 2 Yes 180 190 45 60 3 2 Vols au vent Puff pastry crackers Yes 190 200 20 30 2 Yes 180 190 20 40 3 1 Lasagne Baked pasta Cannelloni Flans Yes 190 200 45 65 2 Lamb Veal Beef Pork 1 kg Yes 190 200 70 100 2 Chicken Rabbit Duck 1 kg Yes 200 ...

Страница 21: ...ESSORIES Sausages Kebabs Spare ribs Hamburgers 2 3 medium high 15 40 4 3 Roast chicken 1 1 3 kg 2 medium 50 65 2 1 Roast beef rare 1 kg 2 medium 35 45 2 Leg of lamb Shanks 2 medium 60 90 2 Roast potatoes 2 medium 45 55 2 Vegetable gratin 3 high 10 15 2 Lasagna Meat Yes 200 50 100 3 1 Meat Potatoes Yes 200 45 100 3 1 Fish Vegetebles Yes 180 30 50 3 1 Stuffed roasts ECO F 200 80 120 3 Meat pieces ra...

Страница 22: ...ved using a washing up brush or a sponge Make sure that the oven has cooled down before carrying out any maintenance or cleaning Do not use steam cleaners Do not use wire wool abrasive scourers or abrasive corrosive cleaning agents as these could damage the surfaces of the appliance Wear protective gloves The oven must be disconnected from the mains before carrying out any kind of maintenance work...

Страница 23: ...n the correct position 5 Try closing the door and check to make sure that it lines up with the control panel If it does not repeat the steps above The door could become damaged if it does not work properly TROUBLESHOOTING WWW Problem Possible cause Solution The oven is not working Power cut Disconnection from the mains Check for the presence of mains electrical power and whether the oven is connec...

Страница 24: ...ger COOKING DIFFERENT FOODS AT THE SAME TIME Using the Forced Air function you can cook different foods which require the same cooking temperature at the same time for example fish and vegetables using different shelves Remove the food which requires a shorter cooking time and leave the food which requires a longer cooking time in the oven USEFUL TIPS WWW Download the Use and Care Guide from docs ...

Страница 25: ...DU FOUR 1 BOUTON DE SÉLECTION Pour allumer le four en sélectionnant une fonction Tournez à la position pour éteindre le four 2 ÉCRAN 3 TOUCHE DE SÉLECTION CONFIRMATION Pour confirmer la sélection d une fonction ou le choix d une valeur Veuillez noter pour les indications relatives à cette touche s affiche à l écran 4 BOUTON DE RÉGLAGE Pour naviguer à travers les menus et confirmer ou changer les r...

Страница 26: ...téléchargez le Guide d utilisation et d entretien sur docs bauknecht eu GRILLE MÉTALLIQUE LÈCHEFRITE PLAQUE DE CUISSON GRILLES COULISSANTES SELON LE MODÈLE Le nombre et type d accessoires peuvent varier selon le modèle acheté Pour les accessoires qui ne sont pas fournis il est possible de les acheter séparément auprès du Service Après Vente INSTALLER LES GRILLES COULISSANTES UNIQUEMENT SUR CERTAIN...

Страница 27: ...éguliers PRÉCHAUFFAGE RAPIDE Pour préchauffer le four rapidement Fonction utilisée comme référence pour la déclaration d efficacité énergétique conformément au Règlement UE n 65 2014 OFF Pour éteindre le four ÉCLAIRAGE Pour allumer éteindre la lumière du four FONCTIONS SPÉCIALES DECON DÉCONGÉLATION Pour accélérer la décongélation des aliments MAINT MAINTIEN AU CHAUD Pour conserver les aliments cui...

Страница 28: ...z déjà commencé à cuisiner Important Veillez à placer l ustensile de cuisson sur la zone de cuisson avant d activer la fonction Ébullition rapide À défaut vous risqueriez d endommager la surface vitrocéramique Les performances spécifiées pour la fonction Ébullition rapide sont garanties pour tous les types de tables de cuisson vitrocéramiques Pour activer la fonction placez la cocotte sur la zone ...

Страница 29: ...ur peut dégager des odeurs provenant de la fabrication Ceci est parfaitement normal Avant de cuire des aliments nous vous conseillons de chauffer le four à vide pour éliminer les odeurs Enlevez les cartons de protection ou les pellicules transparentes du four et enlevez les accessoires qui se trouvent à l intérieur Chauffer le four à 200 C pour environ une heure de préférence utilisant une fonctio...

Страница 30: ... pas régler la fin de la cuisson en programmant un départ différé TURBO RÉGLAGE DE L HEURE DE FIN DE CUISSON DÉPART DIFFÉRÉ Pour plusieurs fonctions une fois que vous avez réglé le temps de cuisson vous pouvez retarder le démarrage de la fonction en programmant l heure de fin de cuisson L écran affiche l heure de fin de cuisson qui a été réglé et le voyant clignote Tournez le bouton de réglage pou...

Страница 31: ... durée BRUNISSAGE Certaines fonctions du four vous permettent de dorer la surface des aliments en allumant le gril une fois la cuisson terminée OK PO Lorsque l écran affiche le message pertinent au besoin appuyez sur la touche de sélection confirmation pour démarrer un cycle de brunissage de cinq minutes Vous pouvez arrêter la fonction à tout moment en tournant le bouton de sélection pour éteindre...

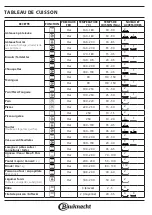
Страница 32: ...250 15 50 2 Oui 190 250 25 50 3 1 Pain Oui 180 220 30 50 2 Pizzas Oui 220 250 15 30 2 Pizza surgelée Oui 250 10 15 2 Oui 250 10 20 3 1 Tourtes tourte aux légumes quiche Oui 180 190 35 45 2 Oui 180 190 45 60 3 2 Vol au vent Feuilletés Oui 190 200 20 30 2 Oui 180 190 20 40 3 1 Lasagnes pâtes cuites cannellonis tartes Oui 190 200 45 65 2 Agneau Veau Bœuf Porc 1 kg Oui 190 200 70 100 2 Poulet Lapin Ca...

Страница 33: ...rgers 2 3 moyenne élevée 15 40 4 3 Poulet rôti 1 1 3 kg 2 moyenne 50 65 2 1 Rosbif saignant 1 kg 2 moyenne 35 45 2 Cuisse d agneau Jarrets 2 moyenne 60 90 2 Pom terre rôties 2 moyenne 45 55 2 Gratin de légumes 3 élevée 10 15 2 Lasagnes Viandes Oui 200 50 100 3 1 Viandes Pommes de terre Oui 200 45 100 3 1 Poisson légumes Oui 180 30 50 3 1 Rôtis de viande farcis ECO C 200 80 120 3 Morceaux de viande...

Страница 34: ...ver les résidus d aliments Assurez vous que l appareil est froid avant de le nettoyer ou d effectuer des travaux d entretien N utilisez pas de nettoyeur à vapeur N utilisez pas de laine d acier de tampons à récurer abrasifs ou des détergents abrasifs ou corrosifs ils pourraient endommager les surfaces de l appareil Utilisez des gants de protection L appareil doit être débranché de l alimentation p...

Страница 35: ...oquets sont bien placés 5 Essayez de fermer la porte et assurez vous qu elle est alignée avec le panneau de commande Sinon répétez les étapes précédentes La porte pourrait s endommager si elle ne fonctionne pas correctement GUIDE DE DÉPANNAGE WWW Problème Cause possible Solution Le four ne fonctionne pas Coupure de courant Débranchez de l alimentation principale Assurez vous qu il n y a pas de pan...

Страница 36: ...ent plus longs CUISSON D ALIMENTS DIFFÉRENTS EN MÊME TEMPS La fonction Chaleur pulsée permet de cuire simultanément plusieurs aliments nécessitant la même température de cuisson par exemple poisson et légumes sur différentes grilles Enlevez les aliments qui demandent moins de cuisson et laissez dans le four les aliments qui ont besoin de plus de cuisson CONSEILS UTILES WWW Pour plus d information ...

Страница 37: ...niet zichtbaar BEDIENINGSELEMENTEN OVEN 1 SELECTIEKNOP Om de oven in te schakelen door het selecteren van een functie Op stand zetten om de oven uit te schakelen 2 DISPLAY 3 SELECTIE BEVESTIGINGSTOETS Om een geselecteerde functie of een ingestelde waarde te bevestigen Let op op het display verschijnt voor aanwijzingen met betrekking tot deze toets 4 INSTELKNOP Om door de menu s te bladeren en inst...

Страница 38: ...WWW Download voor meer informatie de Gids voor Gebruik en Onderhoud op docs bauknecht eu ROOSTER OPVANGBAK BAKPLAAT SCHUIFRAILS INDIEN AANWEZIG Het aantal en type van accessoires is afhankelijk van het model dat u aangekocht hebt Bij de Whirlpool Consumentenservice kunt u apart andere niet bijgeleverde accessoires aanschaffen DE SCHUIFRAILS AANBRENGEN ALLEEN BIJ BEPAALDE MODELLEN Let op De schuifr...

Страница 39: ...uikt SNEL VOORVERWARMEN Om de oven snel voor te verwarmen Functie gebruikt als referentie voor de verklaring van energie efficiëntie in overeenstemming met Verordening EU nr 65 2014 OFF Om de oven uit te schakelen LAMPJE Om het ovenlampje in uit te schakelen SPECIALE FUNCTIES ONTDO ONTDOOIEN Voor het versnellen van het ontdooien van voedsel WARMH WARMHOUDEN Voor het warm en krokant houden van zoju...

Страница 40: ...angrijk Zorg er alvorens deze functie te selecteren voor dat de pan op de geselecteerde kookzone is geplaatst om beschadiging van de kookplaat te voorkomen De gespecificeerde prestatiewaarden voor deze functie worden gegarandeerd voor alle glaskeramische kookplaten Om deze functie in te schakelen zet u de pan eerst op de geselecteerde kookzone en draait u de knop vervolgens op De functie wordt uit...

Страница 41: ...n achtergebleven Dit is volkomen normaal Voordat u begint met het bereiden van voedsel raden we daarom aan om de lege oven te verwarmen om alle mogelijke geuren te verwijderen Verwijder alle beschermende karton of transparante film uit de oven en verwijder eventuele accessoires aan de binnenkant Verwarm de oven tot 200 C gedurende ongeveer één uur ideaal met behulp van een functie met luchtcircula...

Страница 42: ...et einde van de bereidingstijd instellen door een uitgestelde start te programmeren TURBO INSTELLEN VAN EINDE BEREIDING UITGESTELDE START Bij veel functies kunt u nadat u een bereidingstijd hebt ingesteld het starten van de functie uitstellen door het programmeren van de eindtijd Op het display wordt de huidige eindtijd die is ingesteld weergegeven en het pictogram knippert Draai aan de instelknop...

Страница 43: ... of draai aan de instelknop om de bereidingstijd te verlengen door een nieuwe tijdsduur in te stellen BRUINEN Met een aantal ovenfuncties kunt u de bovenkant van de gerechten een bruin korstje geven door de grill in te schakelen als de bereiding voltooid is DRUK Wanneer op het display de betreffende boodschap wordt getoond druk dan indien nodig op de selectie bevestigingstoets om een vijf minuten ...

Страница 44: ...50 2 Ja 190 250 25 50 3 1 Brood Ja 180 220 30 50 2 Pizza Ja 220 250 15 30 2 Diepvriespizza s Ja 250 10 15 2 Ja 250 10 20 3 1 Hartige taarten groentetaart quiche Ja 180 190 35 45 2 Ja 180 190 45 60 3 2 Pasteitjes bladerdeeghapjes Ja 190 200 20 30 2 Ja 180 190 20 40 3 1 Lasagne pasta uit de oven cannelloni ovenschotels Ja 190 200 45 65 2 Lamsvlees kalfsvlees rundvlees varkensvlees 1 kg Ja 190 200 70...

Страница 45: ...DINGSTIJD Min NIVEAU EN ACCESSOIRES Visfilet moten vis 2 gemiddeld 20 35 4 3 Worstjes spiezen spareribs hamburgers 2 3 gemiddeld hoog 15 40 4 3 Gegrilde kip 1 1 3 kg 2 gemiddeld 50 65 2 1 Rosbief rosé 1 kg 2 gemiddeld 35 45 2 Lamsbout schenkel 2 gemiddeld 60 90 2 Geb aardappelen 2 gemiddeld 45 55 2 Gegratin groenten 3 hoog 10 15 2 Lasagne en vlees Ja 200 50 100 3 1 Vlees en aardappelen Ja 200 45 1...

Страница 46: ...je worden verwijderd Zorg ervoor dat de oven afgekoeld is vooraleer te onderhouden of te reinigen Gebruik geen stoomreinigers Gebruik geen staalwol schuursponsjes of schurende bijtende reinigingsproducten omdat deze het oppervlak van het apparaat kunnen beschadigen Draag beschermende handschoenen De oven moet worden losgekoppeld van het elektriciteitsnet voordat u onderhoudswerkzaamheden uitvoert ...

Страница 47: ...e vergrendelingen in de juiste positie staan 5 Probeer de deur te sluiten en controleer of het in lijn met het bedieningspaneel is Als dit niet het geval is herhaalt u de bovenstaande stappen Als het niet goed werkt kan de deur beschadigd raken PROBLEEMOPLOSSING WWW Probleem Mogelijke oorzaak Oplossing De oven werkt niet Stroomonderbreking Loskoppeling van het elektriciteitsnet Controleer of het e...

Страница 48: ...ingstijden zijn dan iets langer HET TEGELIJKERTIJD BEREIDEN VAN VERSCHILLENDE GERECHTEN Met de functie Hete Lucht kunt u tegelijkertijd verschillende gerechten bereiden bijvoorbeeld vis en groenten die dezelfde bereidingsduur hebben op verschillende steunhoogtes Haal de gerechten die klaar zijn uit de oven en laat de gerechten die meer tijd nodig hebben in de oven staan NUTTIGE TIPS WWW Download v...

Страница 49: ...le COMANDI FORNO 1 MANOPOLA DI SELEZIONE Per accendere il forno selezionando una funzione Per spegnere il forno ruotare sulla posizione 2 DISPLAY 3 TASTO DI SELEZIONE CONFERMA Per confermare la selezione di una funzione o un valore impostato Nota sul display appare per le indicazioni relative a questo tasto 4 MANOPOLA DI REGOLAZIONE Per scorrere i menu impostare o modificare i valori MANOPOLE COMA...

Страница 50: ...oni scaricare le istruzioni per l uso da docs bauknecht eu GRIGLIA LECCARDA PIASTRA DOLCI GUIDE SCORREVOLI SE PRESENTE Il numero e il tipo di accessori possono variare a seconda del modello acquistato È possibile acquistare separatamente altri accessori non in dotazione presso il Servizio Assistenza Clienti MONTARE LE GUIDE SCORREVOLI SOLO IN ALCUNI MODELLI Nota Le guide scorrevoli possono essere ...

Страница 51: ...li regolari PRERISCALDAM RAPIDO Per riscaldare rapidamente il forno Funzione di riferimento per la dichiarazione di efficienza energetica in accordo con il Regolamento europeo 65 2014 OFF Per spegnere il forno LAMPADA Per accendere spegnere la luce del forno FUNZIONI SPECIALI SCONG SCONGELAMENTO Per velocizzare lo scongelamento degli alimenti MANTE MANTENERE CALDO Per mantenere caldi e croccanti c...

Страница 52: ...attivare questa funzione accertarsi di aver messo la pentola sulla zona di cottura prescelta per evitare di danneggiare la superficie del piano I valori di prestazione specificati per questa funzione sono garantiti per tutti i piani di cottura vetroceramici Per il funzionamento mettere la pentola sulla zona di cottura prescelta e ruotare la manopola su Disattivare cambiando la posizione della mano...

Страница 53: ...L FORNO Un nuovo forno può rilasciare degli odori dovuti alla lavorazione di fabbrica questo è normale Prima di cucinare gli alimenti è dunque raccomandato di riscaldare a vuoto il forno per rimuovere ogni odore Rimuovere protezioni di cartone o pellicole trasparenti e togliere gli accessori dal forno Riscaldare il forno a 200 C per circa 1 ora utilizzando preferibilmente una funzione ventilata Te...

Страница 54: ...la funzione In questo caso non sarà possibile impostare l ora di fine cottura programmando l avvio ritardato TURBO IMPOSTARE L ORA DI FINE COTTURA AVVIO RITARDATO In molte funzioni una volta impostata una durata è possibile posticipare l avvio programmando l ora di fine Il display mostra l ora di fine della funzione prevista mentre l icona lampeggia Ruotare la manopola di regolazione per impostare...

Страница 55: ...r prolungare la cottura impostando una nuova durata DORATURA Con alcune funzioni alla fine della cottura il forno consente di dorare la superficie del cibo grazie all utilizzo del grill V PER Quando il display visualizza il messaggio relativo se necessario premere il tasto di selezione conferma per avviare un ciclo di 5 minuti di doratura Per spegnere il forno è possibile interrompere la funzione ...

Страница 56: ...50 3 1 Pane Sì 180 220 30 50 2 Pizza Sì 220 250 15 30 2 Pizze surgelate Sì 250 10 15 2 Sì 250 10 20 3 1 Torte salate torta di verdura quiche Sì 180 190 35 45 2 Sì 180 190 45 60 3 2 Vols au vent Salatini di pasta sfoglia Sì 190 200 20 30 2 Sì 180 190 20 40 3 1 Lasagna Pasta al forno Cannelloni Sformati Sì 190 200 45 65 2 Agnello Vitello Manzo Maiale 1 kg Sì 190 200 70 100 2 Pollo Coniglio Anatra 1 ...

Страница 57: ...e Spiedini Costine Hamburger 2 3 medio alta 15 40 4 3 Pollo arrosto 1 1 3 kg 2 media 50 65 2 1 Roast beef al sangue 1 kg 2 media 35 45 2 Cosciotto di agnello Stinco 2 media 60 90 2 Patate arrosto 2 media 45 55 2 Verdure gratinate 3 alta 10 15 2 Lasagne e carne Sì 200 50 100 3 1 Carne e patate Sì 200 45 100 3 1 Pesce e verdure Sì 180 30 50 3 1 Arrosti ripieni ECO T 200 80 120 3 Tagli di carne conig...

Страница 58: ...a Assicurarsi che il forno si sia raffreddato prima di eseguire ogni operazione Non utilizzare pulitrici a getto di vapore Non usare pagliette metalliche panni abrasivi e detergenti abrasivi o corrosivi che possano danneggiare le superfici Utilizzare guanti protettivi Il forno deve essere disconnesso dalla rete elettrica prima di effettuare operazioni di manutenzione Per maggiori informazioni scar...

Страница 59: ...ermi 5 Provare a chiudere la porta verificando che sia allineata al pannello di controllo Se non lo fosse ripetere tutte le operazioni funzionando male la porta potrebbe danneggiarsi RISOLUZIONE DEI PROBLEMI WWW Problema Possibile causa Soluzione Il forno non funziona Interruzione di corrente elettrica Disconnessione dalla rete principale Verificare che ci sia tensione in rete e che il forno sia c...

Страница 60: ... allungheranno leggermente CUCINARE DIFFERENTI ALIMENTI CONTEMPORANEAMENTE Utilizzando la funzione Termoventilato è possibile cuocere contemporaneamente cibi diversi ad esempio pesce e verdure su Ripiani diversi Estrarre i cibi che richiedono tempi di cottura inferiori e lasciare continuare la cottura per quelli con tempi più lunghi CONSIGLI UTILI WWW Per maggiori informazioni scaricare le istruzi...

Страница 61: ...o visible MANDOS DEL HORNO 1 SELECTOR Para encender el horno seleccionando una función Póngalo en la posición para apagar el horno 2 PANTALLA 3 BOTÓN DE SELECCIÓN CONFIRMACIÓN Sirve para confirmar una función o un valor seleccionados Nota la pantalla muestra para las indicaciones referentes a este botón 4 SELECTOR DE AJUSTE Para desplazarse por los menús y aplicar o cambiar las configuraciones SEL...

Страница 62: ...ar los tornillos de fijación ACCESORIOS WWW Descargue la Guía de uso y cuidado en docs bauknecht eu para más información REJILLA GRASERA BANDEJA DE HORNEAR GUÍAS DESLIZANTES SI LA HAY El número y el tipo de accesorio puede variar dependiendo del modelo comprado Los accesorios no incluidos pueden adquirirse aparte en el Servicio Postventa MONTAJE DE LAS GUÍAS DESLIZANTES SOLO EN ALGUNOS MODELOS Not...

Страница 63: ...RECALENT RÁPIDO Para precalentar el horno rápidamente Función utilizada como referencia para la declaración de eficiencia energética de conformidad con la normativa EU Nº 65 2014 OFF Sirve para apagar el horno LUZ Paraencender apagarlabombillainteriordelhorno FUNCIONES ESPECIALES DESCO DESCONGELAR Para acelerar la descongelación de los alimentos MANTE MANTENER CALIENTE Para mantener calientes y cr...

Страница 64: ...situada en la placa seleccionada para evitar daños a la superficie de cocción Los valores de rendimiento indicados para esta función son los que se garantizan para todas las superficies de cocción vitrocerámicas Para utilizar esta función sitúe la olla en la placa seleccionada y gire el selector a Para deseleccionarla cambie la posición del selector MULTIZONAS El símbolo de multizona que se muestr...

Страница 65: ...nuevo puede liberar olores que se han quedado impregnados durante la fabricación Es completamente normal Antes de empezar a cocinar le recomendamos calentar el horno en vacío para eliminar cualquier olor Quite todos los cartones de protección o el film transparente del horno y saque todos los accesorios de su interior Caliente el horno a 200 C aproximadamente durante una hora preferiblemente utili...

Страница 66: ... caso no puede configurar el tiempo final de cocción programando un inicio diferido TURBO SELECCIONAR EL TIEMPO DE FINAL DE COCCIÓN INICIO DIFERIDO En muchas funciones una vez configurado el tiempo de cocción podrá retrasar el inicio de la función programando el tiempo final La pantalla muestra el tiempo final actual configurado y el icono parpadea Gire el selector de ajuste para configurar la hor...

Страница 67: ...funciones del honro le permiten gratinar la superficie de los alimentos activando el grill una vez finalizada la cocción PULSE Cuando la pantalla lo indique si lo desea pulse el botón de selección confirmación para iniciar un ciclo de gratinado de cinco minutos Puede detener la función en cualquier momento girando el selector para apagar el horno TEMPORIZADOR Cuando el horno está apagado la pantal...

Страница 68: ... Sí 190 250 25 50 3 1 Pan Sí 180 220 30 50 2 Pizza Sí 220 250 15 30 2 Pizza congelada Sí 250 10 15 2 Sí 250 10 20 3 1 Tartas saladas tarta de verduras quiche Sí 180 190 35 45 2 Sí 180 190 45 60 3 2 Volovanes Canapés de hojaldre Sí 190 200 20 30 2 Sí 180 190 20 40 3 1 Lasaña pasta al horno canelones budines Sí 190 200 45 65 2 Cordero Ternera Buey Cerdo 1 kg Sí 190 200 70 100 2 Pollo conejo pato 1 k...

Страница 69: ...L Y ACCESORIOS Salchichas brochetas costillas hamburguesas 2 3 medio alto 15 40 4 3 Pollo asado 1 1 3 kg 2 medio 50 65 2 1 Rosbif poco hecho 1 kg 2 medio 35 45 2 Pierna de cordero cerdo 2 medio 60 90 2 Patatas al horno 2 medio 45 55 2 Verduras gratinadas 3 alto 10 15 2 Lasañas y carnes Sí 200 50 100 3 1 Carnes y patatas Sí 200 45 100 3 1 Pescado y verduras Sí 180 30 50 3 1 Asados rellenos ECO A 20...

Страница 70: ... Asegúrese de que el horno se haya enfriado antes de llevar a cabo las tareas de mantenimiento o limpieza No utilice aparatos de limpieza con vapor No utilice estropajos de acero estropajos abrasivos ni productos de limpieza abrasivos corrosivos ya que podrían dañar las superficies del aparato Utilice guantes de protección El horno debe desconectarse de la red eléctrica antes de llevar a cabo cual...

Страница 71: ...cerrar la puerta y compruebe que está alineada con el panel de control Si no lo está repita los pasos de arriba La puerta podría dañarse si no funciona correctamente RESOLUCIÓN DE PROBLEMAS Problema Posible causa Solución El horno no funciona Corte de suministro Desconexión de la red eléctrica Compruebe que haya corriente eléctrica en la red y que el horno esté enchufado a la toma de electricidad ...

Страница 72: ...S ALIMENTOS A LA VEZ El uso de la función Aire forzado permite cocinar al mismo tiempo distintos alimentos que requieran la misma temperatura por ejemplo pescado y verduras utilizando estantes diferentes Retire del horno los alimentos que requieran menor tiempo de cocción y deje los que necesiten una cocción más prolongada CONSEJOS ÚTILES WWW Descargue la Guía de uso y cuidado en docs bauknecht eu...

Страница 73: ...личка не снимать 9 Нижний нагревательный элемент не виден ЭЛЕМЕНТЫ УПРАВЛЕНИЯ ДУХОВКИ 1 РУЧКА ВЫБОРА Включение духовки путем выбора режима Чтобы выключить духовку поверните ручку в положение 2 ДИСПЛЕЙ 3 КНОПКА ВЫБОРА ПОДТВЕРЖДЕНИЯ Подтверждение выбора режима или настройки Примечание Указания касающиеся данной кнопки сопровождаются символом на дисплее 4 РУЧКА РЕГУЛИРОВКИ Перемещение между пунктами ...

Страница 74: ...bauknecht eu РЕШЕТКА ПОДДОН ВСТАВНОЙ ПРОТИВЕНЬ ТЕЛЕСКОПИЧЕСКИЕ НАПРАВЛЯЮЩИЕ ПРИ НАЛИЧИИ Количество и тип принадлежностей может варьироваться в зависимости от приобретенной модели Не входящие в комплект прибора принадлежности можно приобрести отдельно в Сервисном центре УСТАНОВКА ТЕЛЕСКОПИЧЕСКИХ НАПРАВЛЯЮЩИХ ТОЛЬКО В НЕКОТОРЫХ МОДЕЛЯХ Примечание Телескопические направляющие могут быть уже установле...

Страница 75: ...ость дисплея снижается и освещение духовки выключается в целях экономии электроэнергии Дисплей и освещение временно включаются при нажатии любой кнопки Базовый режим для заявления об энергоэффективности в соответствии с Регламентом ЕС 65 2014 OFF ВЫКЛ Выключение духовки LIGHT СВЕТ Включение выключение освещения духовки СПЕЦИАЛЬНЫЕ РЕЖИМЫ DEFRO DEFROST РАЗМОРАЖИВАНИЕ Режим для ускоренного разморажи...

Страница 76: ... на ТАБЛИЦА РЕЖИМОВ ВАРОЧНОЙ ПАНЕЛИ FAST BOIL БЫСТРАЯ ВАРКА Данный режим позволяет быстро доводить воду до кипения с последующим поддержанием температуры в течение заданного времени По истечении заданного времени варочная панель автоматически возвращается к настройке максимальной мощности Этот режим можно выбирать и в процессе приготовления пищи Важно Перед выбором режима убедитесь что на соответс...

Страница 77: ...ом запахов связанных с процессом производства Это нормальное явление Перед началом приготовления блюд рекомендуется прогреть пустую духовку для удаления возможных остаточных запахов Удалите с духовки защитный картон и прозрачную пленку выньте все принадлежности Прогрейте духовку при температуре 200 C в течение примерно одного часа лучше всего в режиме с вентиляцией например Koнвeкция или Конвекцио...

Страница 78: ...ание функции отложенного старта с заданием времени окончания приготовления невозможно TURBO УСТАНОВКА ВРЕМЕНИ ОКОНЧАНИЯ ПРИГОТОВЛЕНИЯ ОТЛОЖЕННЫЙ СТАРТ Для многих режимов после задания длительности приготовления можно установить задержку старта задав время окончания В процессе настройки на дисплее отображается текущее время окончания значок мигает Вращая ручку регулировки установите желаемое время ...

Страница 79: ...едусматривают возможность дополнительного подрумянивания продукта Это делается за счет включения гриля после завершения основного цикла приготовления PRESS Когда на дисплее появится соответствующее сообщение нажмите кнопку выбора подтверждения чтобы запустить пятиминутный цикл подрумянивания если необходимо Вы можете остановить процесс приготовления в любой момент времени повернув ручку выбора в п...

Страница 80: ...качча Да 190 250 15 50 2 Да 190 250 25 50 3 1 Хлеб Да 180 220 30 50 2 Пиццa Да 220 250 15 30 2 Замороженная пицца Да 250 10 15 2 Да 250 10 20 3 1 Соленые пироги овощной пирог киш Да 180 190 35 45 2 Да 180 190 45 60 3 2 Волованы пироги из слоеного теста Да 190 200 20 30 2 Да 180 190 20 40 3 1 Лазанья макаронная запеканка каннеллони фланы Да 190 200 45 65 2 Баранина телятина говядина свинина 1 кг Да...

Страница 81: ...лык ребрышки рубленые котлеты 2 3 средняя высокая 15 40 4 3 Жapeный цыплeнoк 1 1 3 кг 2 средняя 50 65 2 1 Ростбиф с кровью 1 кг 2 средняя 35 45 2 Баранья нога рулька 2 средняя 60 90 2 Пeчeный кapтoфeль 2 средняя 45 55 2 Овощной гратен 3 высокая 10 15 2 Лазанья с мясом Да 200 50 100 3 1 Мясо с картофелем Да 200 45 100 3 1 Рыба и овощи Да 180 30 50 3 1 Фаршированные мясные блюда ECO F 200 80 120 3 М...

Страница 82: ...нными рукавицами Остатки пищи удаляются с помощью щетки или губки Перед началом любых действий по чистке и уходу дайте духовке остыть Не используйте пароочистители Не используйте абразивные губки стальные мочалки агрессивные и абразивные моющие средства так как они могут повредить поверхности прибора Наденьте защитные перчатки Отключите духовку от электросети перед выполнением любых действий по об...

Страница 83: ...это не так повторите вышеописанные действия Неправильно установленная дверца может выйти из строя ПОИСК И УСТРАНЕНИЕ НЕИСПРАВНОСТЕЙ WWW Неисправность Возможная причина Способ устранения Духовка не работает Отсутствует напряжение в сети Прибор отсоединен от электросети Проверьте наличие напряжения в сети Убедитесь что духовка включена в сеть Выключите и снова включите духовку и проверьте не исчезла...

Страница 84: ...и При этом учитывайте что продолжительность приготовления в ней немного увеличивается ОДНОВРЕМЕННОЕ ПРИГОТОВЛЕНИЕ НЕСКОЛЬКИХ БЛЮД При использовании режима Конвекция можно одновременно готовить различные блюда например рыбу и овощи на разных уровнях духовки Выньте из духовки блюда с меньшим временем приготовления и оставьте блюда приготовление которых требует более продолжительного времени ПОЛЕЗНЫЕ...

Отзывы: