


18
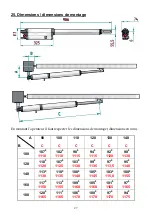
17. Adjustment of end switches
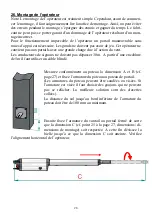
Remove the operator from the sheathing of the pile and the sheathing of the gate
wing and fix it once again with the rear side pointing to “the top “. This makes it
easier to adjust the end switches.
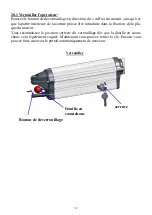
17.1 Adjustment of end switch “CLOSED “
Using the clamp attach the connecting cable to the 3 V button cell included in the
delivery. This makes the LED of the end switch “CLOSED “flash.
button cell
crankcase
end switch
“OPEN”
clamp
end switch “CLOSED “
Now remove the locking screw of the end switch “ CLOSED “ (see page 19 , point
17.2 “Altering the position of end switches”) and move it towards the crankcase un-
til the LED of the end switch “CLOSED” ceases to flash. Now the end switch
“CLOSED” has reached the correct position.
end switch “OPEN”
end switch “ CLOSED “