Bask Aerospace AeroDrone MR4 Скачать руководство пользователя страница 1


Bask Aerospace

AeroDrone MR4 - Getting Started Guide

AeroDrone MR4 - Getting Started Guide

A complete guide to help you get flying

Copyright Bask Industries 2017. All rights reserved. 1 / 31

Содержание AeroDrone MR4

Страница 1: ...Bask Aerospace AeroDrone MR4 Getting Started Guide AeroDrone MR4 Getting Started Guide A complete guide to help you get flying Copyright Bask Industries 2017 All rights reserved 1 31 ...

Страница 2: ...ellers 8 4 Operating the Aircraft 9 4 1 Remote Controller 9 4 2 Flight Modes 20 4 3 Failsafe Systems 22 4 3 1 RC Failsafe 22 4 3 2 Battery Failsafe 23 4 4 Status LED 23 4 5 Ground Control Software 24 5 Flying the Aircraft 25 5 1 Pre flight 25 5 1 1 Powering the Aircraft 25 5 1 2 Arming the Aircraft 26 5 2 Post flight 28 5 2 1 Disarming the Aircraft 28 6 Maintaining the Aircraft 29 Copyright Bask I...

Страница 3: ...coloured callouts that provide additional information NOTE or REFERENCE These provide additional information that will be useful to read or point you to a section of the document that is relevant to what you re reading HINTS and TIPS These are worth reading to understand a topic further and maybe even save some time IMPORTANT MESSAGE Please read and understand each of these messages before moving ...

Страница 4: ...erminology for drones CASA uses Remotely Piloted Aircraft or RPA for short So wherever you see the term RPA you know they re just talking about drones For further information on the Australian rules and regulations around drones you can visit the CASA RPA website There is also a range of other great resources available about flying safely following regulations and being a responsible pilot The Aus...

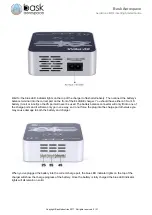
Страница 5: ...used The battery balance connector will only fit into one of the charge ports and it will also only go in one way so do not force the plug into the charge port otherwise you may cause damage to both the battery and charger When you ve plugged the battery into the correct charge port the blue LED indicator lights on the top of the charger will show the charge progress of the battery Once the batter...

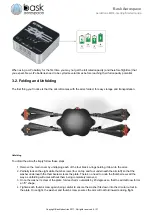
Страница 6: ...g each of the four black o rings holding it down to the arms 2 Partially loosen the eight white thumb screws four on top and four underneath the aircraft so that the washer underneath the thumbscrew clears the plate There s no need to undo the thumbscrews all the way as unfolding will occur without them being completely removed 3 Once the washer is clear of the plate fold each arm outwards by 45 d...

Страница 7: ... Powering the aircraft without antennas can cause damage to the telemetry module To install the antennas simply screw each antenna on to the bulkhead connector on the bottom of the drone To achieve the best performance ie range from the telemetry system one antenna should be as horizontal as possible and the other should be as vertical as possible This is also known as horizontal and vertical pola...

Страница 8: ...rs The aircraft comes with folding propellers They re simple to use and easy to fold for storage or transport The propellers need to be loose enough to swing into place when the motor turns Do NOT overtighten Copyright Bask Industries 2017 All rights reserved 8 31 ...

Страница 9: ...oller also known as RC Controller or RC Transmitter is the most direct way to control your aircraft Even though it s possible to fly the aircraft without using the Remote Controller we always recommend you have it close by ready to use should the need occur Below is a diagram of the Remote Controller stick and switch functions Spectrum DXe Copyright Bask Industries 2017 All rights reserved 9 31 ...

Страница 10: ...Bask Aerospace AeroDrone MR4 Getting Started Guide Copyright Bask Industries 2017 All rights reserved 10 31 ...

Страница 11: ...Bask Aerospace AeroDrone MR4 Getting Started Guide Copyright Bask Industries 2017 All rights reserved 11 31 ...

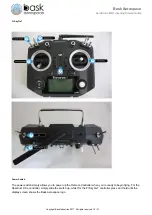
Страница 12: ...allows you to power up the Remote Controller when you re ready to begin flying For the Spectrum DXe controller simply slide the switch up whilst for the Fr Sky Qx7 controller press and hold until the display screen shows the Bask Aerospace logo Copyright Bask Industries 2017 All rights reserved 12 31 ...

Страница 13: ...replaced recharged Throttle Yaw stick The Throttle and Yaw stick is a two axis joystick The throttle is controlled with the up down movement of the stick and the yaw is controlled with the left right movement of the stick You ll notice that the yaw movement is spring loaded causing it to always spring back to the center The throttle however is not This allows you to set the throttle at different p...

Страница 14: ...bout its pitch axis that causes a forward back change in the position of the aircraft This can be thought of as moving the aircraft forwards and backwards just like a car WHAT IS ROLL Roll is the angle of an aircraft about its roll axis that causes a left right change in the position of the aircraft Flight Mode Switch The flight mode switch allows you to command the aircraft to change between diff...

Страница 15: ... you to activate the RTL return to home feature of the system The switch has two positions and is setup as follows Position 1 Back RTL Off Position 2 Forward RTL On The RTL switch will be identifiable by a red indicator over the switch stem Copyright Bask Industries 2017 All rights reserved 15 31 ...

Страница 16: ...ou to set the camera to different angles By default the camera should point forward The switch has three possible positions and is setup as follows Position 1 Up Face Forward 0 deg Position 2 Middle Oblique 45 deg Position 3 Down Face Down 90 deg Copyright Bask Industries 2017 All rights reserved 16 31 ...

Страница 17: ...Bask Aerospace AeroDrone MR4 Getting Started Guide Copyright Bask Industries 2017 All rights reserved 17 31 ...

Страница 18: ...d for filming or capturing still images Position 3 is best suited to mapping applications Trim Tabs The trim tabs should never be used and should always be centered If they re not centered you risk crashing the aircraft Copyright Bask Industries 2017 All rights reserved 18 31 ...

Страница 19: ...Bask Aerospace AeroDrone MR4 Getting Started Guide Copyright Bask Industries 2017 All rights reserved 19 31 ...

Страница 20: ...ng the onboard barometer However as this mode is not GPS dependent the aircraft is not fixed in position and is able to drift when both joysticks are centred It is recommended that the operator is able to fly the aircraft confidently in this mode in case of an emergency that requires you to take manual control Moving the throttle stick up down from the center deadzone commands the aircraft to asce...

Страница 21: ...e is limited in this mode by the climb and descent speed settings which can be changed using your Ground Control Software Moving the throttle back into the central deadzone at anytime will cause the aircraft to maintain it s current altitude This mode automatically attempts to maintain the current altitude position and heading The aircraft s horizontal position can be manually adjusted using the p...

Страница 22: ...will return to should RTL mode be activated Remember RTL mode can be activated manually by the pilot automatically by a system fail safe or in a mission using the RTL mission command It s important to ensure the home location is at the center of an area that is at least 5m x 5m in size with no overhanging trees or other obstructions There are no obstacle avoidance systems onboard this aircraft Whe...

Страница 23: ...f cells and minimum voltages Min Battery Voltage 3 Cell 10 2V 4 Cell 13 6V 5 Cell 17 0V 6 Cell 20 4V Low Capacity Limit When the remaining capacity in the battery reaches a predetermined minimum Usually this is set to allow at least 20 remaining battery capacity when the fail safe triggers but can be set higher or lower if needed For example if your battery has a capacity of 5000mAh you would set ...

Страница 24: ...lashing Yellow Quick beeping tone B Flashing Yellow and Blue High high high low tone sequence dah dah dah doh G Flashing Red and Yellow Rising tone Flashing Purple and Yellow Solid Red Solid Red SOS tone sequence To listen to the different sounds that will be emitted please visit the ArduPilot Pixhawk Sounds Directory 4 5 Ground Control Software Ground Control Software allows you to setup change a...

Страница 25: ...ction Place the aircraft on the ground with the back facing you as shown below Try to place the aircraft in a position that allows it to be as level as possible It s not a good idea to start on sloping ground or an uneven surface as you may have difficulty taking off Now slide the battery in from the right hand side You should feel some friction and then a slight click as the battery locks into pl...

Страница 26: ...ero ie all the way down and the status LED is flashing green If the status LED is not flashing green refer to the Status LED Section to understand what s going on This system has a two factor arming process The first is a physical button known as the arming switch and the second is an arming gesture performed on the remote controller The Arming Switch When you re ready to arm the aircraft you ll f...

Страница 27: ...nd are well clear of the propellers To do this push and hold the throttle stick to the bottom right hand corner for roughly five seconds This will command the aircraft to arm The status LED should go solid green and a long tone will be emitted indicating the aircraft is now ARMED If this is the first time you re arming the aircraft since connecting the battery you will notice the status LED runs t...

Страница 28: ... 2 Post flight 5 2 1 Disarming the Aircraft To disarm the aircraft move the throttle stick to bottom left hand side ie stick all the way down and to the left and hold it there for 2 4 seconds The motors will stop spinning a short tone will be emitted and the status LED will flash green again The aircraft is now DISARMED Copyright Bask Industries 2017 All rights reserved 28 31 ...

Страница 29: ... items you need to keep in mind and check on regularly Screws The most important and regular maintenance you need to perform on your aircraft is to check that all screws remain tight and securely fastened The screws attaching each motor to an arm have been fastened with a thread locking compound as shown below We recommend using Loctite 246 as this is what we use during manufacturing of the system...

Страница 30: ...motors is very minimal After every 10 hours of run time we recommend adding a little Singer Sewing Machine Oil to each bearing Propellers It s important to keep a check on the deterioration of the propellers if any If you find any cracks or delamination Copyright Bask Industries 2017 All rights reserved 30 31 ...

Страница 31: ...imply try to flex the propeller along it s length If it s very easy to bend or it bends a long way down up replace it immediately before flying Most of the time delamination is not visible to the eye Performing a visual inspection won t be enough to recognise it Powered by TCPDF www tcpdf org Copyright Bask Industries 2017 All rights reserved 31 31 ...

Отзывы: