


- 33 -
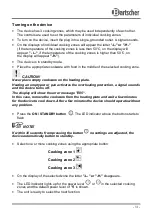
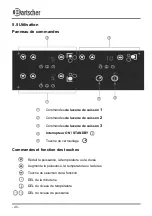
2. Setting the temperature
•
The temperature of individual cooking zones can be set independently from each other.
•
Press the function button
of a given cooking zone to go to the temperature mode.
The display shows the pre-programmed temperature of "120° C" and the temperature
level LED indicator
lights up
.
•
Using the buttons
or
you can change the setting at any time in the range of
60 – 240° C in increments of 20° C.
(Temperature levels: 60, 80, 100, 120, 140, 160, 180, 200, 220 and 240° C).
•
The device heats the food and then maintains the set temperature at a constant
level. The power regulation occurs automatically.
3. Setting the time:
•
After selecting power or temperature level, press again the function button
to
set the time. The time adjustment LED indicator
lights up, and on the display
appears "0".
•
By using the
button you can extend the time of operation in increments of
5 minutes (5,10,15...) to a max. of 180 minutes.
•
Using the
button you can shorten the time by increments of 1 minute.
•
The time setting is counted in increments of 1 minute, and the remaining time is
shown on the display.
•
After the set time has lapsed, a signal will sound and the unit automatically button to
standby mode.
NOTE!
The time settings can be changed at any time when the device is operating
using the buttons
or
.
Thanks to the memory function that the device is equipped with, the set
power or temperature levels do not change.
In a similar way, it is possible to change the power or temperature levels,
without any change to the time set.
•
You should be careful so that the bottom of cookware does not scratch the cooking
zones, although scratching the surface does not adversely affect its use.


