background image


- 31 - 

  Connect the unit to an appropriate power source which serves one piece of 

equipment. 

  The coffee machine is now ready for use. 

  The drip coffee stations can be used simultaneously or separately, as needs dictate. 


Preparation of coffee  


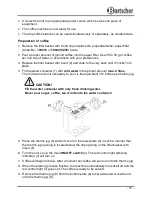
1.  Remove the filter basket with insert (6) and place the proper Bartscher paper filter 

(Code-No.: 190014 or 1900015250) inside.  

2.  Pour a proper amount of ground coffee into the paper filter. Use 35 to 50 g of coffee 

per one litre of water, in accordance with your preferences.   

3.  Replace the filter basket with insert (6) and slide to the very back until it "clicks" into 

place. 

4.  Fill the water container (7) with cold water in the proper amount max. 2 litres.  

The minimum amount necessary to pour is the equivalent of 0,5 litres per thermo jug. 

 CAUTION! 

Fill the water container with only fresh drinking water. 
Never pour sugar, coffee, tea or milk into the water container! 


5.  Place the thermo jug (8) without cover on the lower plate (9) in such a manner that 

the thermo jug opening is located below the drip opening on the filter basket with 
insert (6). 

6.  Turn the unit on via the main ON/OFF switch (4). The red control light (brewing 

indicator) (3) will turn on. 

7.  Coffee will begin to brew. After a moment hot coffee will pour our into the thermo jug.  

8.  When the brewing process finishes, the machine automatically turns itself off and the 

red control light (3) goes out. The coffee is ready to be served. 

9.  Remove the thermo jug (8) from the bottom plate (9) to set aside and screw the lid 

onto the thermo jug (8). 

Содержание Contessa Duo 190049

Страница 1: ...Contessa Duo 190049 Original Gebrauchsanleitung V5 1015...

Страница 2: ......

Страница 3: ...1 5 6 8 7 3 2 1 9 8 5 4 3 9 4 10 12 12 11 6 2 10...

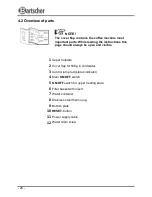
Страница 4: ...onformity 25 3 Transport packaging and storage 26 3 1 Delivery check 26 3 2 Packaging 26 3 3 Storage 26 4 Technical data 27 4 1 Technical specification 27 4 2 Overview of parts 28 5 Installation and o...

Страница 5: ...ese instructions and give them to future owners of the device 1 Safety This device is designed in accordance with the presently applicable technological standards However the device can pose a danger...

Страница 6: ...es The power cable should not hang over the side of the working surface Ensure that no one can step on or trip over the cable The power cable must not be folded bent or tangled and must always remain...

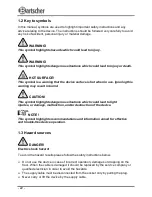
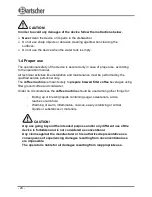
Страница 7: ...urns CAUTION This symbol highlights dangerous situations which could lead to light injuries or damage malfunction and or destruction of the device NOTE This symbol highlights recommendations and infor...

Страница 8: ...ease follow the safety instructions below After turning on the uppear heating plates with the ON OFF switch for upper heating plate they become very hot To avoid burns do not touch these surfaces Furt...

Страница 9: ...meant solely to prepare brewed filter coffee beverages using filter ground coffee and cold water Under no circumstances the coffee machine should be used among other things for Boiling up or brewing l...

Страница 10: ...by violation of advice concerning operation and cleaning use other than designed alterations made by user use of inadequate spare parts We reserve the right to make technical changes for purposes of...

Страница 11: ...The outer and inner packing material should be removed completely from the device before installation NOTE If you liked to dispose the packing consider the regulations applicable in your country Supp...

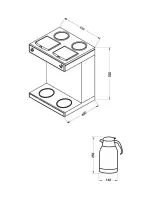
Страница 12: ...nsions W 430 x D 400 x H 520 mm Accessory 2 thermo jugs stainless steel capacity each 2 litres Weight 14 5 kg We reserve the right to make technical changes Additional accessories not included in the...

Страница 13: ...should always be open and visible 1 Upper hotplate 2 Cover flap for filling in cold water 3 Control lamp red status indicator 4 Main ON OFF switch 5 ON OFF switch for upper heating plate 6 Filter bask...

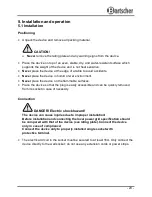
Страница 14: ...the flammable surfaces Place the device so that the plug is easily accessible and can be quickly removed from its socket in case of necessity Connection DANGER Electric shock hazard The device can cau...

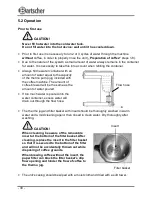
Страница 15: ...ed will be the same as the amount of water poured If too much water is poured into the water container excess water will drain out through the flow hose The thermo jug and filter basket with insert sh...

Страница 16: ...oper amount max 2 litres The minimum amount necessary to pour is the equivalent of 0 5 litres per thermo jug CAUTION Fill the water container with only fresh drinking water Never pour sugar coffee tea...

Страница 17: ...riod of time it is necessary to shake out any remaining water with the help of the water release screw 12 located on the rear wall of the element pour out the water and clean the unit o During shorter...

Страница 18: ...ugh there is still water in the tank e g in case of very hard water o For removal of calcium deposits we recommend Bartscher Fast descaler for coffee machines a formula tried and tested by us Code No...

Страница 19: ...marks In order to remove these residues follow the steps below 1 Take a half and half solution of water and vinegar 2 Leave this solution in the thermo jug for about 20 minutes and pour it out afterwa...

Страница 20: ...ect Pull plug and let the coffee machine cool off Press the RESET button on the back of the machine Contact supplier The unit is turned on the brewing indicator is on but hot water is not flowing out...

Страница 21: ...sal service in your community WARNING To exclude any abuse and the dangers involved make the waste device unfit for use before disposal For that purpose disconnect device from mains supply and remove...

Отзывы: