


1.
2.
3.
4.
Barracuda Vx license token, which you received via email or from the website when
you downloaded the Barracuda SSL VPN Vx package. The license token is a 15
character string, formatted like this:
.
01234-56789-ACEFG
Complete the following steps:
Step 1. Enter the License Code
Step 3. Log Into the Appliance Web Interface and Verify Configuration
Step 5. Change the Administrator Password for the Appliance Web Interface
Step 6. Route Incoming SSL Connections to the Barracuda SSL VPN Vx
Step 7. Verify Incoming SSL Connections to the Barracuda SSL VPN Vx
Related Articles
Barracuda SSL VPN Administrative
Backing Up Your Virtual Machine
Before You Begin
Deploy the Barracuda SSL VPN Vx on your
.
hypervisor For more information, see
.
How to Deploy Barracuda SSL VPN Vx Virtual Images
Step 1. Enter the License Code
Enter the license token to start automatically downloading your license.
Start your virtual appliance.
Open the console for the Barracuda SSL VPN virtual machine.
When the login prompt appears, log in as
with the password
.
admin
admin
In the text-based menu, set the IP address and, under
, enter your Barracuda license token and default domain to complete
Licensing
provisioning. The virtual machine reboots after you finish the configuration.
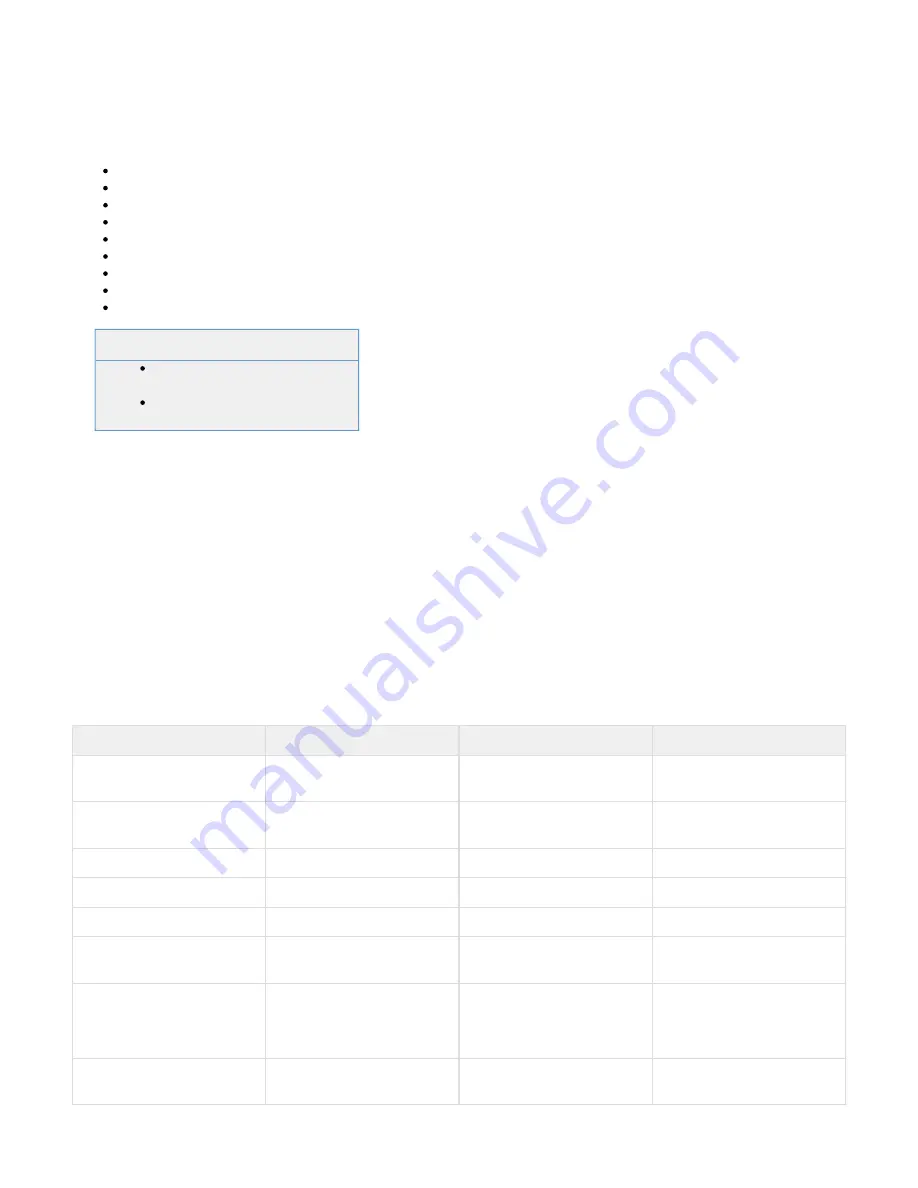
Step 2. Open Firewall Ports
If your Barracuda SSL VPN Vx is located behind a corporate firewall, open the following ports on your firewall to ensure proper operation:
Port
Protocol
Direction
Usage
22
TCP
Out
Remote diagnostics and service
(recommended)
25
TCP
Out
Email alerts and one-time
passwords
53
TCP/UDP
Out
DNS
80
TCP
Out
Energize Updates
123
UDP
Out
Network Time Protocol (NTP)
443
TCP
In/Out
HTTPS/SSL port for SSL VPN
access
8000
TCP
In/Out
External appliance administrator
port (HTTP)
8443
TCP
In/Out
External appliance administrator
port (HTTPS)