6. Getting started
2. Press
LENS FOCUS
button [-] or [+] (C) for an overall focus of the image.
3. Press
▲
LENS SHIFT
▼
button for correct vertical position of the image on the screen.
4. Press
◄
LENS SHIFT
►
button for correct horizontal position of the image on the screen.
6.5.3
Quick picture in picture
Quick On - Off
Press on the
PIP
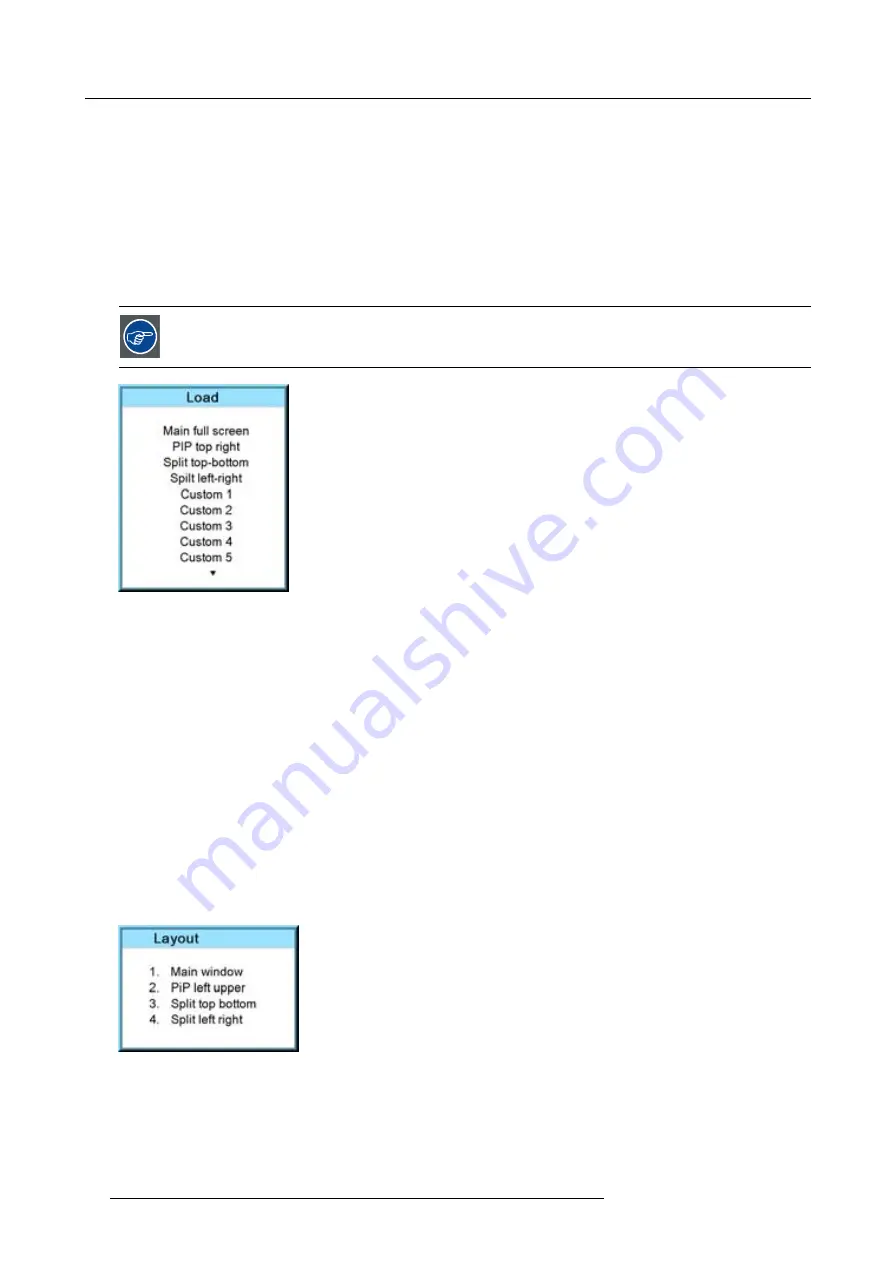
key on the remote control or the local keypad to activate the Load layout window.
Use the
▲ ▼
key to scroll to the desired layout and press
ENTER
to activate.
Select
Main full screen
to switch off PIP.
Image 6-10
6.5.4
Quick layout selection with Rigging key
What can be done ?
When the projector is playing, changing from one layout to another is possible without displaying any on screen selection menu.
The current image is not disturbed as long no selection is made. Press the
Rigging
key followed by one or two digits to jump to a
new layout.
When
Rigging
is pressed, an overview of the possible layouts with a sequence number is given on the local LCD panel. That
sequence number is the number that should be pressed after Rigging is pressed to change the layout to the new selection.
How to make a selection
1. Press
Rigging
followed by one or two digits and wait.
Note:
If you press only one digit, the projector wait a few time to check if a second digit will follow. If not, it switches to the
selected layout.
The selected layout is loaded.
Or,
press
Rigging
.
The layout selection menu is displayed on the local LCD panel.
Image 6-11
2. Enter the digit or the two digits of your choice.
The selected layout is loaded.
Or,
scroll with the arrow keys to the desired layout and press
ENTER
.
The selected layout is loaded.
52
R59770021 CLM R10+ 15/03/2010
Содержание R9050100
Страница 1: ...CLM R10 Users manual R9050100 R90501001 R59770021 10 15 03 2010...
Страница 14: ...1 Safety 10 R59770021 CLM R10 15 03 2010...
Страница 22: ...2 General 18 R59770021 CLM R10 15 03 2010...
Страница 35: ...3 Physical installation Skew Image 3 28 Skew adjustment R59770021 CLM R10 15 03 2010 31...
Страница 36: ...3 Physical installation 32 R59770021 CLM R10 15 03 2010...
Страница 48: ...5 Connections 44 R59770021 CLM R10 15 03 2010...
Страница 64: ...7 Start up of the Adjustment mode 60 R59770021 CLM R10 15 03 2010...
Страница 74: ...8 Input menu 70 R59770021 CLM R10 15 03 2010...
Страница 115: ...10 Layout menu Image 10 61 Image 10 62 Image 10 63 Image 10 64 R59770021 CLM R10 15 03 2010 111...
Страница 116: ...10 Layout menu 112 R59770021 CLM R10 15 03 2010...
Страница 158: ...13 Projector control 154 R59770021 CLM R10 15 03 2010...
Страница 172: ...14 Service menu 168 R59770021 CLM R10 15 03 2010...
Страница 186: ...16 Servicing 182 R59770021 CLM R10 15 03 2010...
Страница 195: ...17 Projector covers removal and installation Image 17 18 Secure the lamp door R59770021 CLM R10 15 03 2010 191...
Страница 196: ...17 Projector covers removal and installation 192 R59770021 CLM R10 15 03 2010...
Страница 204: ...C DMX Chart 200 R59770021 CLM R10 15 03 2010...
Страница 210: ...D Specifications 206 R59770021 CLM R10 15 03 2010...
Страница 216: ...E Troubleshooting 212 R59770021 CLM R10 15 03 2010...
Страница 222: ...F Mounting optional Carry handle 218 R59770021 CLM R10 15 03 2010...
Страница 224: ...G Order info 220 R59770021 CLM R10 15 03 2010...
Страница 232: ...Index 228 R59770021 CLM R10 15 03 2010...


