


5. Getting started
Image 5-3
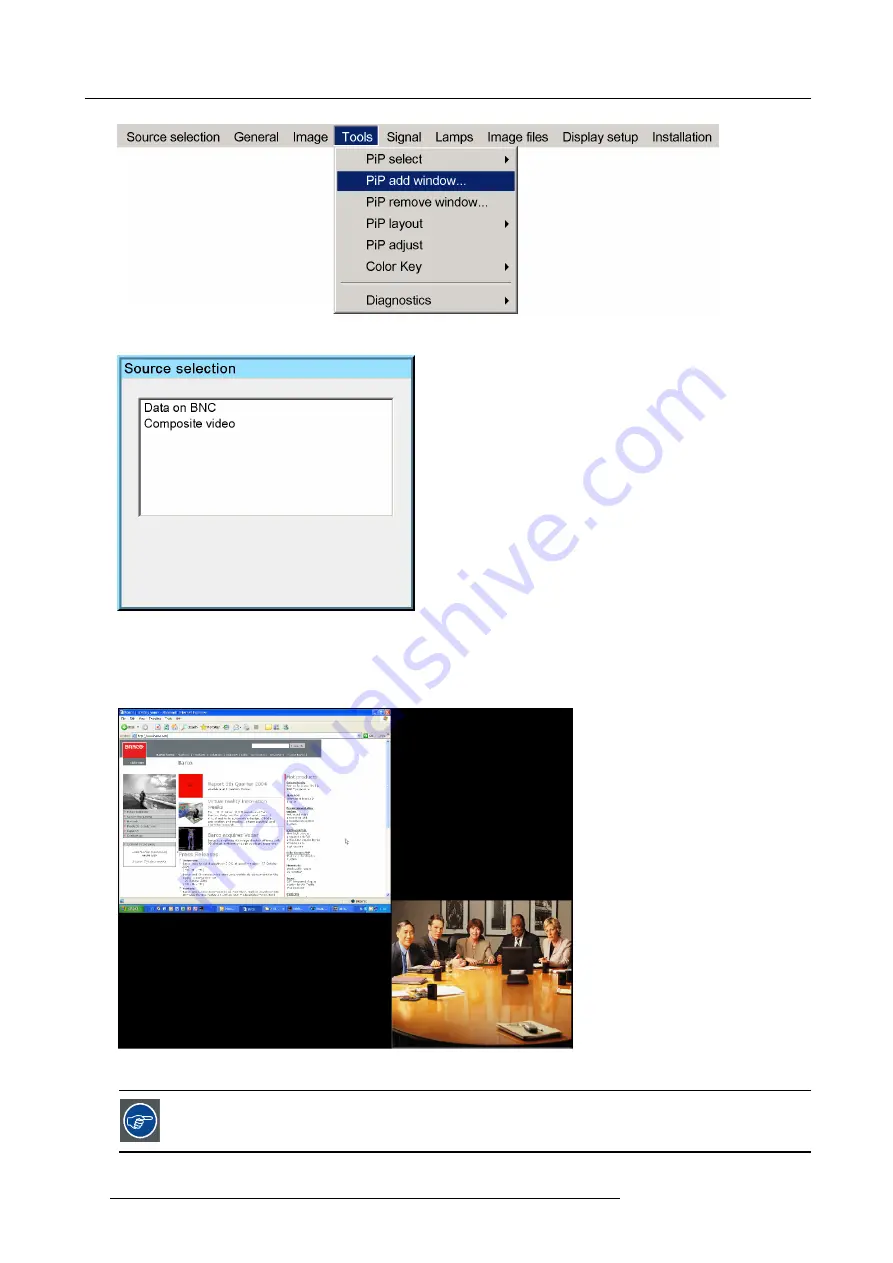
Image 5-4
3. Follow the instruction wizard (size, position, order)
4. Repeat the previous steps to add the RGB source
5. Save the PiP layout in the
PiP layout/Save as
menu by typing a new name
Image 5-5
Video/Data PiP layout
The added source(s) should be displayed with the right settings thanks to AutoImage. If it’s not the case (in
case of some non standard source speci
fi
cations) see
Image
fi
les
in the Advanced chapter.
38
R59770134 ID LR-6 27/05/2011
Содержание iD LR-6 R9010342
Страница 1: ...iD LR 6 User Guide R9010342 R59770134 01 27 05 2011...
Страница 7: ...Table of contents Glossary 125 Index 127 List of images 131 R59770134 ID LR 6 27 05 2011 3...
Страница 8: ...Table of contents 4 R59770134 ID LR 6 27 05 2011...
Страница 28: ...3 Installation 24 R59770134 ID LR 6 27 05 2011...
Страница 40: ...4 Setup 36 R59770134 ID LR 6 27 05 2011...
Страница 44: ...5 Getting started 40 R59770134 ID LR 6 27 05 2011...
Страница 68: ...6 Advanced Image 6 45 64 R59770134 ID LR 6 27 05 2011...
Страница 72: ...6 Advanced Image 6 48 68 R59770134 ID LR 6 27 05 2011...
Страница 130: ...Glossary 126 R59770134 ID LR 6 27 05 2011...
Страница 134: ...Index 130 R59770134 ID LR 6 27 05 2011...