34
User Manual - Introduction
english
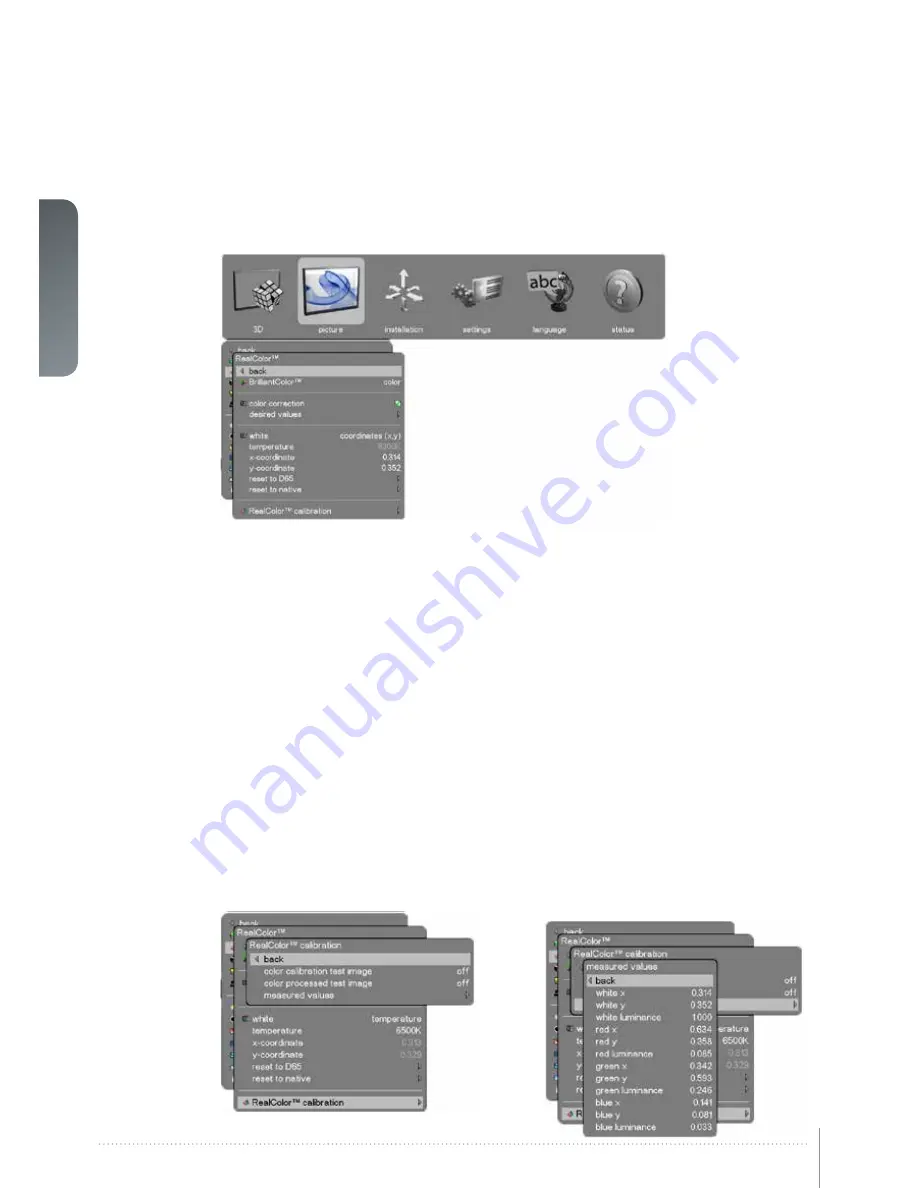
5.6.1 Picture > RealColor sub menu
BrilliantColor™
:
Texas Instruments DLP™ color processing. 3 settings:
Bright:
Max brightness, boosted color profile for highest perceived brightness. In
this mode all segments and spokes of the color wheel are in use.
Color:
Max brightness, balanced color profile for better color performance. In this
mode all segments and spokes of the color wheel are in use.
Off:
In this mode the spokes (transition between segments) and all secondary
segments (cyan and white) and on color wheel are off. Less color and brightness
boost will reduce image noise.
color correction
:
Enable or disable color correction.
desired values
:
Desired processing mode (RGB, RGBCMY) for RealColor and specification of red,
green blue, cyan, magenta and yellow color coordinates (x,y) and gain.
temperature
:
Sets the system color temperature (white point) on the Kelvin scale from 3200K
to 9300K in steps of 100K. All color temperatures are tracked on the black body
curve. The exact coordinates for the temperature will be shown in coordinates
(x,y) when adjusting the temperature.
x-coordinate
:
Sets the X co-ordinate of the white point.
y-coordinate:
Sets the Y co-ordinate of the white point.
reset to D65:
Reset the white point to D65 coordinates.
reset to native:
Resets desired values to measured values.
RealColor calibration:
Selects color calibration test images (off, uncorrected red/green/blue/full white)
and color processed test images (red, green, blue, white, black, cyan, magenta,
yellow). Presents measured values for RealColor (see below). Calibration settings
have to be made individually for each separate profile.
5.6.2 Picture > Advanced sub menu
horizontal position
:
Shifts the image sideways (VGA only)
vertical position:
Shifts the image up or down (VGA only)
phase
:
Adjust for stable image. A jittery image may appear with certain VGA sources.
You may also press the AUTO button on the keypad or remote control
to optimize.
frequency:
Adjust image width. An incorrect setting may produce vertical, unstable bands
in the image, and parts of the image may not be displayed on screen. Push the
AUTO button to find a correct setting, or manually adjust the frequency until the
vertical bands disappear. Frequency adjusts the pixel clock sampling frequency
color space:
Enables selecting between Auto, RGB, YCbCr 601, YCbCr 709
input level:
Choice between; auto, computer, video. Depending on source select between
0-255 (computer), 16-235 (video).
source correction:
Gives access to individual brightness offset settings (see below).
In addition you can start the AD calibration process which requires VGA source
which displays a Grey16 image (right hand image below).
F50 User Manual - Overview
Содержание F50
Страница 1: ...an introduction to the projector an introduction to the projector F50 User Manual www barco com...
Страница 2: ...english 2 User s Guide Getting to know the projector F50 User Manual...
Страница 6: ...6 User Manual Introduction english F50 User Manual Introduction...
Страница 8: ...8 User Manual Introduction english F50 User Manual Introduction...
Страница 12: ...12 User Manual Introduction english F50 User Manual Safety and compliance...
Страница 14: ...14 User Manual Introduction english F50 User Manual What s in the box...
Страница 24: ...24 User Manual Introduction english F50 User Manual Installation...
Страница 48: ...48 User Manual Introduction english F50 User Manual Overview...
Страница 57: ...english 57 Figure 7 4 Film 2 8 gamma Figure 7 5 Video 1 gamma Figure 7 6 Video 2 gamma...
Страница 60: ...60 User Manual Introduction english F50 User Manual Optimising the image...
Страница 61: ...english 61 8 Technical specifications Please see www barco com for more technical information...
Страница 62: ...62 User Manual Introduction english F50 User Manual Technical specifications...
Страница 64: ...64 User Manual Introduction english F50 User Manual Lamp change...
Страница 65: ......


