www.barbecook.com
12
10.4 Grilling with closed lid
Closing the lid while grilling has some important advantages:
•
The temperature of the grill is higher and remains more constant.
•
You reduce the cooking time of your food and keep your food
more moist.
•
You reduce flare-ups and save gas.
When grilling under a closed lid, always keep an eye on the lid
thermometer to make sure the appliance does not get too hot.
See “10.5 Watching the temperature”.
10.5 Watching the temperature
Your appliance is equipped with powerful burners, so it heats up
rapidly and you can keep the temperature steady. When grilling under a
closed lid, however, you have to make sure that the appliance does not
get too hot. Keep an eye on the lid thermometer and take into account
the following guidelines:
•
A normal cooking temperature is about 210 °C. At higher
temperatures, dripping and accumulated fat can ignite.
•
The temperature should never be over 300 °C for more than five
minutes. This can damage and deform the appliance.
If the appliance gets too hot, cool it down by opening the lid
and setting the burners to a lower position.
10.6 Taking advantage of the heat zones
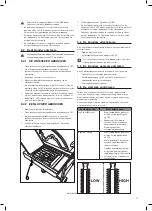
When all burners are lit, the burner hoods distribute the heat as evenly
as possible over the grill. Despite this even heating, some zones are
still hotter than others. You can take advantage of these heat zones to
grill your food to perfection:
Zone
Hot
Use to...
Front
Hot
To sear meat and vegetables
Centre
Hotter
Prepare food that needs some
time to cook (e.g. sausages,
chicken ties...)
Back
Back
Sear meat and vegetables
You can also create heat zones by playing with the power
of the burners. You can, for example, set a burner to a lower
position and use the zone above that burner for delicate food
or food that needs some time to cook.
10.7 Avoiding flare-ups
During grilling, some flare-ups are normal. Too many flare-ups,
however, increase the temperature in the appliance and can ignite
accumulated fat. To avoid flare-ups:
•
Make sure the bowl is clean when you start grilling. We
recommend cleaning the bowl after each use. See “11.2 Cleaning
the bowl”.
•
Regularly check if the fat drain hole is not blocked and if the fat
drip tray or cup is not full yet.
•
When grilling fatty meat, trim excess fat, close the lid and set the
burners to a medium or low position.
11 MAINTAINING THE APPLIANCE
11.1 Cleaning the grill
We recommend cleaning the grill after each use, with the Barbecook
cleaner. Proceed as follows:
1.
Spray the foam on the grill and let it act for a while. The foam
2.
Remove the foam with a soft sponge and water and rinse the grill
thoroughly.
3.
Dry the grill well and store it in a dry place. This prevents
formation of rust.
You can also clean the grill with a soft detergent or with sodium
bicarbonate. Never use oven cleaners on the grill.
11.2 Cleaning the bowl
We recommend cleaning the bowl after each use, with the Barbecook
cleaner. Use it the same way you do on the grill.
11.3 Cleaning the burners and venturis
11.3.1 WHY CLEAN THE BURNERS AND
VENTURIS?
Spiders and insects can make webs and nests in the burners and
venturis. This may block the gas supply to the burners. As a result:
•
You cannot light the burners. If you manage to light them anyway,
they will only produce smoky and yellow flames.
•
The gas can start burning outside the venturis, at the control
knobs. These fires are called flash-backs and can result in serious
injuries and material damage.
Damages caused by blocked burners and venturis are
regarded as inadequate maintenance and are not covered by
the warranty.
11.3.2 WHEN CLEAN THE BURNERS AND
VENTURIS?
You have to clean the burners and venturis of your appliance:
•
Before the first use after a long period of non-use.
•
At least twice a year, of which once at the beginning of the season.
11.3.3 TO CLEAN THE BURNERS AND
VENTURIS
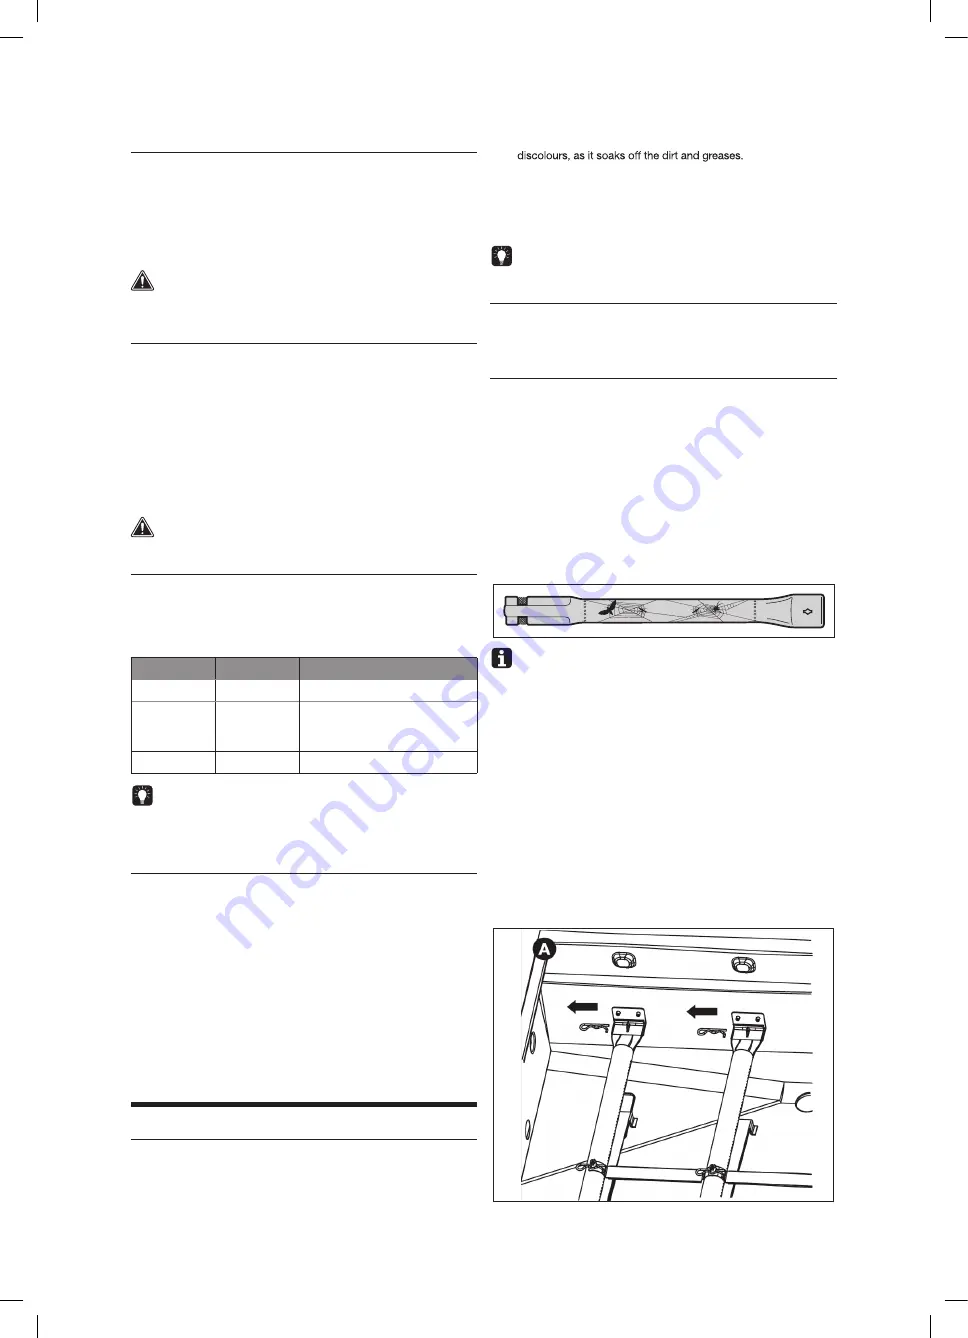
1.
Remove the burners from the appliance as shown on the
illustrations. If you notice that a burner is damaged, you have to
replace it.
Содержание 223.9541.200
Страница 4: ...www barbecook com 4 ...
Страница 82: ...www barbecook com i 82 Illustrations ...
Страница 85: ...1 2 4 13 13 X 1 A B 3 5 6 X 6 X 6 X 6 m o c k o o c e b r a b w w w i 85 3 6 5 3 A ...
Страница 87: ...7c 7d 2 5 6 11 9 X 2 X 2 X 2 X 1 X 1 C1 D1 C1 C1 D1 1 5 6 X 1 X 1 X 1 i 87 8a 8b m o c k o o c e b r a b w w w ...
Страница 88: ...9a 9d 9b 9e 9c 10 X 1 14 X 1 14 m o c k o o c e b r a b w w w i 88 ...
Страница 90: ...11a 11b 11c 12a NOT INCLUDED 11 X 2 m o c k o o c e b r a b w w w i 90 ...
Страница 91: ...12b 13b 13d 13c m o c k o o c e b r a b w w w i 91 13a 11 X 2 ...
Страница 92: ...14a 14b 15a 15c 7 8 9 X 2 X 2 X 2 7 8 9 X 2 X 2 X 2 15b m o c k o o c e b r a b w w w i 92 ...
Страница 93: ...16a 16b 16c 17 18 m o c k o o c e b r a b w w w i 93 m o c k o o c e b r a b w w w ...


