17
6.
Play on the keyboard
• Record the first track.
7.
When you have finished, press Play/Stop to stop the recording.
• The instrument will remain in Record mode.
• The recorded track is confirmed (the relative led stops flashing and
remains permanently on).
8.
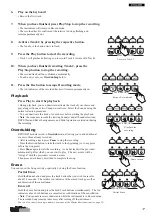
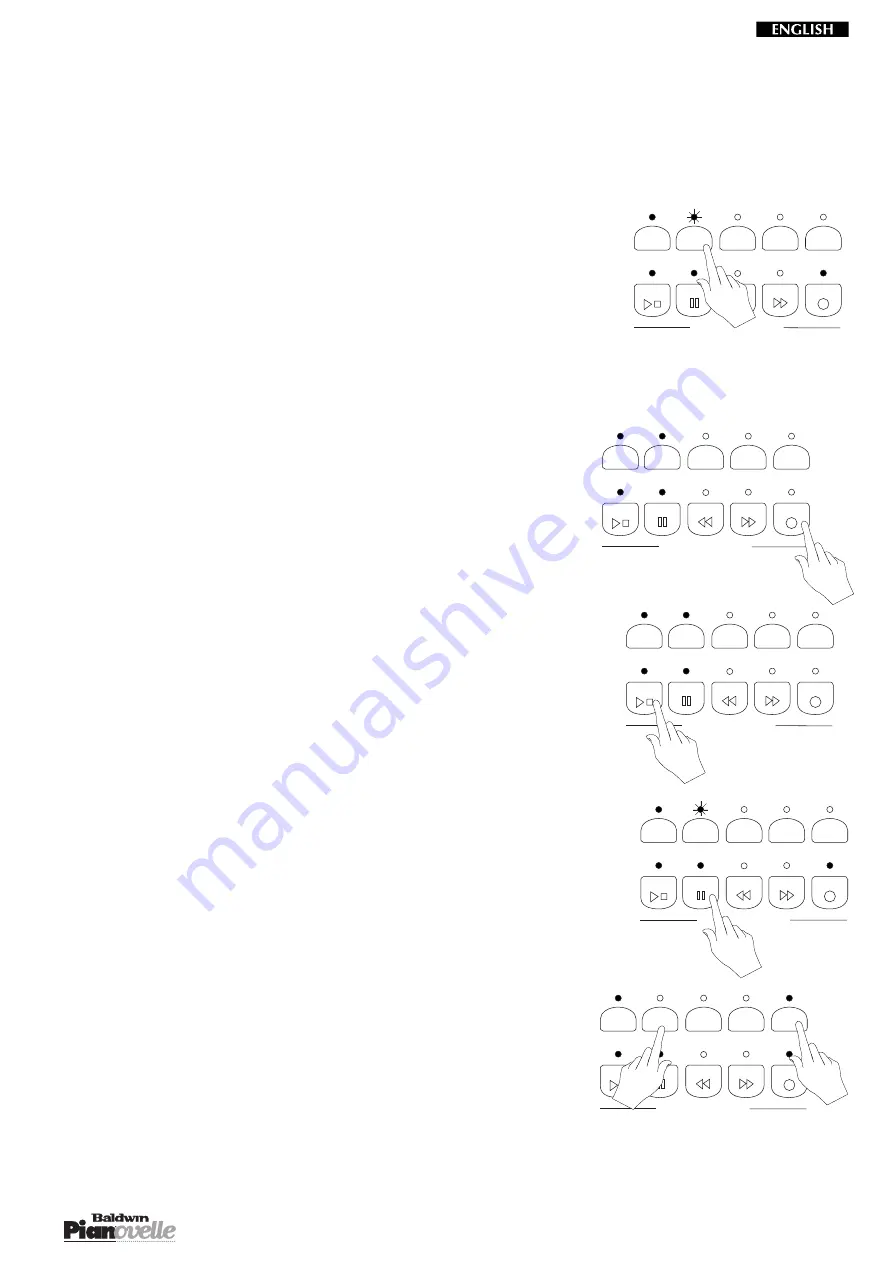
Activate Track 2 by pressing the respective button.
• The led above the button starts to flash.
9.
Press the Play button to start the recording.
• Track 1 will playback allowing you to record Track 2 in time with Track 1.
10.
When you have finished recording Track 2, press the
Play/Stop button to stop the recording.
• The second track will be confirmed automatically.
• To add new events, see Overdubbing below.
11.
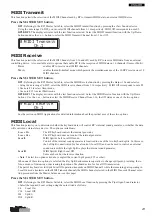
Press the Rec button to escape Recording mode.
• The led indicators of the recorded tracks will remain permanently on.
Playback
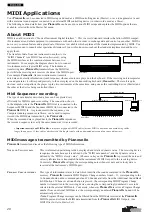
Press Play to start the playback.
• During playback, you can deactivate/activate the track of your choice and
play along with one or two Sounds in real time. Select the Sounds using the
normal selection procedure.
• You can deactivate the track of your choice before starting the playback.
• Note: the sequencer records the starting Sound(s) and all Sound selections,
DSP Effect and Reverb assignments, and Pedal operations carried out during
the recording.
Overdubbing
RP2/GRP3 models record in Overdub mode, allowing you to add additional
events to those already recorded.
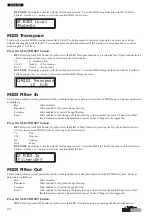
• After recording a track, press Pause to stop the recording.
• Press the Rewind button to take the track to the beginning (or to any point
before the stop point).
• Press Pause again to start the recording. A one bar lead will be provided
automatically, after which you can start to play. The new events will be
“merged” with the previously recorded events.
Then proceed as already described to complete the song.
Erase
You can cancel the Song entirely or partially by using the Erase function.
Partial Erase
Hold the Erase button and press the track button that you wish to erase for
about 2/3 seconds. The relative led indicator of the erased track goes off as
confirmation of the cancellation.
Erase all
Hold the Erase button and press the both Track buttons simultaneously. The led
indicators above both buttons are cancelled as confirmation of the cancellation.
• Note: You cannot erase recorded events while the instrument is in Record mode.
The recorded Song remains in memory after turning off the instrument.
You can also cancel the song in memory by means of the Master Reset function (see page 25).
PLAY & RECORD
PLAY
REC
STOP
REW
FF
TRACK 1
TRACK 2
METRON
TIMING
ERASE
PAUSE
To record Track 2
PLAY & RECORD
PLAY
REC
STOP
REW
FF
TRACK 1
TRACK 2
METRON
TIMING
ERASE
PAUSE
Escape Record mode
PLAY & RECORD
PLAY
REC
STOP
FF
TRACK 1
TRACK 2
METRON
TIMING
ERASE
PAUSE
REW
Pause record
PLAY & RECORD
PLAY
REC
STOP
REW
FF
TRACK 1
TRACK 2
METRON
TIMING
ERASE
PAUSE
Playback the
recording
PLAY & RECORD
PLAY
REC
STOP
FF
TRACK 1
TRACK 2
METRON
TIMING
ERASE
PAUSE
REW
Partial Erase
Содержание Pianovelle GRP3
Страница 34: ...34...


