8
1. After signal received, if there is no need for other settings, you can
just finish reading here. If there is other setting requirements.
Please check the following steps. Or if there is no signal received,
you can follow bellow steps for manual setting.
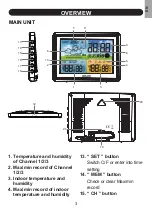
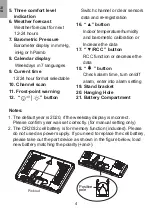
2. Press and hold “ SET ” button to enter into setting, press “ SET ”
button to skip setting steps or go to the next setting option.
*Tips: press and hold “▲” or “ ▼/RCC ” button will quickly
change the value by 8 steps.
3. Press “ SET ” to select the RCC. Default setting : ON. Press “▲” or
“ ▼/RCC ” button to select OFF or ON.
4. Press “ SET ” to select Time Zone. Default setting : 0. Press “▲” or
“ ▼/RCC ” button to select time zone from -12 H to + 12 H.
5. Press “ SET ” to select 12/24H Time Format. Default setting :24 H.
Press the “▲” or “ ▼/RCC ” button to select 12H or 24H.
6. Press “ SET ” to select Hours. Press “▲” or “ ▼/RCC ” button to
adjust the value.
Manual Settings
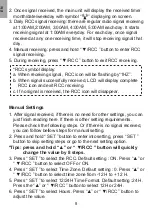
2. Once signal received, the main unit will display the received time/
month/date/weekday with symbol “ ” displaying on screen.
3. Daily RCC signal receiving: there are regular radio signal receiving
at 1:00AM,2:00AM, 3:00AM, 4:00AM, 5:00AM each day. It starts
receiving signal at 1:00AM everyday. For each day, once signal
received at any one receiving time, it will stop receiving signal that
day.
4. Manual receiving: press and hold “ ▼/RCC ” button to enter RCC
signal receiving.
5. During receiving, press “ ▼/RCC ” button to exit RCC receiving.
*RCC symbol display:
a. When receiving signal , RCC icon will be flashing by“1HZ”.
b. When signal successfully received, LCD will display complete
RCC icon and exit RCC receiving.
c. If no signal is received, the RCC icon will disappear.
EN
Содержание B0359WST2H2PR-V1
Страница 91: ...www baldr com service baldr com...
Страница 92: ......


