3
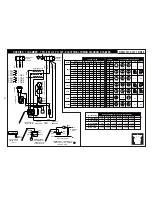
Use minimum conductor size as below:
!
For models PX-14, PX-16, P-18, BK-18 and P-24S:
14 Gauge (1.5mm) for 220-240V, single phase supply.
!
For models P-22S, P-22BL, P-44S, P-44BL, P-46S, P-48S and DP-2:
10 Gauge (2.5mm) for 220-240/380-415V, 3 phase supply.
3. REQUIREMENTS FOR INSTALLATION
For portable units (Model PX-14 and PX-16) there are no special requirements.
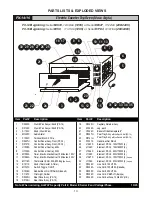
For shipping purposes the optional 4” (100mm) legs are not mounted. For mounting legs, follow
steps a. through g.
a.
Remove the outer shipping carton and paper and place the oven on the floor or other flat
surface.
b.
Remove legs, baking decks and any other materials from inside the unit.
c.
With sufficient help, tilt the unit back far enough to mount the two front legs and tighten with
an adjustable wrench.
d.
After the front legs are tight, lift rear of unit approximately 5” (125mm) off the surface and
block in position using wood or some other solid material. Now mount the two rear legs and
tighten.
e.
Using the proper lifting equipment, move the unit to its final location.
f.
Adjust the bottom portion of legs to make level.
g.
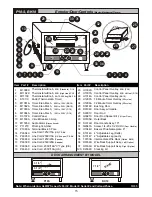
Slide baking decks into each shelf. (View on Page 7)
4.
INITIAL START UP
After the electrical connections have been made, the oven will need approximately 2 to 3 hours to
burn off. Initial heating of the oven may generate smoke or fumes and must be done in a well
ventilated area.
CAUTION: OVEREXPOSURE TO SMOKE OR FUMES MAY CAUSE NAUSEA AND DIZZINESS.
For initial heating of the new oven, follow the steps below:
!
Place the oven in a well ventilated area.
!
Open the oven doors and remove any instructions or samples shipped within the unit.
Make
sure the oven cavity is empty and the baking decks are properly installed.
!
With the oven doors open, turn the temperature knobs to 400° F (205° C) for one hour.
!
Close the oven door. Increase the temperature to 500° F (260° C) for at least 1 ½ hours.
This procedure will dry out the insulation and deck material and will help to insure optimum baking
results thereafter.
OPERATING INSTRUCTIONS
Note: Only
Pizza
or
Bread
can have direct contact with ceramic decks. All other food products must be
placed in a pan or container to avoid direct contact with ceramic decks.
1. GENERAL BAKING
Models: P-18, BK-18, P-22S, P-22BL, P-24S, P-44S, P-44BL, P-46S, P-48S, PX-14 and PX-16
Preheat the oven by setting the thermostat to the desired temperature. When the thermostat light
goes out and has cycled three times, the oven is ready for use.
These ovens have been designed to bake both fresh and frozen products. Frozen fruit pies should
be taken directly from the freezer and placed into the oven. Cooking time will vary with the size of the
pie, but under normal conditions a frozen pie should bake approximately in the same time as a fresh
pie.


