background image

Your device comes with one USB 2.0 port and one micro USB port. Connect USB devices to 
the micro-USB port using a USB cord or USB OTG cable. Once you plug a USB device into a 
USB port on your device, Windows will automatically load a driver for that device. After the 
driver has been loaded once, you can disconnect and reconnect the same device without 
having to install any drivers after subsequent reconnections.

Connecting to the USB port

Connecting an External Device

Note: If Windows requires you to install the driver before connecting, check the documentation 
provided by the device’s manufacturer before connecting the device.

Note: If your USB device uses a power cord, connect the device to a power source before 
connecting it.

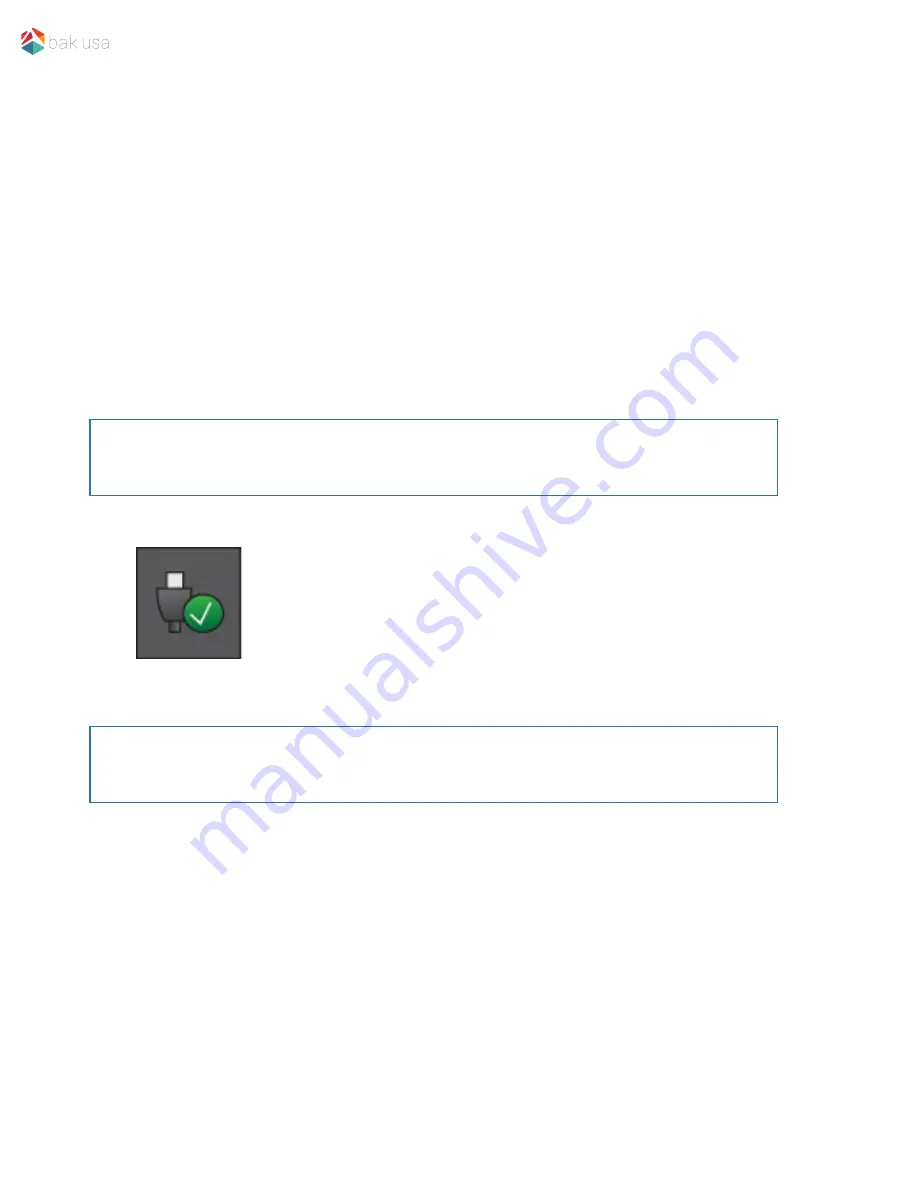
To disconnect a USB storage device, make sure you 
click the Safely Remove Hardware icon (pictured left) 

in the Notification Area to remove the device before 

disconnecting.

25

Содержание Atlas 10

Страница 1: ...BAK USA Technologies Corp 425 Michigan Ave Buffalo New York 14203 Atlas10 User Guide...

Страница 2: ...tlas 10 User Guide Version v2 2016 Thanks for embracing the evolution of mobile technology with Bak USA We hope you enjoy your Atlas 10 experience To best use your device please refer to this guide He...

Страница 3: ...eriodically inspect the device power supply and power cord for damage Replace if necessary Report any damage or loose parts to the seller immediately Do not leave the device plugged in or powered on w...

Страница 4: ...e that RF radiation is below the maximum recommended levels In addition to RF radiation all electronic devices emit extremely low frequency ELF waves These waves are known to interact with the human b...

Страница 5: ...owering on for the first time Powering off your device Putting your device into sleep mode Waking up your device Basic touchscreen options 9 9 9 10 11 11 12 Content Section 1 Getting to Know Your Devi...

Страница 6: ...necting to the HDMI port Section 5 Battery page 27 Section 6 Windows Help and Troubleshooting page 30 Troubleshooting Section 7 Specifications page 34 30 Settings screen Windows Activation Setup Your...

Страница 7: ...If any items are missing or damaged contact the seller immediately Getting to Know Your Device 1 Depending on your order optional add ons might be included in a separate package 1 1 Tablet with a Sty...

Страница 8: ...eo conferencing View and touch to operate the device Rest your stylus here Write on the screen or operate the device Press and hold to power device on off Record sounds and speech 1 Front Facing Camer...

Страница 9: ...network Hook up your HDMI capable monitor here Push the buttons to adjust the sound volume of your system Insert your USB devices such as your USB adapter 1 Rubber Cover 2 Volume Up Down 3 Micro USB D...

Страница 10: ...and bottom of tablet Press to power device on off Connect to the keyboard dock Take photos or record videos Rest the stylus here 1 Power Button 2 Rear Facing Camera 3 Stylus Holder 4 Docking Connecto...

Страница 11: ...Keyboard Dock your tablet here to use your device like a laptop Press here to open the Start menu 1 Docking Connector 2 Windows Key 3 Touchpad Use this to perform traditional mouse functions 5...

Страница 12: ...he volume Toggle the display output between the device and external monitor Decrease the display brightness Increase the display brightness Open the Settings screen Play or pause music and video Speak...

Страница 13: ...ing the dock 2 Gently press and insert the tablet into the docking connector on the dock 3 When you hear a click sound the tablet is successfully docked Undocking from the keyboard 1 Power off your de...

Страница 14: ...ill turn your camera into a microscope 1 Take the macro lens 2 Press it gently over the rear facing camera 3 Fit the lens into the outer rim of the camera 4 Activate any camera app in your tablet 5 Ge...

Страница 15: ...You will see the power indicator LED on the right side of the device light up green Powering on Your Device Powering On Off Powering on for the First Time The laptop will require an initial setup 1 A...

Страница 16: ...ce follow the steps below From the Start menu Click or tap the Windows icon in the lower left corner of the Desktop or press the Windows key on a connected keyboard In the Start menu click or tap Powe...

Страница 17: ...Device into Sleep Mode Waking up Your Device To wake up your device perform one of the following Press the power button once briefly Press any key on the keyboard tap the touchpad or open the display...

Страница 18: ...ap once on the touchpad surface or press once on the lower left corner of the touchpad Right click Press once on the lower right corner of the touchpad Drag Press and continue to hold down the left co...

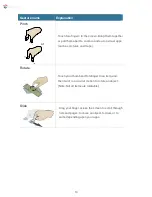
Страница 19: ...port these functions Gesture name Explanation Tap Double tap Press and hold Touch an item once to start an app open a link or perform an optional function This is similar to a left click with a mouse...

Страница 20: ...apps such as pictures and maps Touch your thumb and forefinger to an item and then twist in a circular motion to rotate an object Note Not all items are rotatable Drag your finger across the screen to...

Страница 21: ...app icon pictured left or press the Window key TAB key on keyboard at the same time The Desktop screen is shown below and natively provides the virtual desktop feature Windows Interface 3 Desktop and...

Страница 22: ...Search box App shortcuts area To open the Start menu tap or click the Windows icon aka Start button at the left end of the taskbar or press the Windows key on the keyboard picured left The Start menu...

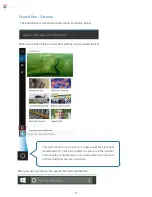
Страница 23: ...pop out as shown below After you set up Cortana the search box will look like this This is the Cortana icon Cortana is a new virtual assistant built into Windows 10 Click here to finish the setup and...

Страница 24: ...the taskbar holds several icons that show you the status of your laptop as shown below This is called Notification Area Click here to show more hidden status icons Displays the current battery status...

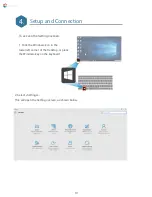
Страница 25: ...gs This will open the Settings screen as shown below Setup and Connection 4 To access the Settings screen 1 Click the Windows icon in the lower left corner of the Desktop or press the Windows key on t...

Страница 26: ...t Activate 4 Follow the instructions to activate Windows Setting up Your Microsoft Account To share files or settings with other devices running Windows 10 or to download and purchase apps from the Mi...

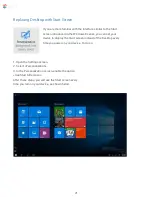
Страница 27: ...ou can set your device to display the Start screen instead of the Desktop every time you power on your device To do so 1 Open the Settings screen 2 Select Personalization 3 In the Personalization scre...

Страница 28: ...will appear To pin the app to your Start menu or taskbar click Pin to Start or Pin to taskbar Removing an App To remove an app 1 Right click the app that you want to remove from your Start menu or tas...

Страница 29: ...ower right you must disable Airplane mode Once you have enabled the wireless connection the device will automatically scan for available wireless networks and display them in the wireless LAN network...

Страница 30: ...the micro SD card into the card slot as shown below 2 Follow the on screen instructions and choose to open and view files 3 A Windows Explorer will run and display all the folders and files stored in...

Страница 31: ...having to install any drivers after subsequent reconnections Connecting to the USB port Connecting an External Device Note If Windows requires you to install the driver before connecting check the doc...

Страница 32: ...port on your device 3 Connect one end of your HDMI cable to the port and the other end to the HDMI port on the external device 4 Power on the external device When connecting a TV you may need to conf...

Страница 33: ...ide of the device 2 Plug the adapter into a wall socket 3 You will see the battery status indicator icon change as described in the next section While system is off it takes around 4 hours to fully ch...

Страница 34: ...box will appear and display the remaining battery percentage as shown below The battery icon reveals the status of your battery which is described as below Icon Definition Battery is fully charged Ba...

Страница 35: ...acity battery life is shortened If the battery life is reduced to under half of its initial time we recommend purchasing a new battery When not using the battery for a long time store the battery afte...

Страница 36: ...T department the seller or the Microsoft website When you observe a problem stop operating the device immediately taking further action may result in data loss or damage Take note of what the system i...

Страница 37: ...o 3 seconds Press the power button Press the Bak USA logo on the screen The critical low battery error message appears and the device turns off The battery power is getting low Connect the AC adapter...

Страница 38: ...or distorted The screen is unreadable or distorted Make sure that The screen resolution and color quality are correctly set The external monitor type is correct Incorrect characters appear on the scr...

Страница 39: ...mmunication operation Disable the sleep timer when you are working on the network The connected external device does not work Do not connect or disconnect any external device cables other than USB whi...

Страница 40: ...ne Speaker G Sensor Light Sensor Compass Gyroscope Hardware Specifications Interface Configuration Type Detail Description Power Interface USB Interface Headphone Jack Microphone jack HDMI Interface K...

Страница 41: ...echnician for help For questions related to the EMC performance of this product contact Elitegroup Computer Systems Co Ltd No 239 Sec 2 Ti Ding Blvd Taipei Taiwan 11493 886 2162 1177 Canadian Departme...

Страница 42: ...ponsibility to hand it over to a designated collection point for the recycling of waste electrical and electronic equipment For more information please contact your local waste collection center or th...

Отзывы: