background image

It is critically important that you start with square and level footings, concrete pad or deck to 

attach your structure

Pay close attention to the items needed for each step. Make sure you are using the correct hardware for each
step. Using incorrect hardware may result in improper assembly

Remember to double check for underground utilities and overhead electrical lines

Owner's Manual

Basic Setup Dimensions & Assembly Notes

Post mounts are provided with your structure which allows you to permanently install your structure to a 
pre-existing or new wood or concrete surface.

The hardware to attach the post mounts to the structure is included.

The hardware to mount the structure permanently to a concrete surface is 

NOT 

included.

The hardware to mount the structure permanently to a wood deck is NOT included and will need to be purchased

separately.

 You must ensure there is ample structural support under the deck before permanently attaching.

Metal Roof Assembly

Remove plastic covering from metal roof panels before installing each piece. Place roofing materials on a nonabrasive,
flat surface before and after assembly as it could bend, dent or scratch

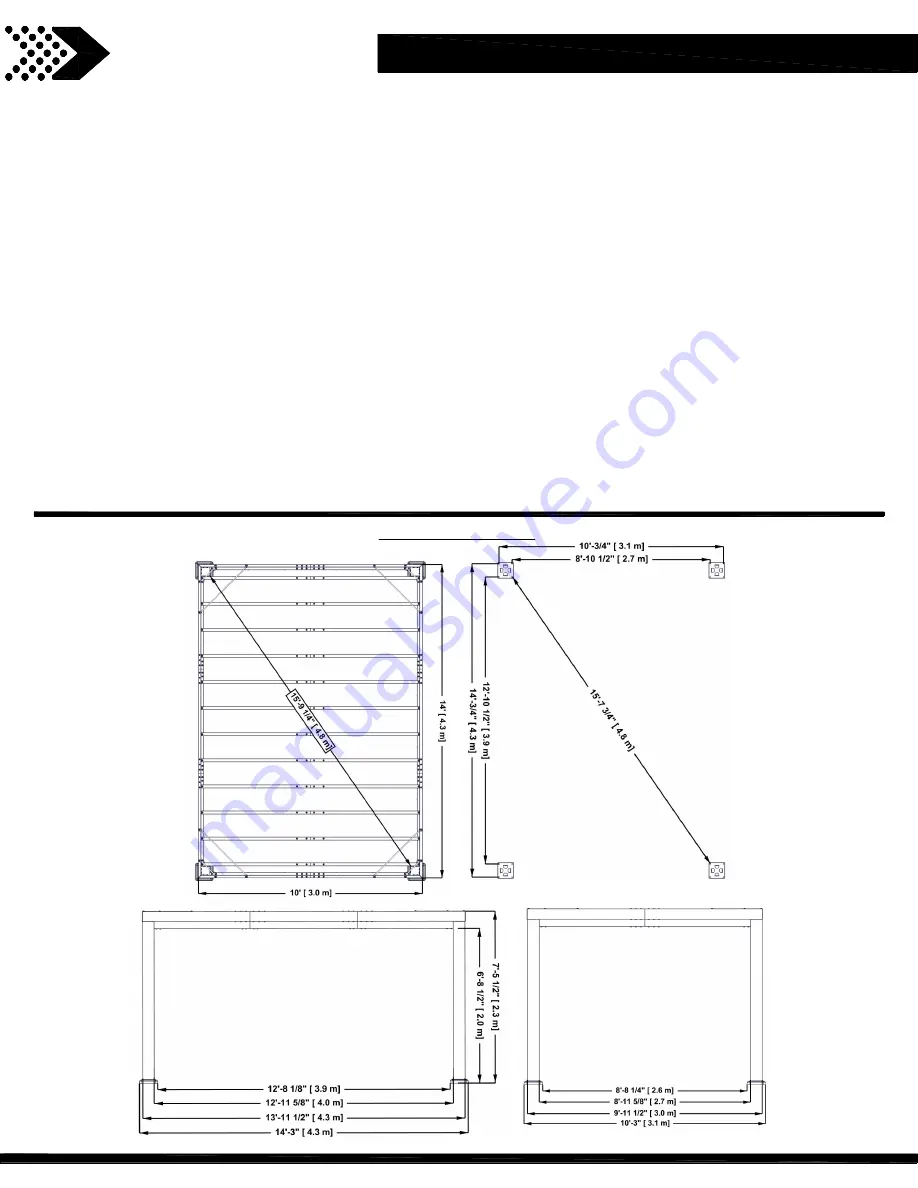
Overall Dimensions

2

Содержание TRENTON 2105126

Страница 1: ...a Swindon SN5 7EX Phone 0800 118 2476 J P Coenstraat 7 The Bridge The Hague 2595 WP Netherlands Phone 08005678990 14x10 TRENTON WINDHAM PERGOLA MODEL s 2105126 2105157 2105423B 2105454B Please visit w...

Страница 2: ...to permanently install your structure to a pre existing or new wood or concrete surface The hardware to attach the post mounts to the structure is included The hardware to mount the structure permanen...

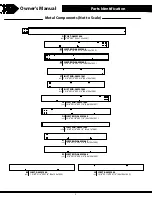
Страница 3: ...M01466 x24 1 3 8 X5 1 4 X53 3 4 36x134x1365 E1 JOIST END A4M01467 x2 D1 JOIST END A4M01464 1 3 8 X5 1 4 X59 7 8 36x134x1521 x2 B2 JOIST END A4M01459 1 3 8 X5 1 4 X55 7 8 36x134x1420 x2 C1 JOIST END A4...

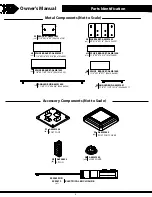
Страница 4: ...1439 1 1 4 X5 1 8 X19 5 8 33x131x500 x4 SPLICE BRACKET A4M01438 1 1 2 X3 X15 3 4 37x77x400 H2 x12 SPLICE BRACKET A4M01440 1 1 4 X5 1 8 X11 33x130x280 H4 x4 P1 A4M01454 POST FOOT x4 Accessory Component...

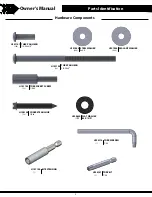
Страница 5: ...H101053 SEALANT WASHER 404 H101054 TORX PAN HEAD 1 4 20x3 4 380 H101101 TORX PAN HEAD 1 4 20x4 24 H101102 TORX SOCKET SCREW 1 4 20 20 H101103 CONCRETE ANCHOR 1 4x2 16 H100120 FLAT WASHER BLK x H100630...

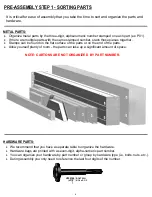
Страница 6: ...s together Stamps can be found on the flat surface of the parts or on the end of the parts Allow yourself plenty of room the parts can take up a significant amount of space HARDWARE PARTS We recommend...

Страница 7: ...PRE ASSEMBLY STEP 2 TOOLS REQUIRED Square Level 24 Phillips Screw Driver Drill Attachments Phillips Head Rubber Mallet Optional Tape Measure 3 16 Concrete Drill Bit Cordless Drill or Electric Drill 7...

Страница 8: ...are several types of assembly instructions available to you 1 Printed Assembly Manual included with your set 2 BILT APP 3D interactive instructions 3 Combination of the Printed Manual and BILT APP No...

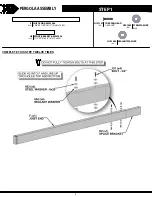
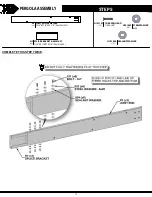
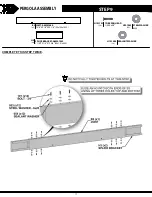
Страница 9: ...01 STEEL WASHER 6x20 48 H101053 SEALANT WASHER 48 H101054 TORX PAN HEAD 1 4 20x3 4 COMPLETE THIS STEP TWELVE TIMES 1 5 8 X3 1 8 X58 1 2 41x81x1485 F JOIST END A4M01466 x12 SPLICE BRACKET A4M01438 1 1...

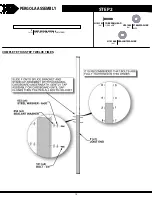
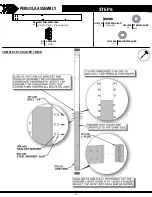
Страница 10: ...GOLA ASSEMBLY STEP 2 48 STEEL WASHER 6x20 48 H101053 SEALANT WASHER 48 H101054 COMPLETE THIS STEP TWELVE TIMES 1 5 8 X3 1 8 X58 1 2 41x81x1485 F JOIST END A4M01466 x12 H101101 TORX PAN HEAD 1 4 20x3 4...

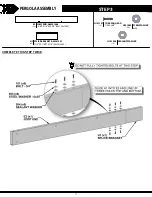
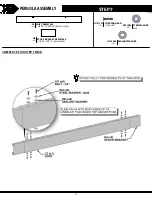
Страница 11: ...L WASHER 6x20 12 H101053 SEALANT WASHER 12 H101054 COMPLETE THIS STEP TWICE 1 3 8 X5 1 4 X53 3 4 36x134x1365 E2 JOIST END A4M01468 x2 SPLICE BRACKET A4M01437 1 1 4 X5 1 8 X15 3 4 33x131x400 H1 x2 H101...

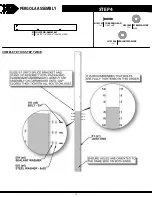
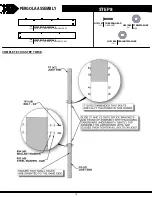
Страница 12: ...PERGOLA ASSEMBLY STEP 4 12 STEEL WASHER 6x20 12 H101053 SEALANT WASHER 12 H101054 COMPLETE THIS STEP TWICE 1 3 8 X5 1 4 X53 3 4 36x134x1365 E1 JOIST END A4M01467 x2 H101101 TORX PAN HEAD 1 4 20x3 4 12...

Страница 13: ...L WASHER 6x20 12 H101053 SEALANT WASHER 12 H101054 COMPLETE THIS STEP TWICE D1 JOIST END A4M01464 1 3 8 X5 1 4 X59 7 8 36x134x1521 x2 SPLICE BRACKET A4M01437 1 1 4 X5 1 8 X15 3 4 33x131x400 H1 x2 H101...

Страница 14: ...EMBLY STEP 6 12 STEEL WASHER 6x20 12 H101053 SEALANT WASHER 12 H101054 COMPLETE THIS STEP TWICE D2 JOIST END A4M01465 1 3 8 X5 1 4 X59 7 8 36x134x1521 x2 N1 A6P00493 L PLUG x4 H101101 TORX PAN HEAD 1...

Страница 15: ...STEEL WASHER 6x20 16 H101053 SEALANT WASHER 16 H101054 COMPLETE THIS STEP TWICE SPLICE BRACKET A4M01440 1 1 4 X5 1 8 X11 33x130x280 H4 x4 C3 JOIST A4M01463 1 3 8 X5 1 4 X55 7 8 36x134x1420 x2 H101101...

Страница 16: ...EEL WASHER 6x20 16 H101053 SEALANT WASHER 16 H101054 COMPLETE THIS STEP TWICE C1 JOIST END A4M01461 1 3 8 X5 1 4 X49 3 4 36x134x1264 x2 C2 JOIST END A4M01462 1 3 8 X5 1 4 X49 3 4 36x134x1264 x2 H10110...

Страница 17: ...EEL WASHER 6x20 24 H101053 SEALANT WASHER 24 H101054 COMPLETE THIS STEP TWICE SPLICE BRACKET A4M01439 1 1 4 X5 1 8 X19 5 8 33x131x500 H3 x4 B3 JOIST A4M01460 1 3 8 X5 1 4 X55 7 8 36x134x1420 x2 H10110...

Страница 18: ...EEL WASHER 6x20 24 H101053 SEALANT WASHER 24 H101054 COMPLETE THIS STEP TWICE B2 JOIST END A4M01459 1 3 8 X5 1 4 X55 7 8 36x134x1420 x2 B1 JOIST END A4M01458 1 3 8 X5 1 4 X55 7 8 36x134x1420 x2 H10110...

Страница 19: ...1 16 STEEL WASHER 6x20 16 H101053 SEALANT WASHER 16 H101054 COMPLETE THIS STEP FOUR TIMES POST A4M01436 6 X6 X89 152x152x2261 A x4 P1 A4M01454 x4 POST FOOT P2 A4M01455 POST FOOT COVER x4 H101101 TORX...

Страница 20: ...LY STEP 12 16 STEEL WASHER 6x20 16 H101053 SEALANT WASHER 16 H101054 COMPLETE THIS STEP FOUR TIMES G1 BRACKET A4M01452 1 1 4 X4 1 8 X5 32x104x128 x8 4 POST ASSEMBLY FROM STEP 11 H101101 TORX PAN HEAD...

Страница 21: ...PERGOLA ASSEMBLY STEP 13 16 STEEL WASHER 6x20 16 H101053 SEALANT WASHER 16 H101054 COMPLETE THIS STEP TWICE 2 INNER END JOIST ASSEMBLY FROM STEPS 3 4 H101101 TORX PAN HEAD 1 4 20x3 4 21...

Страница 22: ...PERGOLA ASSEMBLY STEP 14 12 STEEL WASHER 6x20 12 H101053 SEALANT WASHER 12 H101054 2 INNER SIDE JOIST ASSEMBLY FROM STEPS 7 8 H101101 TORX PAN HEAD 1 4 20x3 4 22...

Страница 23: ...PERGOLA ASSEMBLY STEP 15 16 STEEL WASHER 6x20 16 H101053 SEALANT WASHER 16 H101054 12 H101103 TORX SOCKET SCREW 1 4 20 2 OUTER SIDE JOIST ASSEMBLY FROM STEPS 9 10 H101101 TORX PAN HEAD 1 4 20x3 4 23...

Страница 24: ...PERGOLA ASSEMBLY STEP 16 16 STEEL WASHER 6x20 16 H101053 SEALANT WASHER 16 H101054 8 2 OUTER END JOIST ASSEMBLY FROM STEPS 5 6 H101103 TORX SOCKET SCREW 1 4 20 H101101 TORX PAN HEAD 1 4 20x3 4 24...

Страница 25: ...PERGOLA ASSEMBLY STEP 17 32 STEEL WASHER 6x20 32 H101053 SEALANT WASHER 32 H101054 W BRACKET A4M01453 3 X5 1 8 X9 1 8 78x130x233 G2 x4 H101101 TORX PAN HEAD 1 4 20x3 4 25...

Страница 26: ...PERGOLA ASSEMBLY STEP 18 24 H101102 STEEL WASHER 6x20 24 H101053 SEALANT WASHER 24 H101054 TORX PAN HEAD 1 4 20x4 12 JOIST ASSEMBLY FROM STEPS 1 2 26...

Страница 27: ...EEL WASHER 6x20 32 H101053 SEALANT WASHER 32 H101054 COMPLETE THIS STEP FOUR TIMES L ANGLED ROD A4M01450 1 1 4 X1 1 2 X36 3 8 33x38x924 x4 ANGLED ROD A4M01451 1 1 4 X1 1 2 X12 7 8 33x38x327 M x4 H1011...

Страница 28: ...PERGOLA ASSEMBLY STEP 20 CONCRETE ANCHOR 1 4x2 16 H100120 FLAT WASHER BLK 8x19 16 H100630 28...

Страница 29: ...PERGOLA ASSEMBLY STEP 21 N2 A4M01352 HOLE COVER x20 29...

Страница 30: ...NCLOSURE FOR ELECTRICAL ENCLOSURE INSTALLATION REFER TO ASSEMBLY INSTRUCTIONS THAT COMES PACKAGED WITH THE ELECTRICAL ENCLOSURE KIT INSTALL ON ANY POST THAT IS DESIRED FOLLOW DIRECTIONS FOR PROPER INS...

Отзывы: