background image

  4

8661 • Endovaginal Scanning


Endovaginal Scanning

Before endovaginal scanning, ensure the patient’s bladder is empty.

Smear a small amount of scanning gel over the tip of the transducer cover. This will ease 
insertion and improve the screen images.

Puncture Facilities

Puncture and biopsy is possible with Type 8661. The puncture attachment is illustrated in 
the following pages with a brief description of its use and operating instructions.

The use of probe sheaths during invasive applications is recommended.

For hygiene reasons, the transducer should be enclosed in a transducer cover or a standard 
condom. When sterile conditions are required, cover the transducer with a sterile transducer 
cover.  

Puncture Attachment UA1242

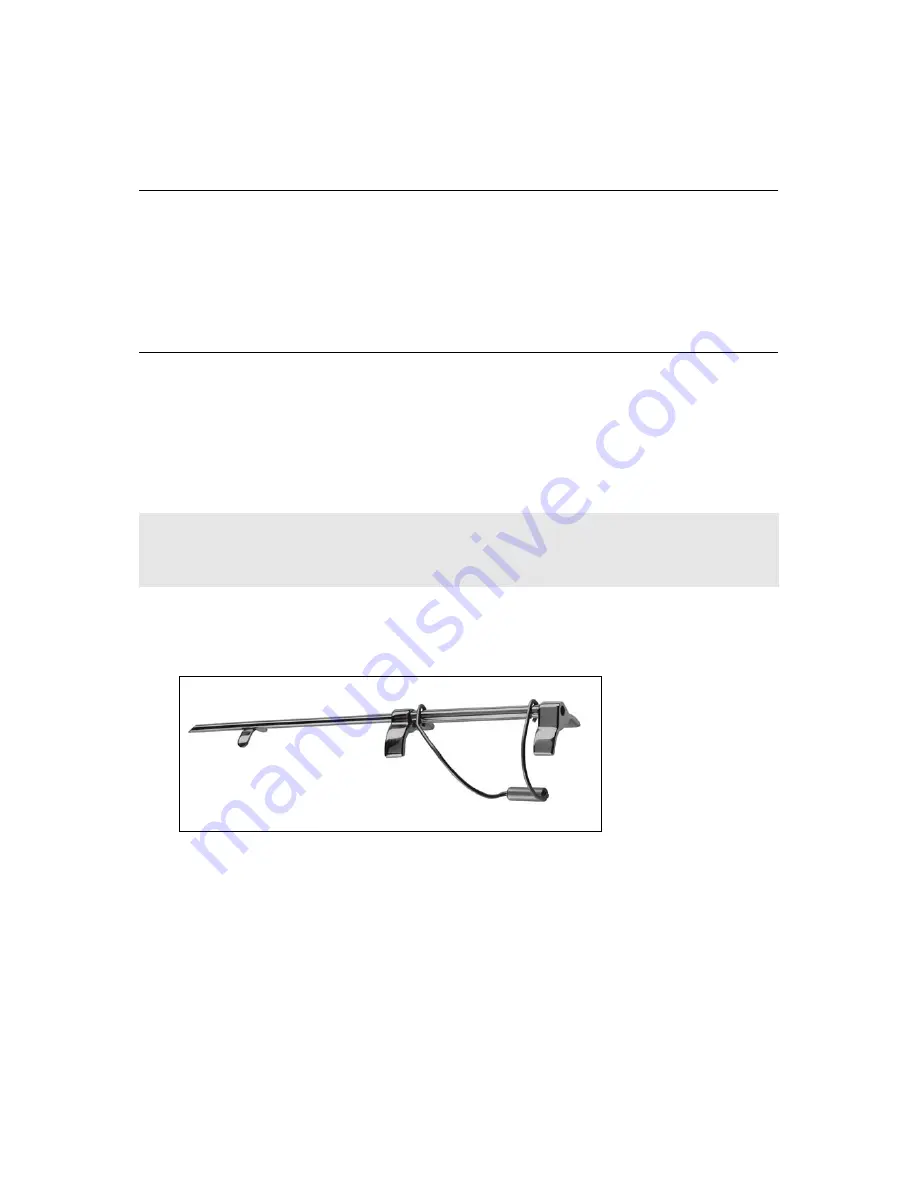
This metal puncture attachment (see Fig. 3.) is intended for endovaginal puncture and 
biopsy with Endovaginal Endfire Transducer Type 8661.

Fig. 3.

Puncture attachment UA1242

The puncture attachment consists of a swinging lock-arm and a needle guide with an inner 
diameter of 2.2mm, suitable for 20 to 14 gauge needles.

The needle guide is angled 

0.5

°

 towards the long axis of the transducer (i.e. towards the mid-

axis of the scan image). The distance from the entrance to the needle guide and the first 
puncture line dot on the scan image is 

215mm

. The dots are 5 mm apart.

All parts of the puncture attachment can be autoclaved or disinfected by immersion in a 
suitable solution.

WARNING

It is essential for the patient’s safety that only the correct puncture attachment is used with 
Type 8661. Never use unauthorized combinations of transducers and puncture attachments or 
other manufacturers’ puncture attachments.

Содержание Type 8661

Страница 1: ...Endovaginal Endfire Transducer Type 8661 English BB0613 G August 2006 User Guide...

Страница 2: ...a sample of our customers a few months after they receive their orders If you receive an email message from us asking for your feedback we hope you will be willing to answer some questions about your...

Страница 3: ...on 2 Starting Scanning 2 Connecting the Transducer 3 Changing Frequency 3 Using a Transducer Cover 3 Using the Transducer Control Button 3 Changing Orientation 3 Endovaginal Scanning 4 Puncture Facili...

Страница 4: ......

Страница 5: ...e 8661 is shown in Fig 2 Fig 2 Scanning plane of Type 8661 The transducers have a groove on the top of their handles opposite the control button This groove shows the direction of the scanning plane G...

Страница 6: ...Caution Keep all plugs and sockets absolutely dry at all times Starting Scanning All equipment must be cleaned and disinfected before use WARNING If at any time the scanner malfunctions or the image...

Страница 7: ...image artifacts caused by air bubbles Pull the transducer cover over the transducer Gel also creates a good acoustic contact between the skin and the transducer therefore apply a small amount to the...

Страница 8: ...nt UA1242 This metal puncture attachment see Fig 3 is intended for endovaginal puncture and biopsy with Endovaginal Endfire Transducer Type 8661 Fig 3 Puncture attachment UA1242 The puncture attachmen...

Страница 9: ...lift the needle guide off the trans ducer Performing Puncture and Biopsy Endovaginal Biopsy Cover the transducer with a sterile transducer cover If the transducer cover is damaged when attaching the p...

Страница 10: ...5 Illustration of puncture line for puncture attachment UA1242 Cleaning after Puncture and Biopsy If biological materials are allowed to dry on the transducer or puncture attachments disin fection and...

Страница 11: ...be followed Within the EU when you discard the trans ducer you must send it to appropriate facilities for recovery and recycling See the applicable scanner user guide for further details WARNING For...

Страница 12: ......

Отзывы: