AXTON A1390 Скачать руководство пользователя страница 35

35

Sensitivity Adjustments and    


gain matching

To reach a maximum of dynamic response from your individu-
al head unit / amplifier / speaker combination, it is important 
to set the respective input sensitivity controls (GAIN) correctly. 
Firstly the sensitivity determines the actual signal-to-noise 
ratio. Secondly, the sensitivity also controls the maximum 
distortion-free sound pressure level (SPL) possible with your 
specific car audio system.
It is recommended to effect the sensitivity adjustments and 
system LEVEL matching in the same sequence as listed below:

➜  

Set all tone controls (Bass, Mid, Treble, Sub) on the head-

unit as well as all fader and balance controls to neutral. 
The "Loudness"  option should be in the "Off" position, too.

➜  

Turn the 

gAin 

control (s) of the connected amplifier(s) 

to its/their lowest positions.

➜  

Turn-on your head-unit and turn-up the volume control 

to approximately 3/4 of full volume and start playing a well 
recorded, dynamic piece of music.

➜  

2- or 4-channel fullrange operation, only: Slowly turn 

up the 

gAin 

control until you can hear distorted sounds. 

Slowly decrease the LEVEL control to the point where the 
distortions will have disappeared. The system adjustment 
is completed.

Logical sequence to adjust the input gains of installs with 
3/4- or 5-channels:

➜  

SUB/ 3- or 5-channel operation (2x)  mono 

sub, only: 

Slowly turn up the 

gAin 

control until you 

can hear some distorted bass sounds. Slowly decrease the 
GAIN level control to the point where the distortions just  
have disappeared.

➜  

Now you reduce the main volume level on the head-unit 

to medium listening level.

➜  

FRONT/ 3- or 5-channel operation (2x)  mono 

sub, only: Start turning up the 

gAin l + r Front 

control clo-

ckwise until you have reached good tonal balance between 
the (front) satellites and the subwoofer. A slight attenua-
tion of the bass range should be preferred, as this will be 
compensated later by normal driving noises. For 3-channel 
operation the system adjustment is completed.

➜  

REAR/  5-channel operation 2x  mono sub, only: 

Start turning up the 

gAin l + r 

rear


control clockwise until 

you feel to you have reached an appropriate 'rear fill' in the 
back of the car, so that the overall in-car sound becomes 
smooth and homogenous.

➜  

Finally, you may want to do some fine-tuning on the 

different highpass and lowpass frequencies selected. It 
is recommended to start fine-tuning with the subwoofer 
lowpass frequency. Then proceed - if necessary - with the 
front satellites and finish the adjustments with the rear 
satellites highpass frequencies.

imPOrTAnT: All advice on controls and adjustments of this 
manual section is based on the assumption that you are also 
thoroughly acquainted with all the requirements and features 
of the entire audio equipment – especially the head-unit and 
the speakers – connected to this amplifier! 

Содержание A1390

Страница 1: ...POWER AMPLIFIERS Einbau und Bedienungsanleitung Installation Operating Instructions A1390 A2090 A2190 A490 A480 250 031298 031298 031298 031209 031209 ...

Страница 2: ...090 A2190 24 Connections Controls A490 26 Connections Controls A480 250 28 Amplifier Location Mounting 30 Wiring Tips 30 Connecting 32 Controls andAdjustments 33 Troubleshooting 36 Specifications 37 Warranty Certificate 56 Index Page Introduction 39 Charactéristiques principales 39 Connections et réglages A1390 40 Connections et réglages A2090 A2190 42 Connections et réglages A490 44 Connections e...

Страница 3: ...ale A1390 A2090 A2190 A490 A480 250 PWM MOSFET Schaltnetzteil mit hohemWirkungsgrad A B Endstufenschaltung mit BJT Transistoren Bipolar JunctionTransistors Diskret aufgebaute Halbleiter Endstufen Betriebsmodus umschaltbar vonVollbereichs Verstärkung Fullrange Betrieb auf Hochpass und Tiefpass Betrieb Integrierte s elektronische s Hoch undTiefpass Filter 12dB Oktave für Satelliten bzw Subwoofer Bet...

Страница 4: ...T L R Cinch Eingangsbuchsen links und rechts zum Anschluß an die NF Pre Out Signal Ausgänge des Steuergerätes q GROUND GND Klemme für die Verbindung zur Chassis Masse w REMOTE REM Anschluß Klemme für die automatische Ein bzw Ausschaltung des Verstärkers über den Amp Remote Anschluß Ihres Steuergerätes e 12 V Anschluß Klemme für die direkte Verbindung zum positiven Batterie Pol des Kfz r FUSE Siche...

Страница 5: ...5 Anschlüsse Bedienungselemente A1390 q w e r t y u i o ...

Страница 6: ... Steuergerätes INPUT L R Cinch Eingangsbuchsen links und rechts zum Anschluß an die NF Pre Out Signal Ausgänge des Steuergerätes q GROUND GND Klemme für die Verbindung zur Chassis Masse w REMOTE REM Anschluß Klemme für die automatische Ein bzw Ausschaltung des Verstärkers über den Amp Remote Anschluß Ihres Steuergerätes e 12 V Anschluß Klemme für die direkte Verbindung zum posi tiven Batterie Pol ...

Страница 7: ...7 Anschlüsse Bedienungselemente A2090 A2190 q w e r t y u i o q w e r t y i o ...

Страница 8: ...gnal Ausgänge des Steuergerätes Anmerkung Obere Reihe für Ch1 u CH2 Untere für CH3 u CH4 q GROUND GND Klemme für die Verbindung zur Chassis Masse w REMOTE REM Anschluß Klemme für die automatische Ein bzw Ausschaltung des Verstärkers über den Amp Remote Anschluß Ihres Steuergerätes e 12 V Anschluß Klemme für die direkte Verbindung zum positiven Batterie Pol des Kfz r FUSE Sicherung en für die inter...

Страница 9: ...9 Anschlüsse Bedienungselemente A490 q w e r t y u i o ...

Страница 10: ...g INPUT CH1 bis CH4 Cinch Eingangsbuchsen links und rechts zum Anschluß an die NF Pre Out Signal Ausgänge des Steuergerätes Anmerkung Obere Reihe für Ch1 u CH2 Untere für CH3 u CH4 Linke Reihe für CH5 q GROUND GND Klemme für die Verbindung zur Chassis Masse w REMOTE REM Anschluß Klemme für die automatische Ein bzw Ausschaltung des Verstärkers über den Amp Remote Anschluß Ihres Steuergerätes e 12 V...

Страница 11: ...11 Anschlüsse Bedienungselemente A480 250 q w e r t y u i o f g ...

Страница 12: ...llte verlegen Sie es mit einer S förmigen Schleife keine Rund bzw Spiralschleife in der Kabelmitte CMONTAGE TIPS 1 Die Plazierung IhresVerstärkers hat einen großen Einfluß auf dieAbleitung der im normalen Betrieb entstehenden Wärmebzw aufdaseventuelleAnsprechender automatischen Überhitzungssicherung des Gerätes Aufgrund derWärme entwicklung desVerstärkers sollten Sie einen gut belüfteten Installat...

Страница 13: ...en Sie unbedingt auf guten Masse Kontakt Schlechte Masse Kontakte sind die Ursache für die meisten Störprobleme im Auto 7 Verlegen Sie alle Kabel so daß weder für Lenker In noch Passagiere Beeinträchtigungen der Manövrierfähigkeit bzw der Sicherheit entstehen 8 Beachten Sie beimVerlegen der Kabel daß keine Kurz schlüsse mit dem Fahrzeugchassis entstehen Ver wenden Sie überall dort wo Kabel durch B...

Страница 14: ...zu den entsprechenden Lautsprechern oder Passiv Weichen Achten Sie auf korrekte Polarität Immer auf und auf Für Mono Brückenbetrieb verwenden Sie die mit BRIDGE markierten und Anschluss Klemmen Im Brü ckenbetrieb darf eine Gesamtimpedanz von 4 Ohm nicht unterschritten werden 5 Masse Verbindung zum Chassis des Fahrzeugs Wenn möglich Masse Kabel sehr kurz halten und sicherstellen daß der Masse Konta...

Страница 15: ...den fünf AXTON Verstärker Modellen A480 250 A2090 2190 A490 undA1390 haben Sie nicht nur die Möglich keit der traditionellenVollbereichs oder Fullrange Verstärkung Sie können Ihre Lautsprecher mit Hilfe der Hochpass bzw Tiefpass Betriebswahlmöglichkeit auch ganz gezielt in denjeni gem Frequenzbereich spielen lassen für den die Lautsprecher am Besten geeignet sind Im HIGHPASS Hochpass Betrieb arbei...

Страница 16: ...ährend den Einstellungen ausgeschaltet sein Mit der Einstellung des HIGHPASS Hochpass Filters HPF der Satelliten Lautsprecher an den entsprechenden Reglern soll eine elektrische und mechanische Entlastung der einge setzten Koax oder Kompo Systeme erreicht werden Je nach vorhandener Membranfläche und Nennbelastbarkeit der Lautsprecher empfiehlt sich eine Einsatz bzw Trennfrequenz zwischen 50 und 25...

Страница 17: ... den GAIN Regler gerade soweit zurück bis die Verzerrungen wieder ver schwunden sind Die Einstellungen sind hiermit für den Subwoofer abgeschlossen Frontkanäle Drehen Sie nun den GAIN Regler der vor deren Lautsprecher langsam im Uhrzeigersinn auf bis Sie einen tonal ausgewogenen Klangcharakter zwischen Front Satelliten und Subwoofer erzielt haben Eine leichte Bassbetonung ist vorzuziehen da sie vo...

Страница 18: ...nchleitungen und oder schlecht gewählte Cinchkabelführung induktive Einstreuungen der Bordelektrik Prasseln in Abhängigkeit der Schlecht entstörte Zündanlage Motordrehzahl Störgeräusche Deutet auf eine Masseschleife doppelter Masseanschluß hin Bei der Montage desVerstärkers Kontakt zur Kfz Masse vermeiden Überprüfen Sie auch die Masse Verbindungen der anderen angeschlossenen Audio Geräte Wichtig D...

Страница 19: ...kt 12 12 12 12 12 Regelbereich Hochpass Tiefpass Hz HPF od LPF 50 250 50 250 50 250 50 250 50 250 Regelbereich Subsonic Hz 15 50 n a n a n a 15 50 Empf Stromkabel Querschnitt bei ca 5 m Länge mm 20 20 20 20 20 Eingangsimpedanz kOhm 24 24 24 24 24 Max Eingangsempfindlichkeit V 0 2 7 0 2 7 0 2 7 0 2 7 0 2 7 Dämpfungsfaktor an 4 Ohm Last 220 150 250 200 100 Thermische Sicherung C 80 80 80 80 80 Siche...

Страница 20: ...20 ...

Страница 21: ...plifier in your vehicle please contact your nearest AXTON dealer A General Features A1390 A2090 2190 A490 A480 250 PWM MOSFET high efficiency switching power supply A B amplification technology with BJT transistors Bipolar JunctionTransistors Discrete solid state layout Operating mode switchable between fullrange and highpass or lowpass amplification respectively Integrated active high and lowpass...

Страница 22: ...ignal input for connection to head unit pre out q GROUND GND Power connection terminal to chassis ground or negative terminal of car battery w REMOTE REM Remote switching contact for the automatic remote toggle on off of the power amplifier from the head unit s remote lead e 12 V Power connection terminal to positive terminal of car battery r FUSE Fuses for protection of the amplifier internal ele...

Страница 23: ...23 Connections Controls A1390 q w e r t y u i o ...

Страница 24: ...rs overtemp etc u REMOTE PORT Input for RJ11 jack for the external bass level remote control A2190 only LPF FILTER Crossover filter frequency control allowing the setting of the Lowpass cut off frequency between 50 and 250 Hz Note This control is not active when the amplification mode switch is in Fullrange position Amplification Mode Switch Depending on the selected switch setting the amplifier o...

Страница 25: ...25 Connections Controls A2090 2190 q w e r t y u i o q w e r t y i o ...

Страница 26: ... connection to head unit pre out NOTE Upper row for CH1 and CH2 Lower row for CH3 and CH4 q GROUND GND Power connection terminal to chassis ground or negative terminal of car battery w REMOTE REM Remote switching contact for the remote on off toggling of the power amplifier from the head unit s remote lead e 12 V Power connection terminal to positive terminal of car battery r FUSE Fuses for protec...

Страница 27: ...27 Connections Controls AXTON A490 q w e r t y u i o ...

Страница 28: ...r row for CH1 and CH2 Lower row for CH3 and CH4 Left side for CH5 q GROUND GND Power connection terminal to chassis ground or negative terminal of car battery w REMOTE REM Remote switching contact for the automatic remote toggle on off of the power amplifier from the head unit s remote lead e 12 V Power connection terminal to positive terminal of car battery r FUSE Fuses for protection of the ampl...

Страница 29: ...29 Connections Controls A480 250 q w e r t y u i o f g ...

Страница 30: ... amplifier get into contact with metal parts of the vehicle This helps to prevent unwanted ground loops D WIRINGTIPS Please note wrong power or signal connections may damage the amplifier and other components connected to it Therefore please read this manual carefully before the connection of any power signal and speaker leads is done The wire routing is critical for noise free performance For bes...

Страница 31: ...chassis ground contact because poor ground contacts are the cause for most power problems with car audio installations 7 Make sure no power signal or speaker lines are shorting to chassis ground by using rubber grommets wherever a cable has to pass through any metal part of the vehicle Important Before any wiring always remove the battery s negative terminal to prevent short circuiting The last le...

Страница 32: ...ors 3 Next step Connect the remote lead connection from the head unit to the amplifier 4 Speaker cables to respective speakers or passive crossovers Make sure to maintain polarity to and to For Mono 1 channel mode use of 4 2 channel models connect the two terminals and marked with Bridge Min impedance for bridged mode is 4 ohms 5 Ground connection to chassis ground or negative battery pole If poss...

Страница 33: ...ency setting on the filtering controls will be inactive if the amplification mode switch remains in position FULL F CONTROLS ADJUSTMENTS Sequence of Adjustments Depending on amplifier type mono 2 channel 4 channel 5 channel or a combination thereof amplification mode fullrange highpass or lowpass and connecting mode ste reo or mono bridged it is possible that only part of the adjustments described...

Страница 34: ...actice proven list for appropriate satellite HIGHPASS HPF crossover fre quencies covering the most widely used dashboard door and rear shelf speaker diameters Front Satellite Systems HPF FILTER FREQ 10 cm Ø Coaxials or 2 Way Compos 90 120 Hz 13 cm Ø Coaxials or 2 Way Compos 80 100 Hz 16 cm Ø Coaxials or 2 3 Way Compos 70 80 Hz Rear Satellite Systems HPF FILTER FREQ 10 cm Ø Coaxials or 2 Way Compos...

Страница 35: ...on 2x stereo mono sub only Slowly turn up the GAIN control until you can hear some distorted bass sounds Slowly decrease the GAIN level control to the point where the distortions just have disappeared Now you reduce the main volume level on the head unit to medium listening level FRONT 3 or 5 channel operation 2x stereo mono sub only Start turning up the GAIN L R Front control clo ckwise until you...

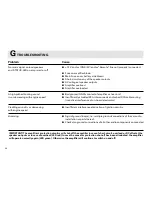
Страница 36: ...inductive interference of on board electronics Crackling sound in or decreasing Insufficient interference elimination of ignition circuitry with engine speed Humming Sign of ground loop s i e multiple ground connections of the car audio installation or parts thereof Check also ground connections of all other audio components conncected IMPORTANT The amplifier s protection circuitry will shut off t...

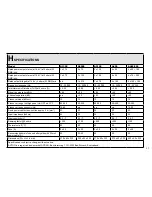
Страница 37: ... 50 Crossover slope dB oct 12 12 12 12 12 Crossover range low highpass Hz HPF od LPF 50 250 50 250 50 250 50 250 50 250 Crossover range subsonic Hz 15 50 n a n a n a 15 50 Recd power cable cross section approx 5 m mm 20 20 20 20 20 Input impedance kohms 24 24 24 24 24 Input sensitivity V 0 2 7 0 2 7 0 2 7 0 2 7 0 2 7 Damping factor 4 ohms 220 150 250 200 100 Thermal cut off C 80 80 80 80 80 Fuse A...

Страница 38: ...38 ...

Страница 39: ...e lire attentivement cette notice d utilisation Si vous rencontrez un quelconque problème n hésitez pas à vous rapprocher de votre revendeur AXTON A Caractéristiques principales A1390 A2090 2190 A490 A480 250 Alimentation MOSFET hautes performances Etages de sorties à transistors bipolaires en classe A B filtres actifs 12 dB oct intégrés 50 250 Hz Fréquences de coupure des filtres indépendantes en...

Страница 40: ...REMOTE signal de mise en marche de l amplificateur à connecter à une sortie télécommandée de la source e 12 V à connecter à la borne positive de la batterie r Fusible protége l amplificateur contre les surcharges t sorties bornier haut parleur Impédance mini 2 ohms y Indicateur de mise en marche MiSE en protection ce voyant vert indique le bon fonctionnement de l amplificateur Rouge indique que l ...

Страница 41: ...41 Connections et réglages AXTON A1390 q w e r t y u i o ...

Страница 42: ...ue le bon fonctionnement de l amplificateur Rouge indique que l amplificateur a enclen ché une de ces protections suite à un problème u ENTRE POUR REGLAGE EXTERNE DU NIVEAU DE SUBWOOFER entrée pour connecter le cable du reglage externe niveau de sub pas pour 2090 Filtre passe bas Permet d ajuster la fréquence du filtre passe bas entre 50 et 250 Hz SELECTION DU MODE DE FILTRAGE Filtre passe haut Pe...

Страница 43: ...43 Connections et réglages A2090 2190 43 q w e r t y u i o q w e r t y i o ...

Страница 44: ...gative de la batterie w REMOTE signal de mise en marche de l amplificateur à connecter à une sortie télécommandée de la source e 12 V à connecter à la borne positive de la batterie r Fusible protége l amplificateur contre les surcharges t sorties bornier haut parleur Impédance mini 2 ohms y Indicateur de mise en marche MiSE en protection ce voyant vert indique le bon fonctionnement de l amplificat...

Страница 45: ...45 Connections et réglages AXTON A490 45 q w e r t y u i o ...

Страница 46: ...t CH4 CH5 á la gauche q Masse à connecter au châssis du véhicule ou à la borne négative de la batterie w REMOTE signal de mise en marche de l amplificateur à connecter à une sortie télécommandée de la source e 12 V à connecter à la borne positive de la batterie r Fusible protége l amplificateur contre les surcharges t sorties bornier haut parleur Impédance mini 2 ohms y Indicateur de mise en march...

Страница 47: ...47 Connections et réglages AXTON A480 250 q w e r t y u i o f g ...

Страница 48: ...breux parasites D Astuces de câblages Note un mauvais câblage des alimentations ou des RCA peut sévèrement endommager l amplificateur Lisez soi gneusement ce manuel avant de procéder au câblage Le passage des câbles est une opération critique l absence de parasite lors de l utilisation en dépend Pour obtenir les meilleurs résultats possibles respectez les conseils donnés ci dessous 1 Pour obtenir ...

Страница 49: ...2190 A490 A480 250 Important Le câble d alimentation 12 v ne sera connecté à la batterie qu a la fin complète de l installation Le câble et fusible d alimentation recommandé pour une longueur de 5 m Modèle Section de câble Fusible principale A1390 20 mm 60 A A2090 2190 20 mm 60 A A490 20 mm 60 A A480 250 20 mm 60 A Il est bien recommandé de câbler votre amplificateur comme suit 1 assurez vous que ...

Страница 50: ...sse haut est à réservé à l utilisation des haut parleurs de petites tailles 10 16 cm en portières au tableau de bord ou sur plage arrière Le mode passe bas est utilisé pour la mise en œuvre de subwoofers 3 connectez le câble de remote 4 connectez les câbles des haut parleurs en respectant bien les polarités Les haut parleurs doivent avoir une impédance mini de 2 ohms important en mode bridgé au mo...

Страница 51: ...oax ou 2 voies 80 100 Hz Ø16 cm Coax ou 2 3 voies 70 80 Hz Haut parleurs arrières Fréquence de coupure Ø10 cm Coax ou 2 voies 100 150 Hz Ø13 cm Coax ou 2 voies 120 130 Hz Ø16 cm Coax ou 2 3 voies 100 130 Hz Règle 1 Les haut parleurs de meilleur qualité sont installés à l avant du véhicule Règle 2 en se basant sur des haut parleurs de diamètres et de qualité identiques la fréquence de coupure des h...

Страница 52: ...leur position la plus basse Mettez en marche votre source amplificateur et posi tionnez le curseur de volume aux trois quarts du volume maximum et passez un morceau de musique dynamique et bien enregistré 2 4 canaux Augmentez doucement le gain jusqu à obtenir de la distorsion diminuez alors légèrement le gain jusqu à ce que la distorsion disparaisse 3 5 canaux Augmentez doucement le gain du caisso...

Страница 53: ...uvaise qualité blindage insuffisant mauvaise antiparasitage du circuit d allumage Bourdonnements signe d une boucle de masse masse prise en différents points du châs testez les différentes masses de l installation Important le circuit de protection de l amplificateur coupe l appareil en cas de court circuit courant continu ou surchauffe LED rouge protection active L amplificateur tente de redémarr...

Страница 54: ...es intégrés dB oct 12 12 12 12 12 Fréqu des filtres ajustables Hz HPF od LPF 50 250 50 250 50 250 50 250 50 250 Fréquence des subsonic Hz 15 50 n a n a n a 15 50 Section de câble recommandée mm 20 20 20 20 20 Impédance d entrée kohms 24 24 24 24 24 Sensibilité d entrée V 0 2 7 0 2 7 0 2 7 0 2 7 0 2 7 Facteur d amortissement 4 ohms 220 150 250 200 100 Coupure thermique C 80 80 80 80 80 Fusibles A 2...

Страница 55: ...55 ...

Страница 56: ...her form of damage whether incidential consequential otherwise This warranty will not cover any loss during transportation transport costs or any other damage caused by transport or shipment of the product Please keep thisWarranty Certificate along with the sales slip proof of purchase Serial No Model Dealer s Address Date of Purchase Important Dear customer thank you for buying this AXTON product...

Страница 57: ...hränkt Verlust durchTransport bzw auf dem Transportweg oder Schäden durch ungenügendeVerpackung oderTrans portkosten sind durch diese Garantie nicht gedeckt Jeder über diese Garantie Erklärung hinausgehendeAnspruch und jede Haftung für direkte oder indirekte Folgeschäden werden ausdrücklich abgelehnt Bitte bewahren Sie diese Garantiekarte zusam men mit Ihrer Kaufbestätigung auf Seriennummer Modell...

Страница 58: ......
Отзывы: