background image

Chapter 3: Axon Dock Installation 10

TASER Axon Dock Installation Manual

Connect the end other end of the power cord to a standard power outlet. 

The green “POWER” LED on top of the core will light up when the dock is powered.

Give the dock several minutes to fully start.
The green “STATUS” LED on top of the core will light up when the dock has started.

Step 5: 

Connect to the Dock

Confirm that the computer connected to the dock does not have wireless Internet turned on.

Confirm that the computer connected to the dock is not connected to your network in any 

other way. Ensure that there is no wireless connection enabled and no VPN (remote access) 

software active on your computer.

Open a Web browser, such as Google Chrome or Mozilla Firefox. 

Note:

 If you are using Internet Explorer, ensure that you are using version 8 or greater.

In the URL box, type 

10.10.1.1

 and press 

Enter

.

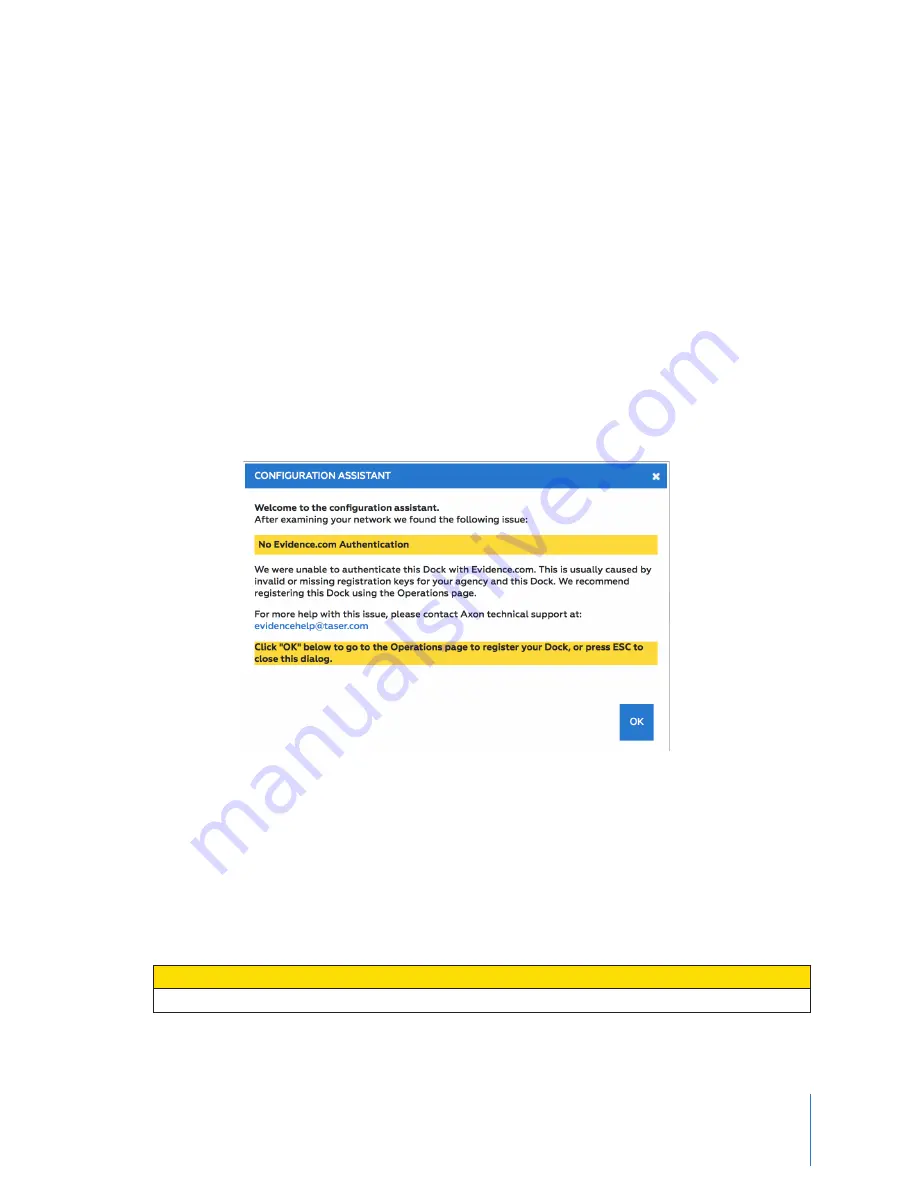
In the Configuration Assistant dialog box, click 

OK

.

Step 6: Device Configuration

Complete the information for the 

Authentication Required

 dialog box:

In the User Name box, type 

admin

In the Password box, type 

admin

.

Click 

OK

.

Note:

  TASER strongly recommends that you change the password at this time. Go to the 

Admin-

istration

 tab and enter your information, using the existing user name and password. In 

the Password Change section, type the new password twice and click 

Save Changes

.

CAUTION! 

POTENTIAL SYSTEM ACCESS LOSS

Ensure that you remember the password. It cannot be reset.

Содержание TASER Axon Dock

Страница 1: ...NT SAFETY INSTRUCTIONS Read all warnings and instructions Save these instructions The most up to date warnings and instructions are available at www taser com MMU0054 Rev F TASER Axon Dock Installation Manual ...

Страница 2: ...s for an Axon Dock with a 6 Bay for Axon Body 2 and Axon Fleet Cameras 15 Dimensions for an Axon Dock with a 6 Bay for Axon Flex 2 Systems 18 Removing the Locking Adapters 19 Chapter 5 Attaching the Desk Plate 19 Introduction 19 Tools and Materials 22 Chapter 6 Troubleshooting the Axon Dock 23 Status Lights 24 Chapter 7 Network Troubleshooting 24 Status Page Errors 26 Chapter 8 Warnings 26 TASER A...

Страница 3: ...ular and up to 5 individual bays can be connected to 1 core The type of bay you use will depend on which Axon camera you use There are 3 individual bay de signs one accepts Axon Body cameras and Axon Flex cameras and controllers Another other accepts Axon Body 2 and Axon Fleet cameras and the third is designed for Axon Flex 2 cameras and control lers Core Individual Bay for Axon Body 2 Cameras Acc...

Страница 4: ...or Axon Flex 2 systems is not shown here A bridge adapter is used to attach the core to a bay and to attach individual bays to each other CAUTION CONNECTOR DAMAGE Be careful when removing a bridge adapter from a bay as damage may occur if the bridge adapter is removed unevenly from the bay Bridge adapters must be pulled straight out and not angled when removed A locking adapter is used to help fas...

Страница 5: ...Axon Dock 3 TASER Axon Dock Installation Manual Additional Materials The package containing the Axon Dock also contains two Ethernet cables and an external power sup ply with an AC power cable Ethernet Cables Power Supply and Cable ...

Страница 6: ...ock directly on the Internet The dock must be connected behind a firewall or secure network Firewall Configuration The dock and Axon devices do not require any incoming data ports for regular operation All dock communications are outbound All video and data files are transmitted securely using HTTPS SSL and 256 bit AES encryption For proper operation the dock requires the following outbound firewa...

Страница 7: ... If the dock is placed on a network where a proxy is used to access web sites the IP assigned to the dock must be whitelisted Depending on the specific network setup this may require a static or reserved DHCP IP We recommend using a DHCP reservation whenever possible to minimize configuration overhead Note If you are using a version of Internet Explorer below 11 0 you will need to enable TLS 1 2 F...

Страница 8: ... are present 2 Connect your core to all bays you plan to use Notes Do not attach more than 5 individual bays or one 6 bay to 1 core You should hear a click when pushing the core bays and bridge adapters together If the Axon Dock assembly does not stay together press the components together with more force The parts need to fit flush together CAUTION DATA AND POWER LOSS Do not attach more than 5 in...

Страница 9: ...ap into place helping to hold the core and bay together When properly installed the locking adapter is flush in place with the core and bay 5 Place the connected dock on a flat surface away from heat sources and direct sunlight See Chapter 4 Wall Mounting an Axon Dock for additional information on using the Wall Mount 6 Place the dock within reach of appropriate power and Ethernet connections ...

Страница 10: ... back of the Axon Dock core has 2 ports for Ethernet cables the WAN and LAN ports Note The USB port on the rear of the core is not currently functional It is there for future applica tions 1 Plug one of the Ethernet cables into the WAN port Reboot button WAN to Internet LAN to computer USB port Power port ...

Страница 11: ...ort which connects to your agency network 3 Plug the other Ethernet cable into the LAN port 4 Plug the other end of this Ethernet cable to your computer CAUTION INSTALLATION DO NOT connect the LAN port to the wall Step 4 Connect to Power 1 Connect the two segments of the power cord included with the dock 2 Plug the power cord into the core ...

Страница 12: ...d no VPN remote access software active on your computer 3 Open a Web browser such as Google Chrome or Mozilla Firefox Note If you are using Internet Explorer ensure that you are using version 8 or greater 4 In the URL box type 10 10 1 1 and press Enter 5 In the Configuration Assistant dialog box click OK Step 6 Device Configuration Complete the information for the Authentication Required dialog bo...

Страница 13: ...ame and password that you previously created when you first registered with Evidence com in the respective boxes 3 Click Save Changes Step 8 Registration The system will then report that it is Registering the Dock then Generating Security Tokens and finally Restarting the Dock Allow up to 2 minutes for the system to restart Once the system is ready the page will refresh and display the message The...

Страница 14: ...k the Save Changes button You are already registered when this message is dis played Go to Step 9 Confirm Registration Step 9 Confirm Registration Click Status on the top left part of the screen There should be 6 green check marks on the left side of the screen This dock is now registered ...

Страница 15: ...applicable building and fire codes For in wall installation most require UL rated wire labeled CL2 or CL3 Tools and Materials Tools Materials Cable wire tester locator Wall Mount Kit Level Pencil Power drill and bits Screwdriver Stud finder Tape measure Dimensions The dimensions below show the mounting hole locations of the Wall Mount Bracket and the overall size of the assembly with the dock atta...

Страница 16: ...ches and centimeters Dimensions for an Axon Dock with a 6 Bay for Axon Body 2 and Axon Fleet Camer as 14 000 CTR TO CTR 7 375 CTR TO CTR 17 50 8 51 5 21 7 55 35 6 cm 18 7 cm 21 6 cm 19 2 cm 13 2 cm 44 5 cm 7 375 CTR TO CTR 14 000 CTR TO CTR 17 50 8 51 ETHERNET INPUT POWER INPUT ALL DIMS SHOWN IN INCHES 7 24 5 21 AREA FOR POWER SUPPLY MOUNTING 35 6 cm 18 7 cm 21 6 cm 44 5 cm 18 4 cm 13 2 cm ...

Страница 17: ... dock Step 2 Attach the Dock to the Wall Mount Bracket 1 Place your dock on the Wall Mount Bracket 2 Align the holes of the core unit with the holes on the bracket 3 Use the screws provided in the dock wall mount kit to attach and mount the core portion of the dock to the bracket 4 Use the screws washers and wing nuts to mount the opposite end bay portion to the bracket 5 Put the screws through th...

Страница 18: ...ne of the stud 5 Use a level to ensure the bracket is level before marking the holes 6 Mark the center of the left side keyholes in the center of each wall stud 7 Using a power drill drill a pilot hole smaller than the screw diameter 8 Install the screws into the stud until there is 1 8 3 2 mm of space between the bottom of the screw head and the wall This will allow the bracket to be placed onto ...

Страница 19: ...e power supply for the dock 2 Position the power supply between the slots in the bracket and secure the power supply to the bracket with the Velcro strap 3 Route the barrel connector around the edge guard and plug the barrel connector into the pow er jack on the dock 4 You can secure the cable in position with the attached zip tie and the associated slots in the bracket 5 Plug the power supply cab...

Страница 20: ...ove any Axon devices from the bays 2 Unplug all power and network cables from the core 3 Insert a flat blade screwdriver into the locking adapter CAUTION AVOID EQUIPMENT DAMAGE Do not insert the screwdriver blade past the opening in the locking adapter 4 Turn the screwdriver to lift the locking adapter 5 Repeat steps 3 4 for the other side of the locking adapter Do not insert the screw driver blad...

Страница 21: ...bay the other is for use with a core and a 6 bay The pictures in this procedure show the plate designed for use with a 6 bay Tools and Materials Tools Materials Screwdriver Screws Desk plate Rubber feet Step 1 Preparation 1 Ensure you have all the tools necessary to perform this procedure 2 Read all of the manufacturer s installation instructions for the dock Fol low the instructions for putting t...

Страница 22: ... the desk plate so the openings on the dock are lined up with the holes in the plate Note Ensure the core is placed over the rectangular holes in the plate 5 Ensure the holes in the dock are directly over the holes in the desk plate 6 Use a screwdriver to drive the 6 screws into the dock Core ...

Страница 23: ...SER Axon Dock Installation Guide 7 Turn the dock and desk plate assembly over 8 Remove the adhesive backing from the rubber feet 9 Place the rubber feet on the desk plate The metal is scored where the feet are to be located Put the foot here ...

Страница 24: ... besides completing the Evidence com Authentica tion please see Network Requirements Network Requirements Chapter 2 to confirm network requirements are met I am asked for a user name and password when navigating to 10 10 1 1 The default user name for the dock is admin and the password is admin This will be a pop up box after you click OK on the configuration assistant If you have changed the user ...

Страница 25: ...e that the core s software is running The power LED will be on when the bay is plugged into power The power LED will be off when the bay is not plugged into power The status LED may be green or red solid or blinking depending on the dock s system status System Status Status LED Indication System running Solid green System reset Solid red Bay s reset Blinking green Power LED Status LED ...

Страница 26: ...equired fields We were unable to locate a DNS server Possible Issue Troubleshooting Steps Port 53 is blocked Confirm that Port 53 is not being restricted by your firewall DNS Server address es entered incorrectly This applies only when using Static IP configuration Return to the networking tab and verify that the DNS Server address information has been en tered correctly We were unable to communic...

Страница 27: ...were unable to contact your network s default gateway Possible Issue Troubleshooting Steps Static IP address entered incorrectly This ap plies only when using Static IP configuration Return to the networking tab and confirm that the static IP address has been entered correctly ...

Страница 28: ...before using any Axon system Failure to do so could increase the risk of serious injury system malfunctions or loss of data 2 Obey applicable laws regulations and agency guidance Use the Axon systems only in accor dance with applicable federal state and local laws and other regulations or legal requirements This document uses a signal word panel to mark specific warnings WARNING This signal word p...

Страница 29: ...ffect a pacemaker ICD implantable defibrillator VNS vagal nerve stim ulator and other implanted electrical medical devices Many of these devices are made with a fea ture that deactivates it when in contact with a strong magnetic field Therefore care must be taken to avoid inadvertently deactivating such devices when in close proximity to the Axon magnet mount Persons with a pacemaker ICD VNS or ot...

Страница 30: ...g while operating a vehicle riding a bicycle operating other conveyance when dealing with potentially violent individ uals or handling a hazardous or potentially hazardous situation If you use an Axon system while operating a conveyance keep in mind the following guidelines Do not take notes look up information adjust the camera or perform any other activities that require or distract your attenti...

Страница 31: ...these batteries The Axon Body 2 camera battery is replaceable only with a TASER manufactured battery 2 Avoid extreme temperatures Do not expose the battery to excessive heat cold water other liq uids or corrosive substances Do not use or leave the batteries for on officer cameras near a heat source or at a very high temperature for example fire heater in strong direct sunlight or in a vehi cle in ...

Страница 32: ...pose it to direct sunlight water other liquids or corrosive substances 3 Axon Dock in Vehicle Caution Installing an Axon Dock in a vehicle may expose the Dock to ex cessive temperatures In vehicle temperatures may exceed the threshold for recharging an Axon device in the Dock WARNING HAZARDOUS SUBSTANCE Failure to follow these safety instructions could result in fire electric shock damage system m...

Страница 33: ...ry completely drained Near strong magnetic fields or mechanical vibrations 4 Exposure to Magnets or Magnetic Fields Do not use the Axon system in close proximity to unau thorized magnets or magnetic fields which may cause the Axon system to unintentionally turn the camera on or off 5 Avoid Exposure to Wet Conditions If a system component including a camera or controller is drenched or immersed in ...

Страница 34: ...OET Bulletin 65 2001 and ANSI IEEE C95 1 1992 Proper operation of this radio according to the product instruc tions will result in exposure substantially below the FCC s recommended limits To comply with the FCC and ANSI C95 1 RF exposure limits these devices have been tested for compliance with FCC RF Exposure limits in the typical configuration The radiated output power of these wireless devices...

Страница 35: ...s antérieures Les avertissements les plus récents sont aussi disponibles en ligne à l adresse fr taser com 1 Lisez le document et conformez vous aux directives Lisez comprenez et suivez l ensemble des directives des manuels des avertissements et des documents de formation TASER pour les sys tèmes Axon en vigueur avant d utiliser un système Axon Le non respect de cette exigence pour rait augmenter ...

Страница 36: ...mmages le dysfonctionnement du système la mort ou des lésions corporelles Aimants au néodymium Le support aimanté Axon contient un aimant au néodymium qui émet des champs magnétiques puissants pouvant nuire au fonctionnement de stimulateurs cardiaques de DISA défibrillateur interne à synchronisation automatique de stimulateurs de nerf vague et d autres appareils électriques médicaux implantés Parm...

Страница 37: ...es corrosives ou de la chaleur de la poussière de la lumière directe du soleil de l eau ou d autres facteurs environnementaux néfastes pour l appareil Les installations dans une voiture pourraient exposer la station Dock à une chaleur excessive 3 Tenez loin de l eau et des autres liquides et évitez les endroits humides N installez pas la station Dock près de liquides d eau ou de conduits d eau La ...

Страница 38: ...emps vous pourriez vous habituer à un volume son ore élevé qui même s il semble normal pourrait endommager votre ouïe 6 Risques d étouffement Les systèmes Axon comportent des petites pièces qui peuvent présenter un risque d étouffement Gardez les systèmes Axon et leurs accessoires à l abri des petits enfants 7 Mouvements répétitifs Quand vous faites des activités qui impliquent des mouvements répé...

Страница 39: ...on sont connectés correcte ment entre eux au moment de les charger ou de les ranger Pour éviter les risques d incendie les brûlures ou les dommages à votre bloc pile ne faites pas ce qui suit laisser un objet métallique toucher aux contacts de la pile frapper ou lancer la pile souder la pile ou la percer avec un clou ou un objet pointu démonter court circuiter ou chauffer la pile jeter la pile au ...

Страница 40: ...s risques de perte de don nées Entretenez correctement le système Le fait de ne pas entretenir le système Axon ou la station Axon Dock la station conformément aux directives peut provoquer un dysfonctionnement ou en limiter le fonctionnement correct ou optimal Le contenu enregistré dans la mémoire pourrait être altéré détruit ou effacé lors d erreur d utilisation de défaillance du système ou de l ...

Страница 41: ...on avec une source de chaleur externe comme un four à micro ondes ou un séchoir à cheveux Un composant Axon endommagé en raison d une exposition à des liquides n est pas en état de service 6 Réparation ou modification Ne tentez jamais de réparer ou de modifier le système AXON vous même sauf si cela est spécifiquement décrit dans les instructions d utilisation spécifiques au modèle utilisé Le servi...

Страница 42: ...a FCC et de la norme ANSI C95 1 RF ces appareils ont été testés conformément aux limites d exposition RF de la FCC en configuration classique La puissance d émission radio de ces appareils sans fils est très inférieure aux limites d exposition à la radiofréquence définies par la FCC Les systèmes Axon se conforment à la partie 15 des règles de la FCC Son fonctionnement est soumis aux deux condition...

Страница 43: ...ada Dans le but de réduire les risques de brouillage radioélectrique pour les autres utilisateurs il faut choisir le type d antenne et son gain de sorte que la puissance isotrope rayonnée équivalente p i r e ne dépasse pas celle requise pour établir une communication satisfaisante LES SYSTÈMES AXON RÉPONDENT AUX EXIGENCES DU GOUVERNEMENT POUR L EXPOSITION AUX ONDES RADIO ...

Страница 44: ... and Wi Fi is a trademark of the Wi Fi Alliance AXON Axon Axon Body Axon Body 2 Axon Dock Axon Flex Evidence com TASER and are trademarks of TASER International Inc some of which are registered in the US and other countries For more information visit www taser com legal All rights reserved 2016 TASER International Inc MMU0054 Rev F ...

Отзывы: