General Safety Instructions
7
It is good practice to leave the machine unplugged until work
is about to commence, also make sure to unplug the machine
when it is not in use, or unattended. Always disconnect by
pulling on the plug body and not the cable.
Once you are ready to commence work, remove any tools used
in the setting operations (if any) and place safely out of the
way. Re-connect the machine. Carry out a final check e.g. check
the drill bit is securely tightened in the machine, check you
have the correct speed and function set, check that the power
cable will not ‘snag’ etc.
Make sure you are comfortable before you start work,
balanced, not reaching etc. If the work you are carrying out
is liable to generate flying grit, dust or chips, wear the appro-
priate safety clothing, goggles, gloves, masks etc. If the work
operation appears to be excessively noisy, wear ear-defenders.
If you wear your hair in a long style, wearing a cap, safety hel-
met, hairnet, even a sweatband, will minimise the possibility of
your hair being caught up in the rotating parts of the machine.
Likewise,consideration should be given to the removal of rings
and wristwatches, if these are liable to be a ‘snag’ hazard.
Consideration should also be given to non-slip footwear, etc.
DO NOT work with cutting or boring tools of any description
if you are tired, your attention is wandering or you are being
subjected to distraction. A deep cut, a lost fingertip or worse is
not worth it!
DO NOT use this machine within the designated safety areas of
flammable liquid stores or in areas where there may be volatile
gases. There are very expensive, very specialised machines for
working in these areas, THIS IS NOT ONE OF THEM.
CHECK that drills are the correct type and size, are undamaged
and are kept clean and sharp, this will maintain their operating
performance and lessen the loading on the machine. Above all,
OBSERVE…. make sure you know what is happening around
you, and USE YOUR COMMON SENSE.
General Safety Instructions for Drilling Machines
1. DO NOT operate the machine without carrying out
a preliminary inspection.
2. CHECK that the speed is correct for the planned operation,
and the upper drive belt cover is closed and fastened secure.
3. CHECK the drill bit is the correct size and type, is correctly
fitted and tightened in the chuck.
4. Make sure that the drillhead, the table bracket arm, the table
tilt and the table swivel clamps are all locked before any drilling
is attempted.
5. DO NOT attempt to carry out any drilling operation on
material that has not been secured to the drill table, either by
vice or clamp.
6. Remove any tools (chuck key, spanners etc), that may have
been used in setting up operations and put them away in their
correct stowage positions.
7. Try to arrange the drilling operation so that the drill tip does
not come in contact with the table.
8. ALWAYS allow the drill to stop before removing drills or swarf
from around the job or the table.
9. NEVER remove ‘flying’ swarf strands from the drill whilst it is
turning.
10. It is a good precaution to wear eye protection when drilling,
especially using small drills, or very hard material that produces
small chips.
11. It is not a good idea to wear gloves when
operating a drill press.
12. After the job is completed, remove all tools and accessories
from the machine, check that drill bits are still sharp and re-use
able.
13. Clean the machine down thoroughly, including removing
coolant or cutting compounds from the drill table.
14. Lightly coat all metal surfaces with a light oil coating.
15. Disconnect the machine from the supply. Secure the cable/
plug clear of the floor.
Содержание AHDP13B
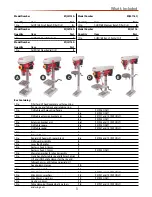
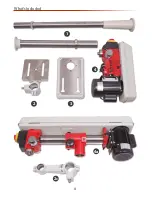
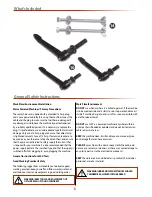
Страница 4: ...What s Included 4 1 2 3 4a 2c 4 ...
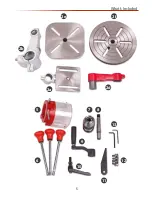
Страница 5: ...What s Included 5 2b 2e 2d 2a 5 6 10 9 7 8 13 11 12 2f ...
Страница 24: ...Exploded Diagram Parts List 24 AHDP13B Bench Pillar Drill ZQJ4113A ...
Страница 26: ...Exploded Diagram Parts List 26 AHDP16B Bench Pillar Drill ZQJ4116Q ...
Страница 28: ...Exploded Diagram Parts List 28 AHDP16F Floor Pillar Drill ZQJ4116A ...
Страница 30: ...Exploded Diagram Parts List 30 AHRD16B Bench Radial Drill ZQJ3116 AHRD16F Floor Radial Drill ZQJ3116A ...
Страница 34: ...Wiring Diagram 34 ...
Страница 35: ...CE Certificate 35 AHDP13B Bench Pillar Drill ZQJ4113A AHDP16F Floor Pillar Drill ZQJ4116A ...
Страница 36: ...CE Certificate 36 AHDP16B Pillar Drill ZQJ4116Q ...
Страница 37: ...CE Certificate 37 AHRD16B Bench Radial Drill ZQJ3116 AHRD16F Floor Radial Drill ZQJ3116A ...
Страница 38: ...Notes 38 ...
Страница 39: ...Notes 39 ...


