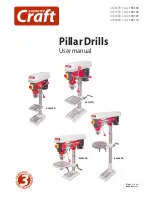

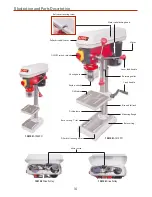

Assembly
11
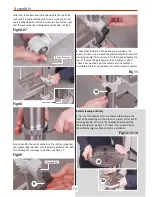
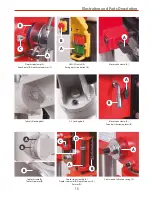
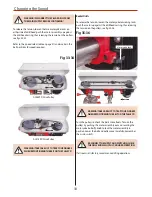
Note: On the two radial drills fit the extension arm (2d)
into the mounting arm (2b and 2c) then the tables, see figs
14-15-16.
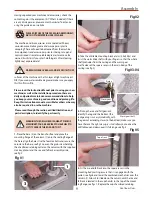
Fig 15-16
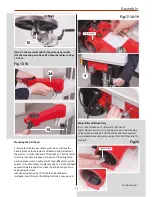
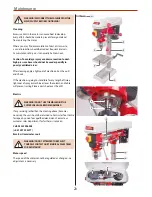
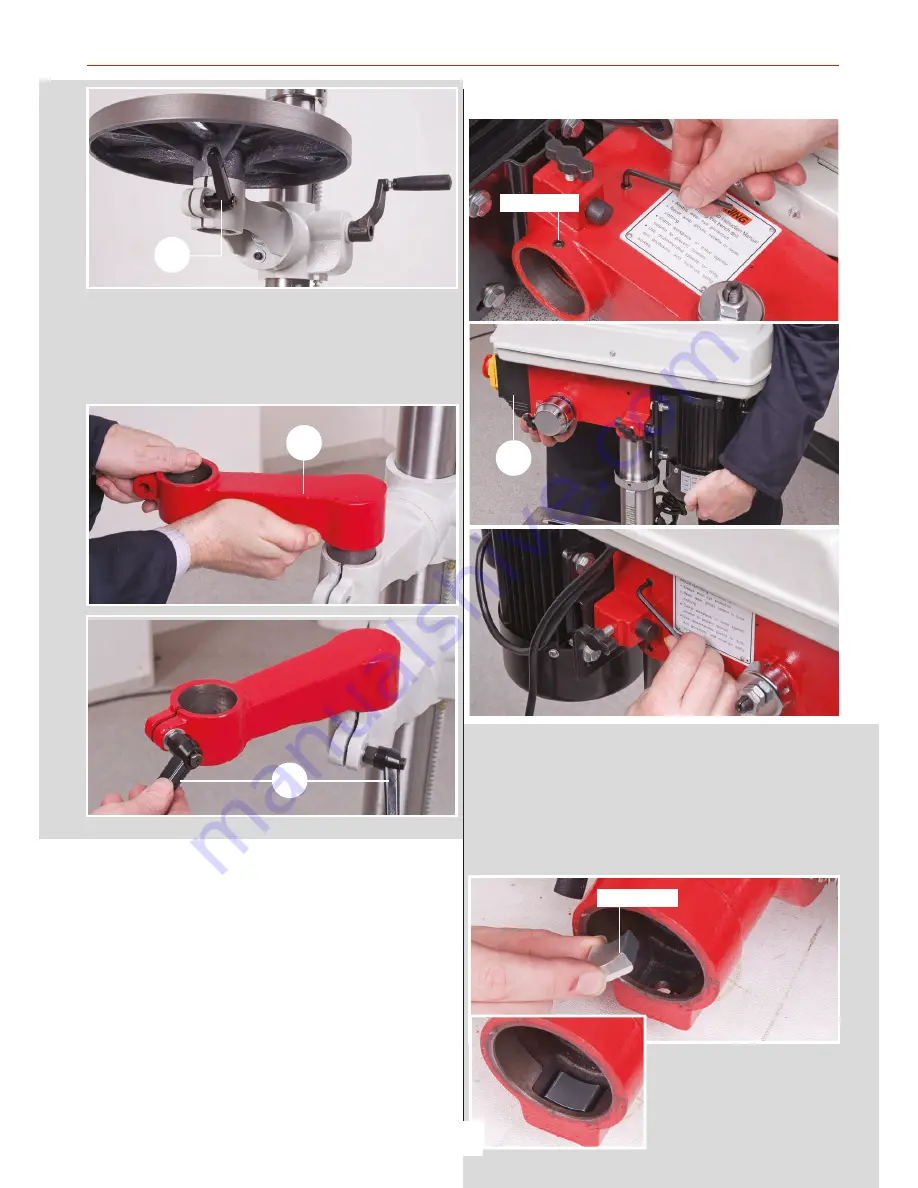
1. Ensure that the two hex socket grub screws that lock the
head in place on the column are withdrawn and will not foul
the column (1) when the head is fitted, see fig 17. Put the lower
assembly (you have just been working on) in the designated
position, make sure it is stable and lift the drillhead (4) over the
column (1) and let it drop into place, see fig 18. Set the drill head
approximately fore and aft and lock in position using the two
cap head grub screws
mentioned earlier, see fig 19. Check that the drillhead is
immobile. Everything on the drilling machine is now secured.
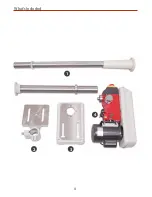
Mounting the Drill Head
Fig 17-18-19
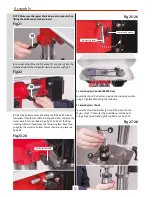
2. Lay the drill head on its side, locate the column
spacer block and insert it into machined recess inside the base
of the drill head, see fig 20. Lift the drill head onto the column
as described above and secure using a lift and shift handle (10),
see figs 21.
Fig 20
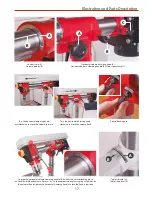
Radial Pillar Drill Head Only
10
2d
10
Grub screw
4
Spacer block
Continues Over....
Содержание 105105
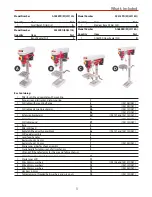
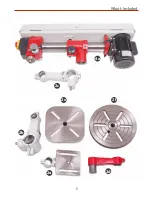
Страница 4: ...What s Included 4 1 2 3 4 ...
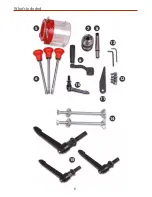
Страница 5: ...What s Included 5 2b 2e 2d 2a 2f 4a 2c ...
Страница 6: ...What s Included 6 14 10 5 6 10 9 7 8 13 11 12 ...
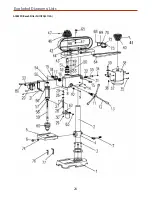
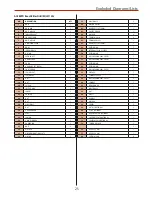
Страница 24: ...Exploded Diagrams Lists 24 AC285PD Bench Pillar Drill ZQJ4113A ...
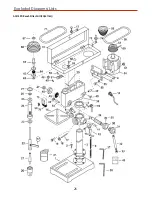
Страница 26: ...Exploded Diagrams Lists 26 AC315PD Bench Pillar Drill ZQJ4116Q ...
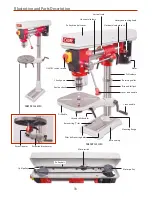
Страница 28: ...Exploded Diagrams Lists 28 AC220RD Bench Radial Drill ZQJ3116 AC680RD Floor Radial Drill ZQJ3116A ...
Страница 32: ...Wiring Diagram 32 ...
Страница 33: ...Notes 33 ...
Страница 34: ...Notes 34 ...
Страница 35: ...Notes 35 ...