4
Connecting the Cables
Caution: Connect the cables to the printer before plugging in
the power supply. If power is received from the host
computer, turn it off before connecting any cables.
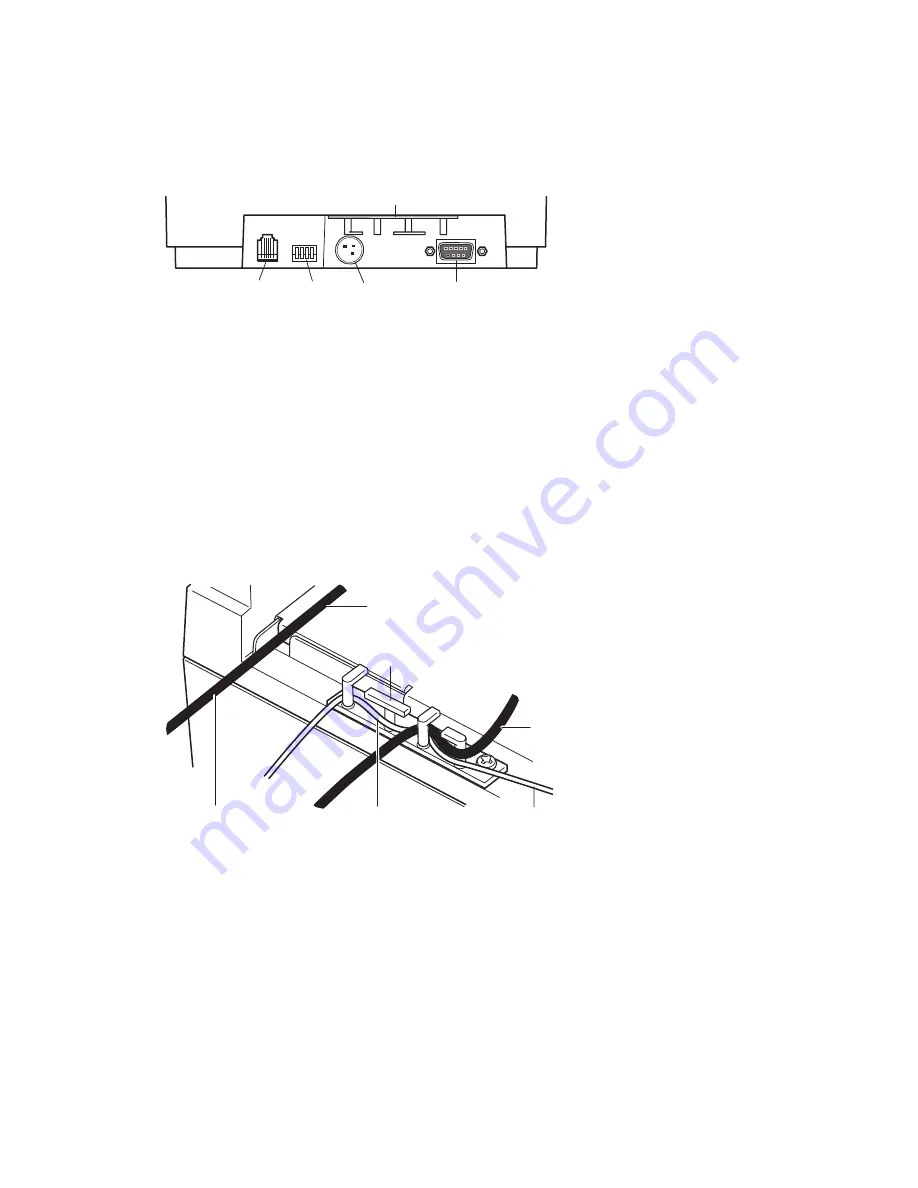
Note: Depending on your printer configuration, the connector panel
may vary from the above illustration.
1. Turn off the host computer.
2. Secure the communication cable to the communication connector.
3. Connect the cable to the host computer.
4. Connect the cash drawer cable to the cash drawer connector at the
left rear of the unit.
If your system has two cash drawers, attach a Y-cable to the printer’s
cash drawer connector first.
5. Connect the power supply cable to the power supply connector last.
6. Route the cash drawer and the power supply cables through the strain
relief as shown.
7. Plug the power cord into the power supply, then plug the power supply
into an outlet. The green LED on the top cover will light up.
Back of
Printer
Strain Relief
DIP
Switches
Communication
Connector
(9-pin connector
shown)
Power
Supply
Connector
Cash
Drawer
Connector
Communications
Cable
To the
Communications
Connector
Strain
Relief
Cash Drawer
Cable
Power
Supply
or Adapter
Cable
Cash Drawer
Cable
September 1999
3
A758 Setup Guide


