background image


STEP 3:

 Install the AA to the mounting surface.  The space between the top of the (TB) and the bottom 

of the (AA) is indicated below. 


***all the sizes are in inches 


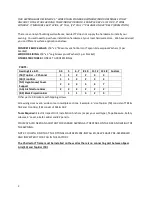
Model 

Space 
between TB 
and SA in 
inches 

Height incl. 
valance 

Projection 

CH22 

24 

24 

24 

CH32 

36 

36 

24 

CH33 

36 

36 

36 

CH21 

12 

18 

12 

ECH1836 

18 

18 

36 

ECH23 

24 

24 

36 


Содержание CH21

Страница 1: ...e contact us and we will send replacement parts if needed At this time visualize how the components fit together and make sure that you have identified the various parts Important Installation Information Charleston frame must be installed on the wall as there is no connecting part between Architectural Arms AA and Top Bar TB Please read instructions fully before installing Models with Valance CH2...

Страница 2: ...wning Size in Ft 3 4 5 6 7 8 10 11 12 13 18 Custom TB Top Bar C Channel 1 1 2 2 3 3 FB Front Bar 1 1 2 2 3 3 NC Hypotenuse Cover Support 2 3 3 5 4 7 AA Architecture Arms 2 2 2 2 2 2 BP Black Projection Bar 1 1 3 2 5 Other parts Z Brackets self tapping screws All awning sizes over 6 wide come in multiple sections Example 6 size Top Bar TB consists of TB1 TB2 and Front Bar FB consist of FB1 FB2 Tool...

Страница 3: ... first Mount Provided Z Brackets to surface and insert TB into brackets There are no pre drilled holes for the Z Bracket You ll use self tapping screws to secure them wherever you like The C Channel must be close to the wall Before installing the TB you must make sure that there is enough space below to install AA Please see the chart below for the height measurements ...

Страница 4: ...e between the top of the TB and the bottom of the AA is indicated below all the sizes are in inches Model Space between TB and SA in inches Height incl valance Projection CH22 24 24 24 CH32 36 36 24 CH33 36 36 36 CH21 12 18 12 ECH1836 18 18 36 ECH23 24 24 36 ...

Страница 5: ...ht with arrow facing upwards Secure those with self tapping screws the holes on the FB and TB are pre drilled Make sure that the Velcro on NCs are facing inwards Note If the awning is larger than 4 52 5 wide then you must install additional NCs and WSs to complete the frame assembly and installation WSs will not have pre drilled holes You ll need to use self tapping screws to attach them to the ba...

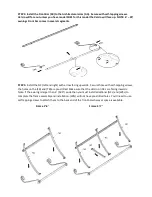
Страница 6: ...6 The Frame for Charleston is complete Frame 2 4 Frame 5 7 INSTALLING THE COVER STEP 6 Slide the tubing at the top of the fabric cover into the C Channel on the top of TB ...

Страница 7: ...ric over the fame with the valance hanging down below the NC and FB bars Frame 2 4 Frame 5 7 STEP 7 Once you are satisfied with the position of the cover Pull the tabs snugly and attach them to the pre installed Velcro tape on the bars ...

Отзывы: