3
Electric Screen User
Manual
Please refer to the label on
carton box
&
screen housing.
Voltage: 100V~120V, 60Hz
or 220V~240V, 50Hz
Power:
125W (MAX)
The screen can be wall mounted or ceiling mounted, users can
choose the mounting method according to their needs.
Whichever method of mounting is used, insure the right
equipment is used.
For wall/ceiling mounting on a wooden surface; use
ø
6x50mm
wood screws.
For mounting on a brick, concrete or plaster surface; use
ø
6x60mm screws with screw anchors or wall plugs.
Ceiling / Wall Mounting
Unscrew the“
Ι
”beam and slide it out from the Aluminum casing.
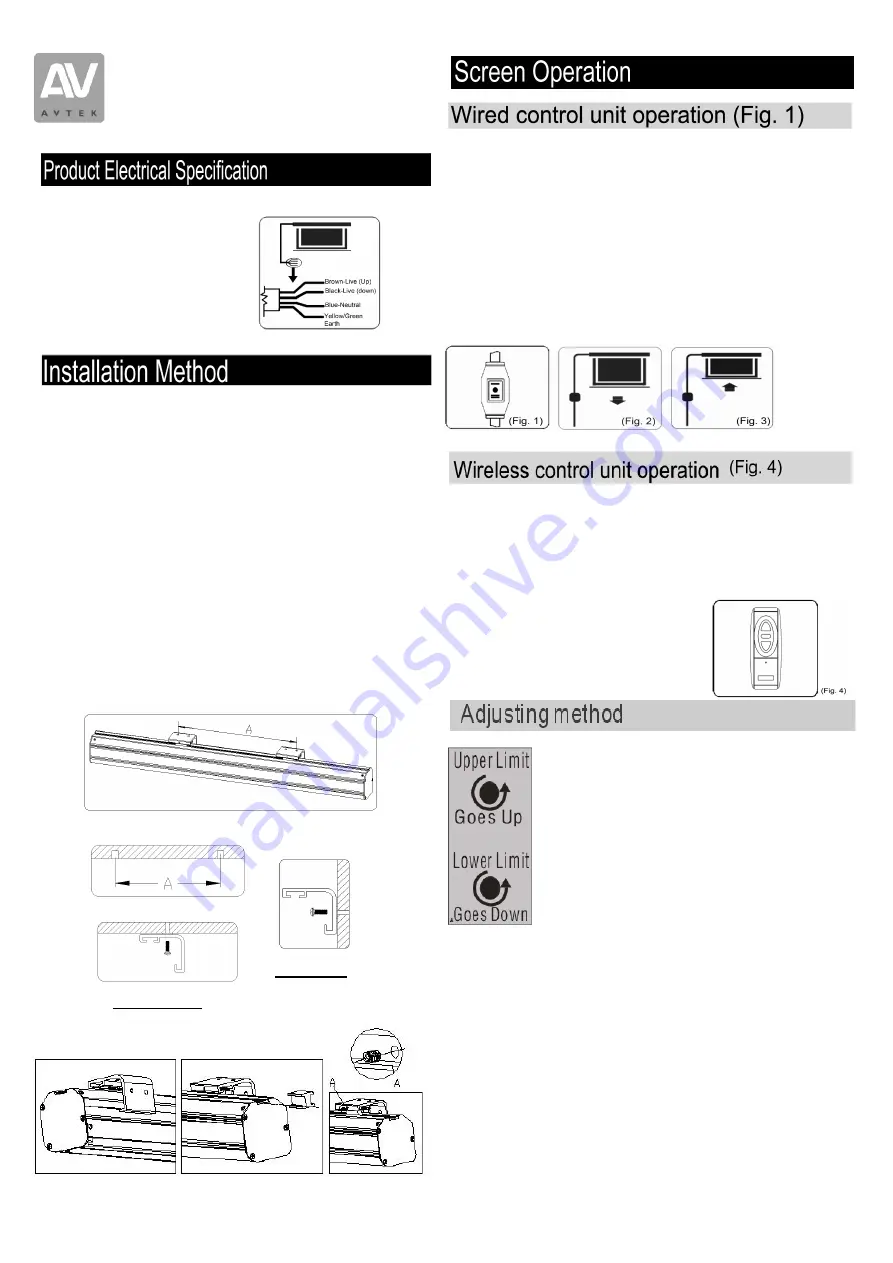
Detach the “L” shape mount from the casing. Align and drill the
L-mounts onto the ceiling/wall. Recommended distance of A is
around 1/3 of the total length of the casing. Hang the casing onto
the back-hook of the L-mount. Slide the “
Ι
” beam back to the
middle position of the L-mount and fasten it with the tools and
screws provided
Wall Mount
Ceiling Mount
Plug power cord into mains socket. (Make sure the correct voltage
is supplied.) Position the cord so that it will not be tripped over,
pulled or contact hot surfaces. If an extension cords is needed then
use a cord with the same current rating.
To lower the projection surface
(Fig. 2)
Toggle the switch to position <
=
>, the projection surface will lower
itself, when it is fully extended it will stop automatically.
To retract the projection surface
(Fig. 3)
Toggle the switch to position <
-
>, the projection surface will retract
into its case, when it is fully retracted it will stop automatically.
To stop the projection surface
manually at an intermediate
position, toggle the switch to the <
O
> position.
To lower the projection surface
Press the bottom button on the control unit, the projection surface
will lower itself, when it is fully extended it will stop automatically.
To retract the projection surface
Press the top button on the control unit, the projection surface will
retract into its case, when it is fully retracted it will stop
automatically.
To stop the projection surface
Manually at an intermediate position,
press the middle button on the control
unit.
Upper limit
—Adjust the stopping level of slat when
fully retract. Turn ”upper limit” switch in
counterclockwise direction let the slat go
closer to
the casing.
Lower limit
—Adjust the stopping level of slat when
fully extend. Turn ”lower limit” switch in
counterclockwise direction let the slat go closer to
the ground.
Содержание Premium Video
Страница 8: ...A V T E K http www avtek eu...


