1
X
Features
•
Color/B&W scan selection
•
300/600 dpi scan selection
•
Direct save JPEG/PDF file to microSD card
•
Support microSD card up to 32 GB
•
View photos in iPad
o
Package Contents
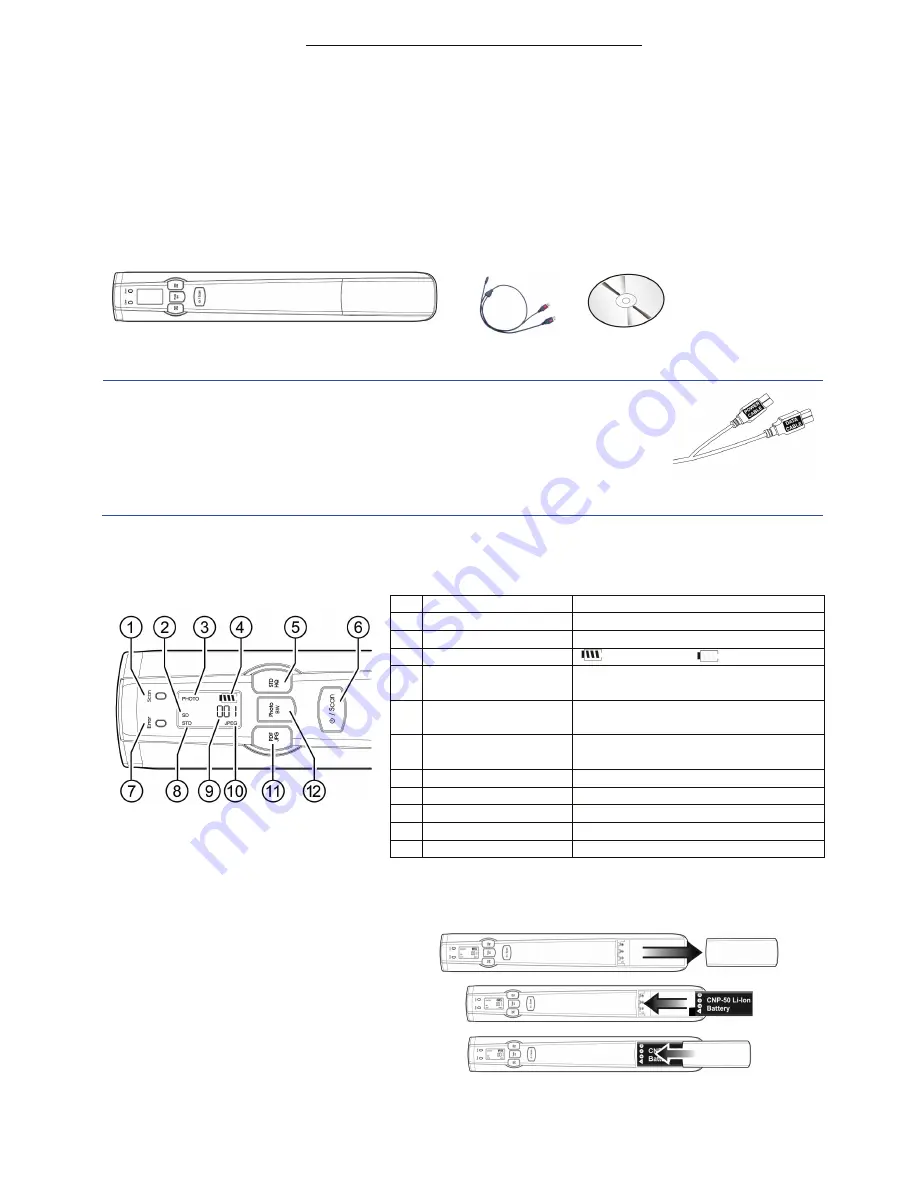
Portable scanner
USB Y Cable
Software CD
Accessories:
•
Cleaning Cloth
•
Pouch
•
Rechargeable
Li-Ion battery
(CNP50)
•
Calibration Sheet
Note
:
1.
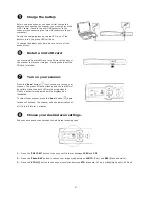
One end of the supplied USB Y cable includes two USB connectors. These two connectors (one
labeled “
Power Cable
”, the other labeled “
Data Cable
”) are used to connect to your
computer at the same time to increase the transferring speed. However, if only one USB port
is available from your computer, please plug the connector labeled “
Power Cable
” to your
computer while charging the battery and plug the connector labeled “
Data Cable
” to your
computer while downloading the images.
2.
Use the supplied USB Y cable only to this scanner. Using this USB Y cable to other devices may
cause your computer to malfunction.
Z
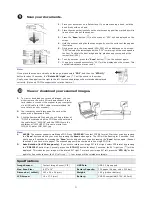
Understand the LCD Screen and Button Functions.
1
Ready LED
Show ready status or scan in progress
2
SD card indicator
Pictures will be stored in micro SD card
3 Effect
indicator
Photo
(
Color
)
or BW
(
Black and White
)
4 Battery
indicator
Battery is full
,
Empty battery
5 Resolution
selector
Press to choose STD(standard) or HQ
(high quality) resolution
6
Power/Scan button
Hold 2 seconds to power on/press to start
scan and end scan.
7
Error LED
A red flashing LED indicates error
conditions such as scanning too fast
8
Resolution indicator
STD(300dpi) or HQ(600 dpi)
9
Counting indicator
Show scan count
10 File format indicator
JPEG or PDF
11 File format selector
Press to choose JPEG or PDF
12 Color selector
Press to choose Color or Black and white
[
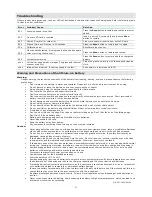
Install the Battery
1.
Push and remove the battery cover on the
scanner.
2.
Load the battery into the battery container.
Make sure the battery is loaded with the
correct polarity. Note the copper strips on the
battery should be touching the copper strips
on the device inside the battery container.
3.
Insert the battery cover.
Handy Scanner-Quick Start Guide


