5
EnglishEnglish
Mounting the Camera
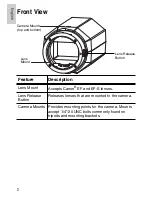
Camera mounting points are provided on both the top and bottom of
the camera body. Use these mounting points to mount the camera on
a bracket, in an enclosure, or on a tripod. The mounting points have
¼”-20 UNC threaded holes which allow them to accept standard
photographic mounting bolts.
Consult the installation instructions provided with the bracket,
enclosure or tripod for detailed mounting instructions.
If used outdoors, a UL listed outdoor enclosure rated type 3 or better is
required.
Connecting Power
NOTE:
Do not perform this procedure if Power over Ethernet (POE) is
used.
If PoE is not available, the camera needs to be powered through the
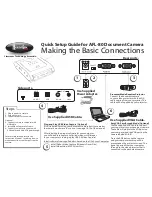
removable power connector block. Refer to the diagrams in this guide
for the location of the power connector block.
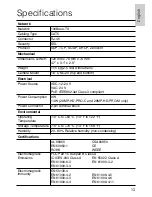
The device can be powered from 12 VDC or 24 VAC. The power
consumption information is listed in the product specifications.
To connect power to the power connector block, complete the
following steps:
1.
Remove the power connector block from the device.
2.
Remove the insulation from ¼” (6 mm) of the power wires.
Do not nick or damage the wires.
Warning —
Only use UL listed mounting brackets suitable
for the mounting surface and can sustain a minimum 1.15 kg
(2.5 lbs) plus the weight of the attached lens.
Caution —
This camera is designed for indoor use only.
Содержание 11MP-HD-PRO-C
Страница 2: ......
Страница 23: ... 9 27 11 Avigilon Corporation ...


