VENUE MADI Card
8
5
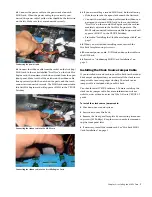
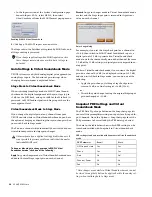
If you have an existing HDx card installed in your rack, do
the following to remove an existing cable from the rack:
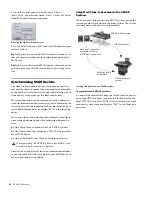
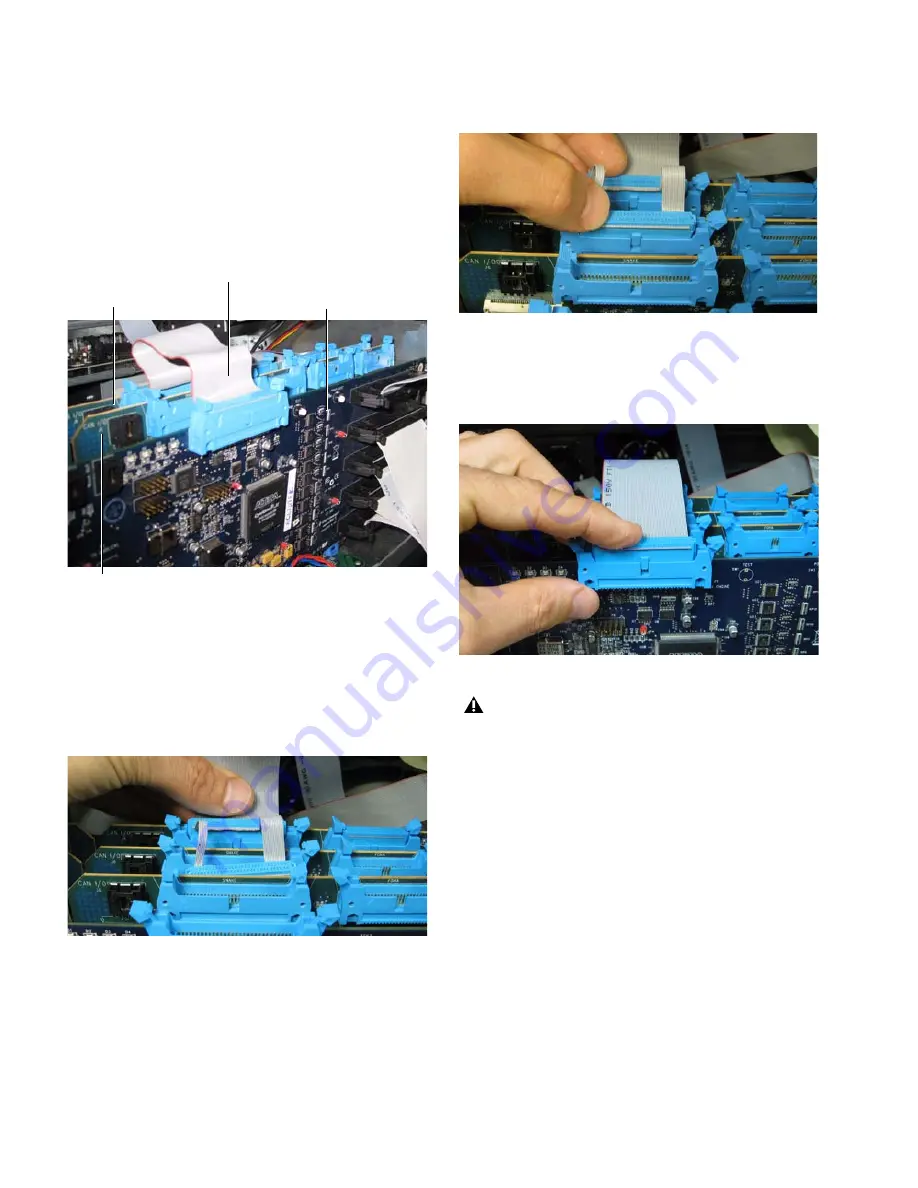
• Locate the first, innermost Mix Engine card.
• Disconnect the existing ribbon cable (noted in the figure
below) from the port labeled “Snake” by moving the
latches on the port outwards to release the connector.
• Locate the other end of the cable (connected to the post
labelled “Snake” on the Hub48 card), disconnect the ca-
ble, and remove it from the Mix Rack.
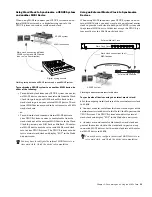
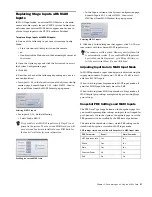
6
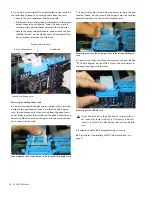
Connect the included clock source jumper cable’s first con-
nector to the port labeled “Snake” on the first Mix Engine
card, the innermost card when viewed from the open front
panel. Make sure that the notches on the ribbon cable line up
correctly with the notch on the ports, and that each connec-
tor is connected securely.
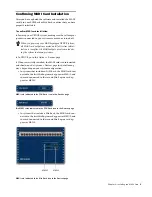
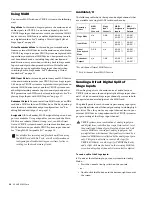
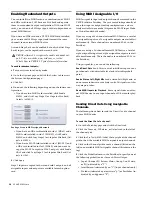
7
Connect the cable’s second blue connector to the to the port
labeled “Snake” on the second Mix Engine card (the card im-
mediately adjacent to the first Mix Engine card).
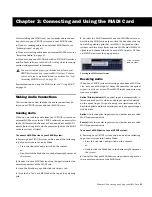
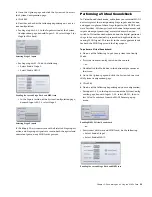
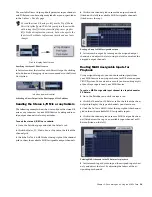
8
Connect the cable’s last blue connector to the port labeled
“P1 To Mix Engine” on the HUB 48 card (the card closest to
the open front panel of the rack).
9
Reattach the Mix Rack faceplate using its screws.
10
Proceed to “Confirming MADI Card Installation” on
page 9.
Removing the existing ribbon cable
Connecting the clock source jumper cable to the first Mix Engine card
First Mix Engine card
Hub48 card
Second Mix Engine card
Existing cable (remove)
Connecting the clock source jumper cable to the second Mix Engine
card
Connecting to the HUB 48 card
If your Mix Rack has a third Mix Engine card installed, do
not connect the jumper cable to it. The jumper cable only
connects to the first two Mix Engine cards and the Hub 48
card.
Содержание VENUE MADI
Страница 1: ...PN 9321 62800 00 REV B 10 10 VENUE MADI Card for VENUE Systems...
Страница 13: ...VENUE MADI Card 10...
Страница 23: ...VENUE MADI Card 20...


