


18
Chapter 3
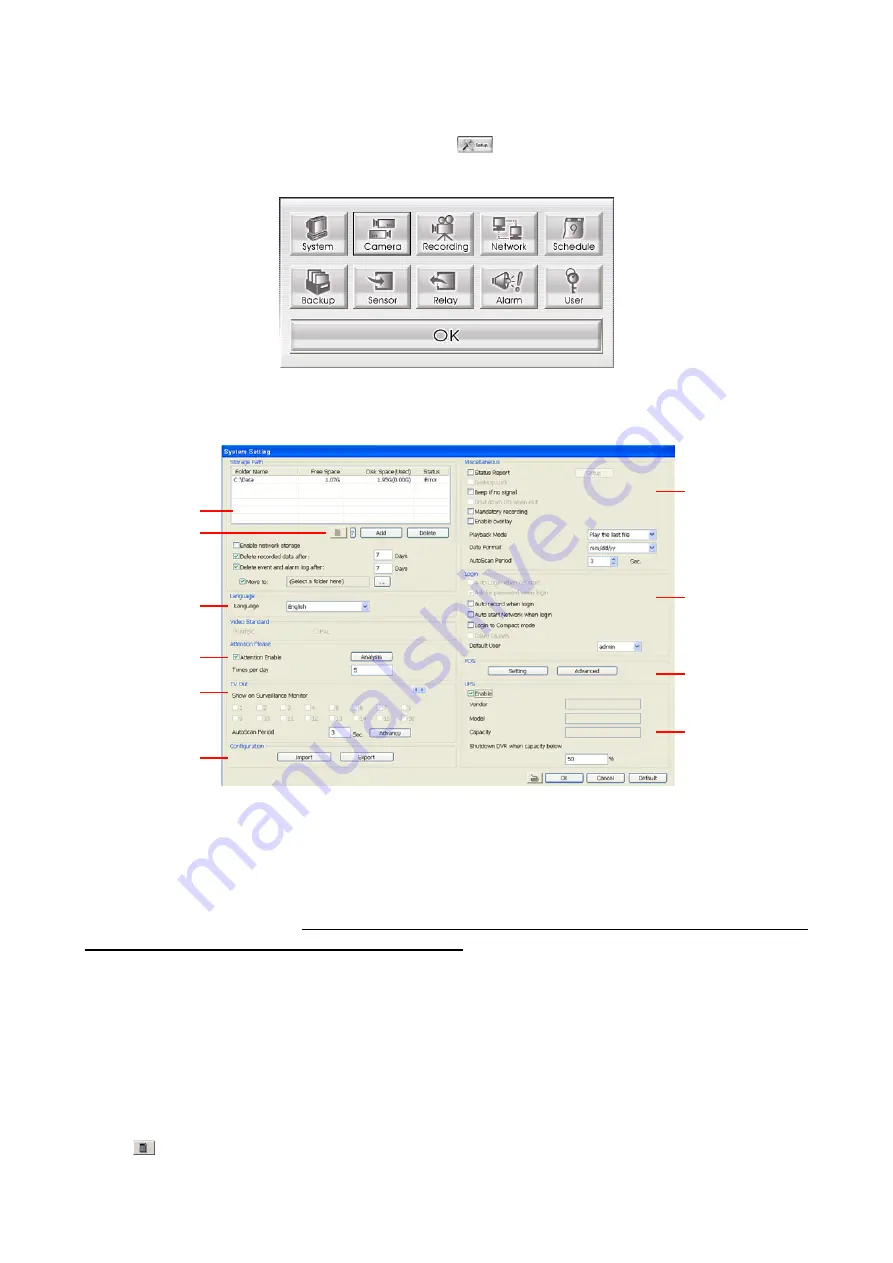
Customizing the DVR System
In the Preview/Advanced screen mode, click
button to customize your DVR. When
the DVR configuration setup selection appears, select and click the buttons you want to
change the setting.
3.1 System
Setting
In the System Setting dialog box, click
OK
to accept the new settings, click
Cancel
to exit
without saving, and click
Default
to revert back to original factory setting.
(1)
(2)
(3)
(4)
(5)
(6)
(7)
(8)
(9)
(10)
(1) Storage Path
Set the directory on where to save the data. When there is not enough free space to record
one hour data, the system automatically replaces the oldest data. In case you have more
than one storage path, the system automatically saves the data to the next storage path.
You may also add additional network-attached storage (NAS) for extremely high storage
capacity. Select the Enable network storage check box to send the recorded video in
network-attached storage. To add network storage, the Internet storage drive/folder must
be mapped as Network Driver in DVR server. To know how to assign or connect to a
network drive, please refer to your Windows help file and search “Map Network drive”.
By default the data is stored in C:\Data, to insert another storage path, click
Add
. To
remove the selected path, click
Delete
. If you want the system to automatically erase the
data after a certain days, enable the
Delete recorded data after
check box and enter the
numbers of days in
Days
text box.
(2) Hard Disk Calculator
Estimate the hard disk recording capacity. The result of calculation is a rough value which
only for reference. The hard disk record capacity will be varied by the real record quality
and complexity of video scene.
Click
, the hard disk calculator windows will show up.
Total Recording time
is the
current hard disk recording capacity. Enter the expect hard disk size or expect recording
Содержание XR8032
Страница 1: ...AVerMedia XR8032 User s Manual...


